3–Installation in a Windows Environment
Installing Hardware
3-6 FE0254601-00 A
For QLE815x Series Adapters, see the list of approved copper cables
at http://www.qlogic.com/Resources/Pages/Resources.aspx
under
Cable Support.
10. Connect the other end of the Ethernet cable to a supported switch.
11. Plug in the power cables and power up the server.
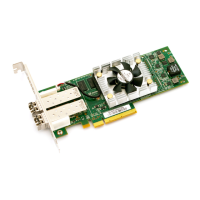
Figure 3-3. Adapter Hardware
Verify the Adapter Installation
To verify that the adapter is properly installed and that it can be recognized as a
PCIe device by the server:
1. While the host server is booting, verify that the adapter BIOS banner
appears without errors. Some servers may require that you press the ESC
key at the motherboard BIOS banner screen to enable the display of
diagnostic messages.
2. The QLogic BIOS banner indicates that the adapter has passed its
Power-On Self Test (POST), the adapter has been recognized and
enumerated as a PCIe device, and it is safe to boot the operating system
and install the QLogic driver.
The presence or absence of the QLogic banner does not indicate that
the QLogic adapter has been connected to a compatible switch.

 Loading...