4.Replacement and Adjustment
81
Fusing and Exit
Switch off the main power, unplug the machine from its power source, and allow the fusing unit
to cool before removing it.
Fusing Unit
The non-contact thermistor is installed so that there is a gap of 1 mm between it and the surface of the
hot roller. To maintain this gap of 1 mm, do not remove the non-contact thermistor, and do not remove
the hot roller and the pressure roller, which cannot be removed without the removal of the non-contact
thermistor.
Replace the fusing unit when the non-contact thermistor, the hot roller, or the pressure roller are broken.
1. Remove the right cover (Printer models: Right Cover, MF models: Right Cover).
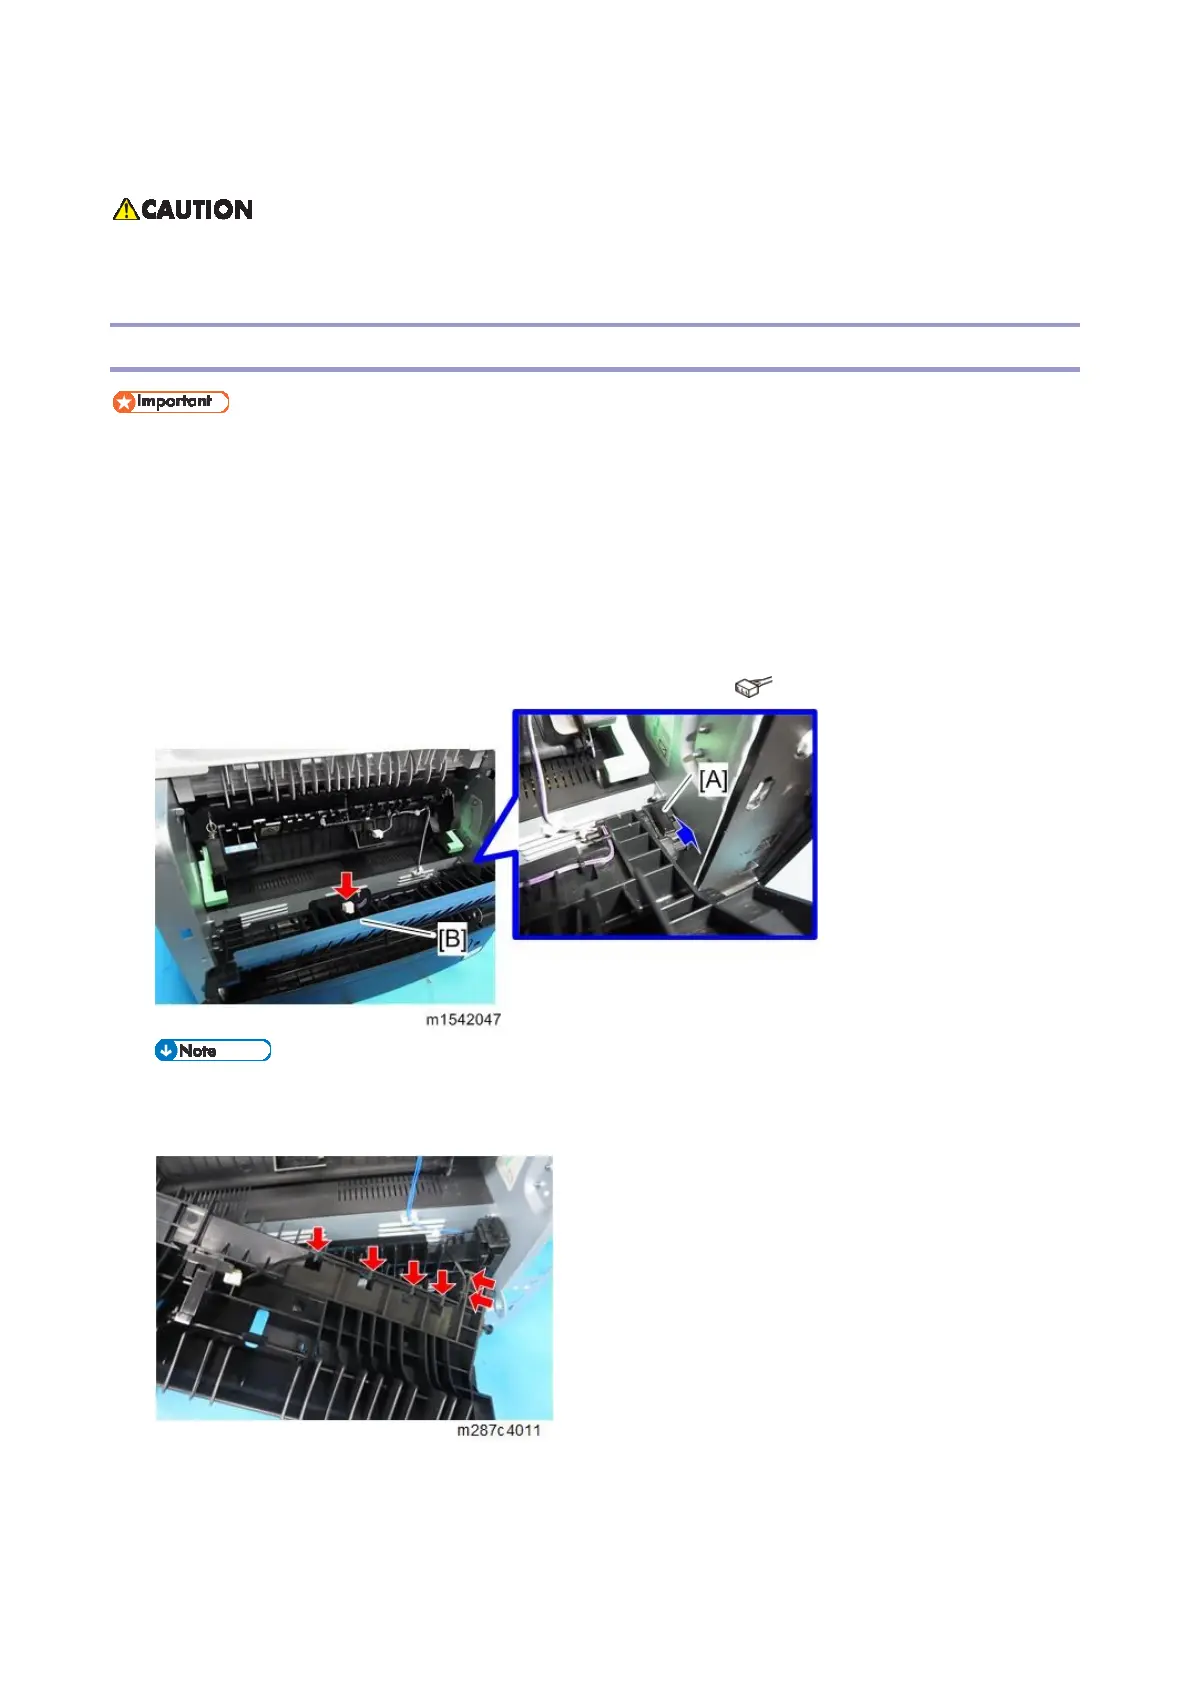
2. Release the lock [A], and then remove the entrance guide [B] ( x 1).
A harness is routed on the entrance guide. Remove the entrance guide carefully.
 Loading...