16. Electrical Equipment
16-13
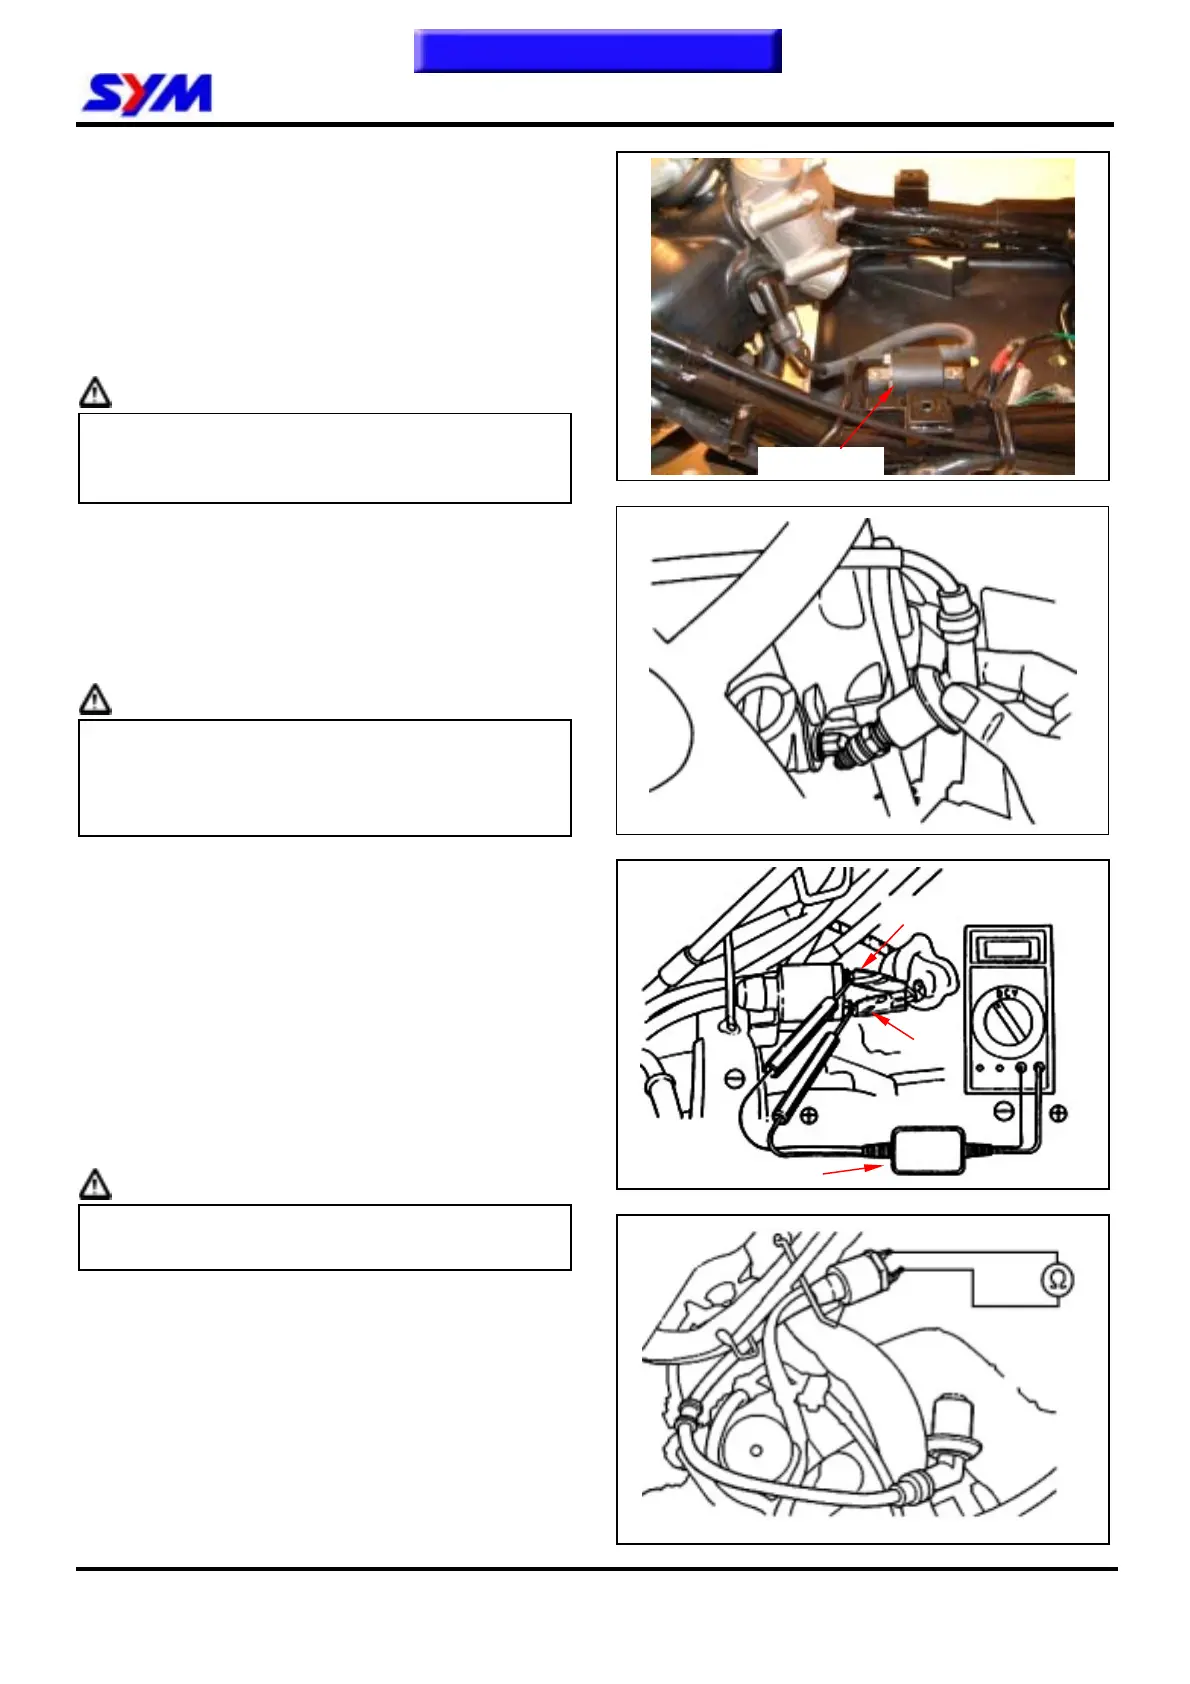
Ignition coil
Removal
Remove the luggage box, body cover and floor
panel.
Remove spark plug cap.
Remove the primary coil wire of ignition coil.
Remove the fix screws for the ignition coil, and
remove the coil.
Install the coil in reverse order of removal.
Caution
● Install primary coil with black/yellow lead
connected to black coupler and green lead
connected to green coupler.
Spark plug confirmation
Remove the spark plug and install a good plug into
plug cap, and then ground it to engine ground.
Make sure its spark condition. If it is in not good or
burnt spark plug, replace the spark plug with new
one.
Caution
z Make sure each wire connection is correct,
and test as required. Even the wire
connection is in correct, sometimes; it might
not be tested occurred.
Connect the high voltage shunt with a multi-meter
or input a resistor in the 10MΩ 10CV of voltage
meter.
Remove the central cover.
Connect ignition coil wires, and connect a shunt
between primary terminal (black/yellow and green)
and frame ground.
Press the starting motor button, or starting lever to
test the max. primary voltage of ignition coil.
Connection: connect (+) terminal to green side,
and (-) to black/yellow side.
Min. voltage: Above 95 V.
Caution
z Do not touch metal parts on the test probe
with fingers to avoid electric shock.
Primary coil check
Disconnect the primary coil coupler and check the
resistance between primary coil terminals.
Standard: HU10U/W 0.21Ω± 10 % (at 20℃)
HU05U 4.0 KΩ±15% (at 20℃)
Primary coil is good if resistance within standard.
Primary coil is broken if resistance is infinite.
Replace the coil.
High voltage shunt
Green
Ignition coil
Black / Yellow
To this chapter contents

 Loading...