12.3.1 Exporting, Importing and Customizing Labels Using a Text Editor
You can export custom label settings to a text file for back up or to modify the labels using a text editor. The text file is
exported and imported using a USB drive.
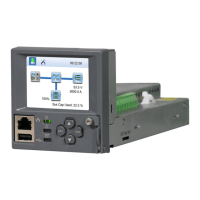
1. Insert a USB drive into an open USB port on the rear of the touchscreen display, then navigate to the Custom
Labels panel and touch Export.
The EXPORT FILE dialog opens, and the connected USB drive is automatically detected.
• If you are prompted No USB devices are available, check the connection or try re-inserting the drive.
2. Touch Name and type a descriptive name for the file, then touch Go.
3. Touch Export and wait at least 15 seconds, then you can remove the USB drive.
4. Insert the USB drive into a PC or laptop and locate the file, which is named with the Name you entered and the
extension cl.txt. For example, if you named your export MyLabels, the file will be MyLabels.cl.txt.
5. Open the file in a text editor. The file contains all of the labels available for customization listed with the
menu/panel on which the label is located, the label identifier, and an equal sign (=) as shown in the following
example:
NOTE: You must use an editor that interprets Linux line endings, otherwise all of the lines will run together. For
example, Microsoft WordPad will interpret the Linux line endings, but Microsoft Notepad will not.
analog_input/row_customer_analog_inputs=Unit A Inputs
analog_input_properties/header_property=Property
analog_input_properties/header_value=Value
6. To customize, type a new label name to the right of =, and save the text file.
The following example will result in the same custom labels shown in Figure 12.3 on the previous page .
analog_input/row_customer_analog_inputs=Unit A Inputs
analog_input_properties/header_property=Input
analog_input_properties/header_value=Configuration
7. Remove the USB drive with the updated/saved text file from the PC/laptop, insert it into an open USB port on the
rear of the touchscreen display, then navigate to the Custom Labels panel and touch Import.
8. Locate the updated text file in the drop-down list, and touch Import.
The dialog closes and the customizations display on the menus and panels that you updated.
12 Customizing the Vertiv™ Liebert® iCOM™ Display
180
Vertiv™ Liebert® iCOM™Installer/User Guide

 Loading...
