WPC 2000 User Manual 1128500
Initialization, Setup, and Checkout 3-35
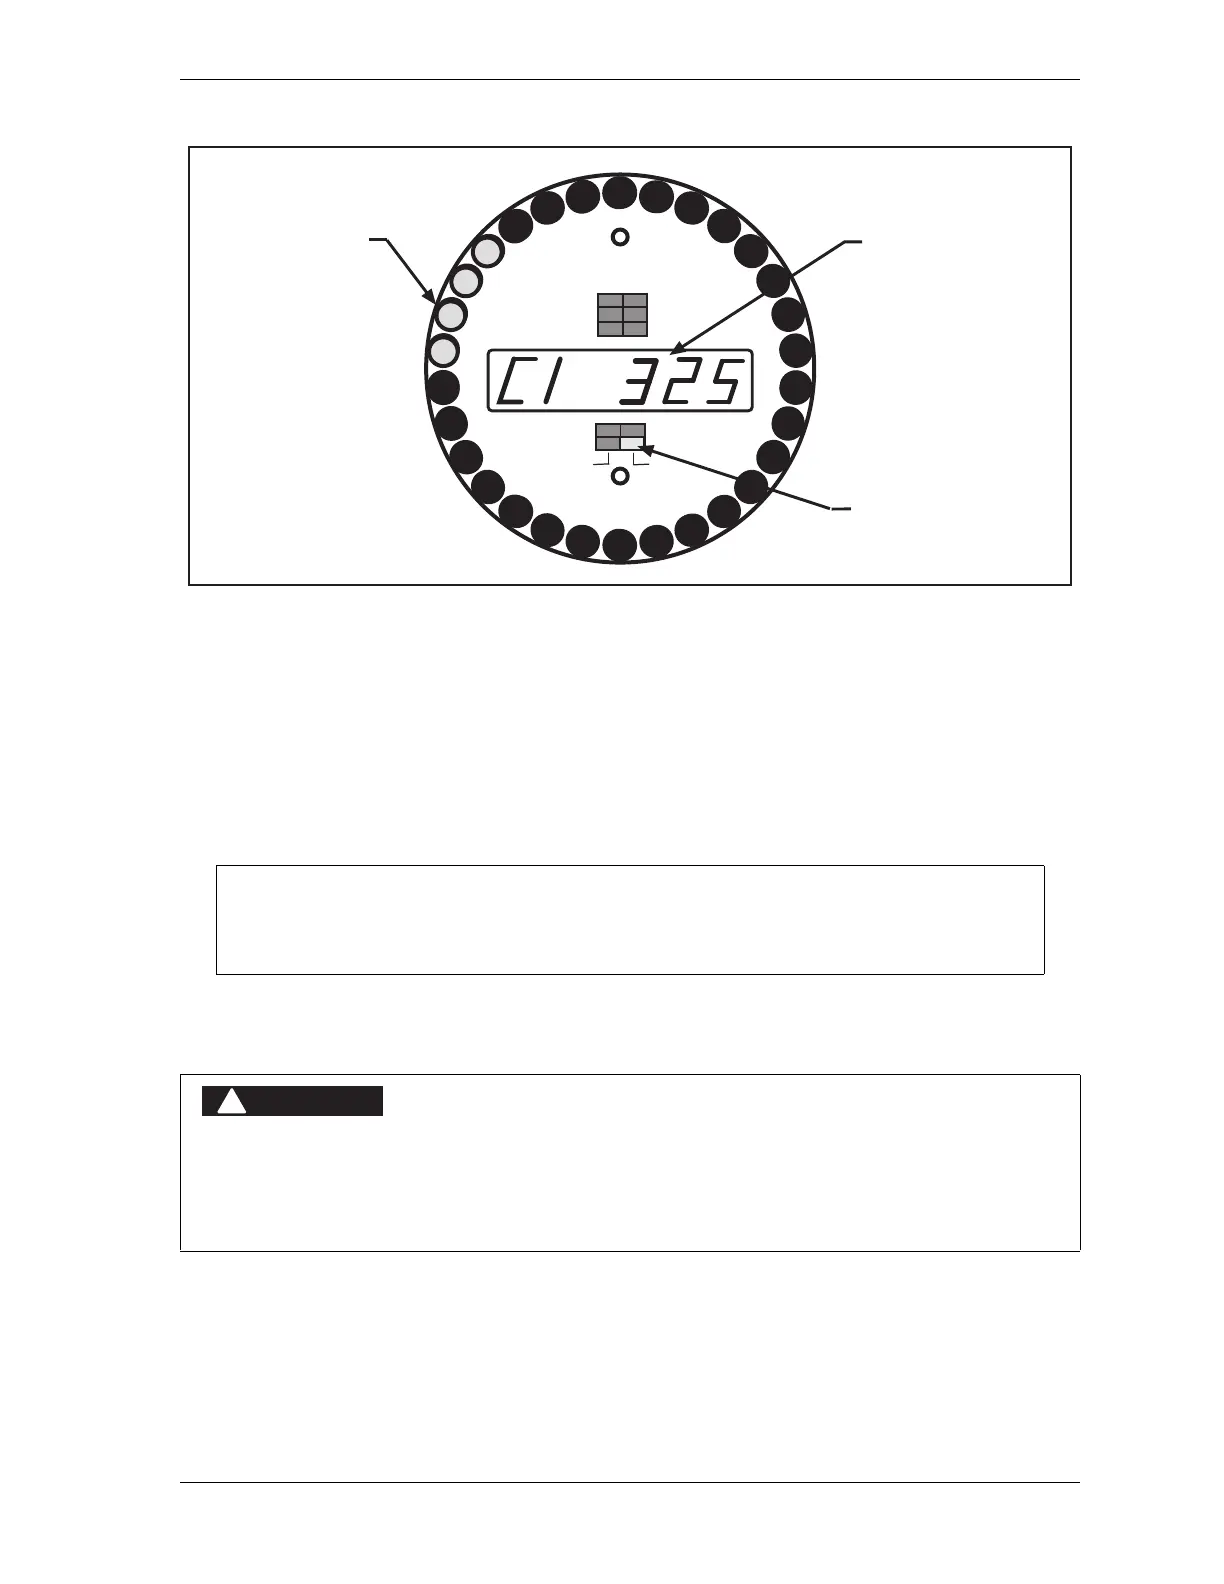
6. Repeat step 4 to change the current Cam 1 OFF setting. The length of the illuminated arc
of LEDs on the crank-angle clock changes as you increase or decrease the Cam 1 OFF
angle. Figure 3-13 shows the LED arc when cam 1 is set to ON = 270°, OFF = 325°.
7. Repeat steps 3 through 6 for Cams 2, 3, and 4 as necessary.
8. Disable the Set Cams function (see step 1). Cycle power to the WPC 2000, if necessary,
or press Reset/Select to highlight the “Angle/SPM” segment.
Final Checkout
Figure 3-13. Cam Channel Settings Display: Cam 1 OFF Setting (325°) Shown
If you do not disable the Set Cams function, you will not be able to adjust the settings
controlled by the indicator segments in the lower half of the display.
INJURY DURING TESTING
• Keep all personnel away from the press during testing.
• Be sure there is no die or other tooling in the press during testing.
Failure to comply with these instructions will result in death or serious injury.
BRAKE WARNING
INTERRUPTED STROKE
TOP STOP ANGLE
AUTO CARRYUP
STOP TIME LIMIT
MICRO-INCH
STOPPING TIME
STOPPING ANGLE
90
° STOP TEST
COUNTER
COUNTER PRESET
ANGLE / SPM
cam on angle
cam off angle
Cam off angle
segment
Cam 1 OFF angle
display
Cam 1 ON
and OFF
angles
shown by
illuminated
LEDs

 Loading...