15. Removal and installation of the projector covers
15.8 Installation of the top cover plate of the Light Processor compartment
Necessary tools
Allen wrench 3 mm
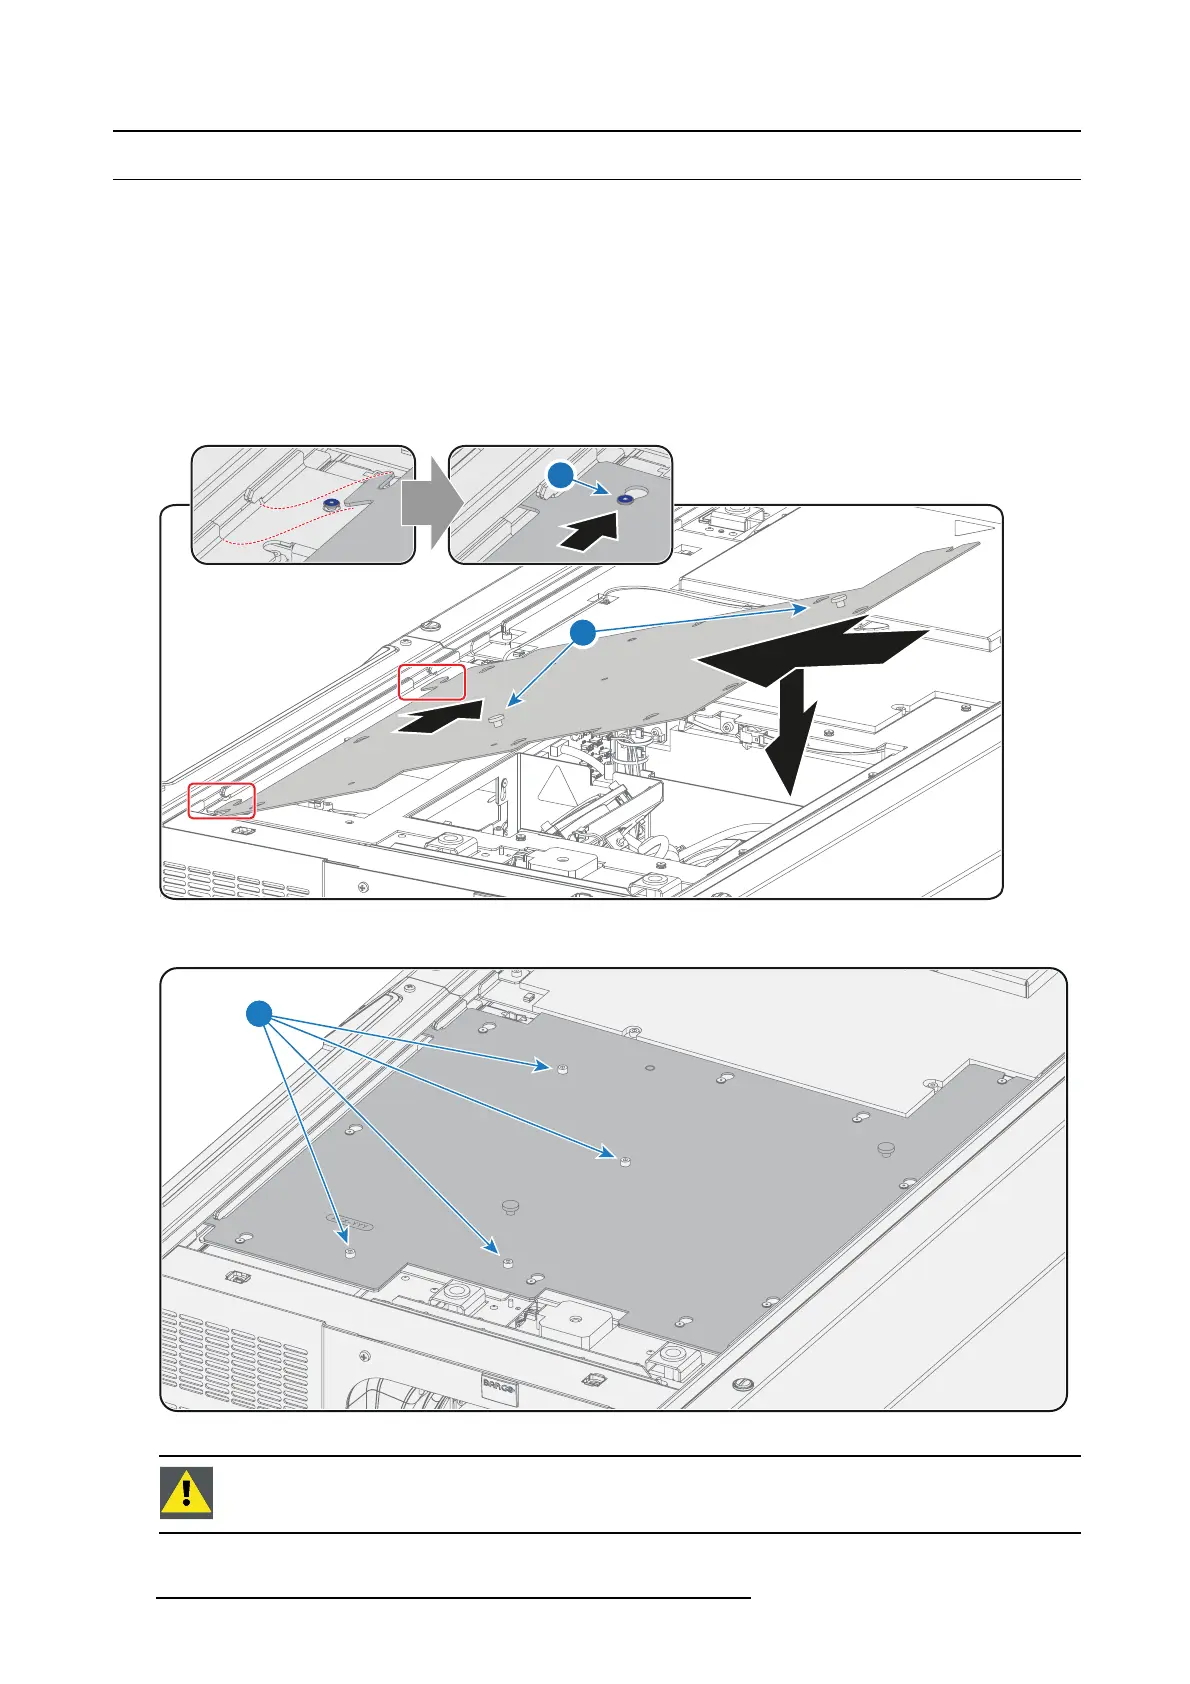
How to install the top cover pla te from the Light Processor compartment?
1. Install the top c over plate as follows:
a) Approach the projector with the top c over plate tilted as illustrated and insert the two hooks of the top cove
r plate into the
projector chassis (see detailed illustration image 15-10).
b) Lower the top cover plate completely.
c) Grip the two knobs (reference 2 image 15-10) , slide the top cover plate to the rear side of the projector and ensure that all
slots (reference 1 ima ge 15-10) of the top cover plate are engaged.
A
B
C
C
1
2
Image 15-10
2. Fasten the top cover plate with four screws (reference 1 image 15-11). Use a 3 mm Allen wrench.
1
Image 15-11
CAUTION: O pening the Light Processor com partm ent by removing the top c over p late or side cover plate will
result in a tamper event. An authorization to clear the security w arning on the projector, after clo sing off the
Light Processor co mp artment, will be needed !
140 R5906847 DP2K SLP SERIES 02/06/2017
 Loading...


