8. Communicator Touch Panel
8.2 Installing the Touch Panel interface
Necessary tools
• open-end wrenc h 17 m m
• open-end wrenc h 10 m m
How to install the Touch Panel interface onto the top of the projector?
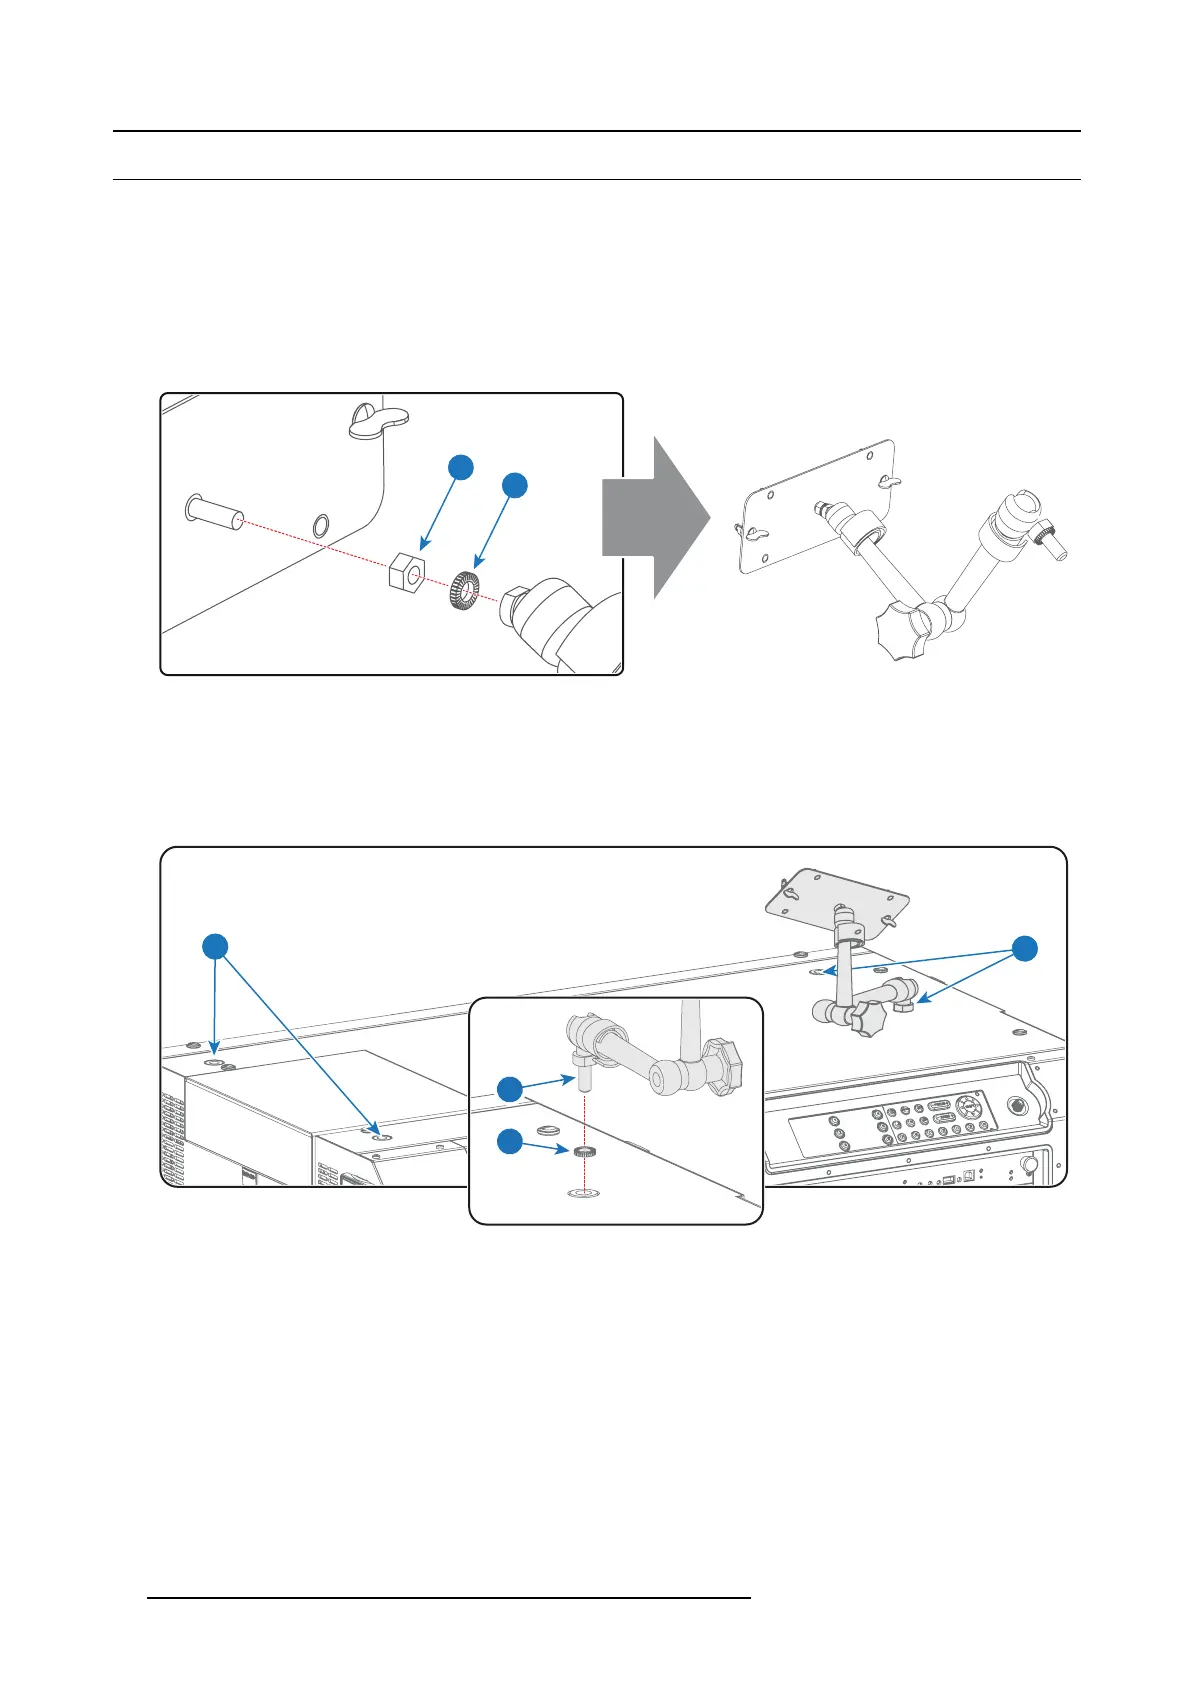
1. Assemble the mounting plate and the swivel arm together as illustrated. F irst place the nut (reference 1 image 8-4) upon the
rod of the mounting plate, then add the lock wa sher (reference 2 image 8-4), then fasten the mounting plate a
nd the swivel arm
together. When the arm is mounted, turn the nut (reference 1 image 8-4) against the arm to secure the position.
1
2
Image 8-4
2. Slide a was her (reference 4 image 8-5) over the bas e of the swivel arm (reference 3 image 8-5) and insert the base of the swivel
arm into one of the four possible mounting holes (reference 1 & 2 image 8-5) at the top of the projector.
Note: Which mounting hole to use depends on the oper ator preferences. In the illustration below the swivel arm is installed
into the moun ting hole nearest by the Local Keypad of the projector.
Caution: If you choose to use the back mounting holes (reference 1 image 8-5) to m ount y our Touch P anel, ens ure it is s uffi-
ciently remov ed from the hot top ex haust system, to avoid damage.
1
2
3
4
Image 8-5
3. Place the Touch Panel interface upon the mounting plate of the swivel arm and fasten the two wing nuts (reference 5 image 8-6)
as illustrated.
86
R5906847 DP2K SLP SERIES 02/06/2017
 Loading...


