Before You Begin
To configure the system remotely, you must have a DHCP server on the same network as the system.
Your DHCP server must be preconfigured with the range of MAC addresses for this server node. The
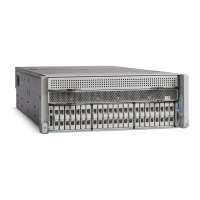
MAC address is printed on a label that is on the pull-out asset tag on the front panel. This server node has
a range of six MAC addresses assigned to the Cisco IMC. The MAC address printed on the label is the
beginning of the range of six contiguous MAC addresses.
Note
Step 1
Attach a power cord to each power supply in your server, and then attach each power cord to a grounded AC power
outlet.
If you are using DC power supplies, see Installing DC Power Supplies (First Time Installation), on page 91.
Wait for approximately two minutes to let the server boot to standby power during the first bootup. You can verify system
power status by looking at the system Power Status LED on the front panel. The system is in standby power mode when
the LED is amber.
Step 2
Plug your management Ethernet cable into the dedicated management port on the rear panel.
Step 3
Allow your preconfigured DHCP server to assign an IP address to the server node.
Step 4
Use the assigned IP address to access and log in to the Cisco IMC for the server node. Consult with your DHCP server
administrator to determine the IP address.
The default user name for the server is admin. The default password is password.
Note
Step 5
From the Cisco IMC Server Summary page, click Launch KVM Console. A separate KVM console window opens.
Step 6
From the Cisco IMC Summary page, click Power Cycle Server. The system reboots.
Step 7
Select the KVM console window.
The KVM console window must be the active window for the following keyboard actions to
work.
Note
Step 8
When prompted, press F8 to enter the Cisco IMC Configuration Utility. This utility opens in the KVM console window.
Step 9
Continue with Setting Up the System With the Cisco IMC Configuration Utility, on page 23.
Setting Up the System With the Cisco IMC Configuration Utility
Before You Begin
The following procedure is performed after you connect to the system and open the Cisco IMC Configuration
Utility.
Step 1
Set the NIC mode to choose which ports to use to access Cisco IMC for server management:
• Shared LOM EXT (default)—This is the shared LOM extended mode, the factory-default setting. With this mode,
the Shared LOM and Cisco Card interfaces are both enabled. You must select the default Active-Active NIC
redundancy setting in the following step.
Cisco UCS C240 M5 Server Installation and Service Guide
23
Installing the Server
Setting Up the System With the Cisco IMC Configuration Utility
 Loading...