Only PCIe riser version 2C has a connector that supports front-loading NVMe SSDs. This riser 2C is
kitted with the required PCIe cable. For SFF versions of the server, use kit CBL-NVME-C240SFF; For
the LFF version of the server, use kit CBL-NVME-C24LFF.
Note
•
If the server was ordered with front-loading NVMe SSDs, this kit was preinstalled at the factory. No
action is required.
•
If you are adding front-loading NVMe SSDs for the first time, you must order and install the kit as
described in the following procedure.
Step 1
Remove the existing PCIe riser 2 version and replace it with PCIe riser 2C. See Replacing a PCIe Riser, on page 93.
Step 2
Connect the two connectors on one end of the cable to the PCIe connectors on the drive backplane.
Step 3
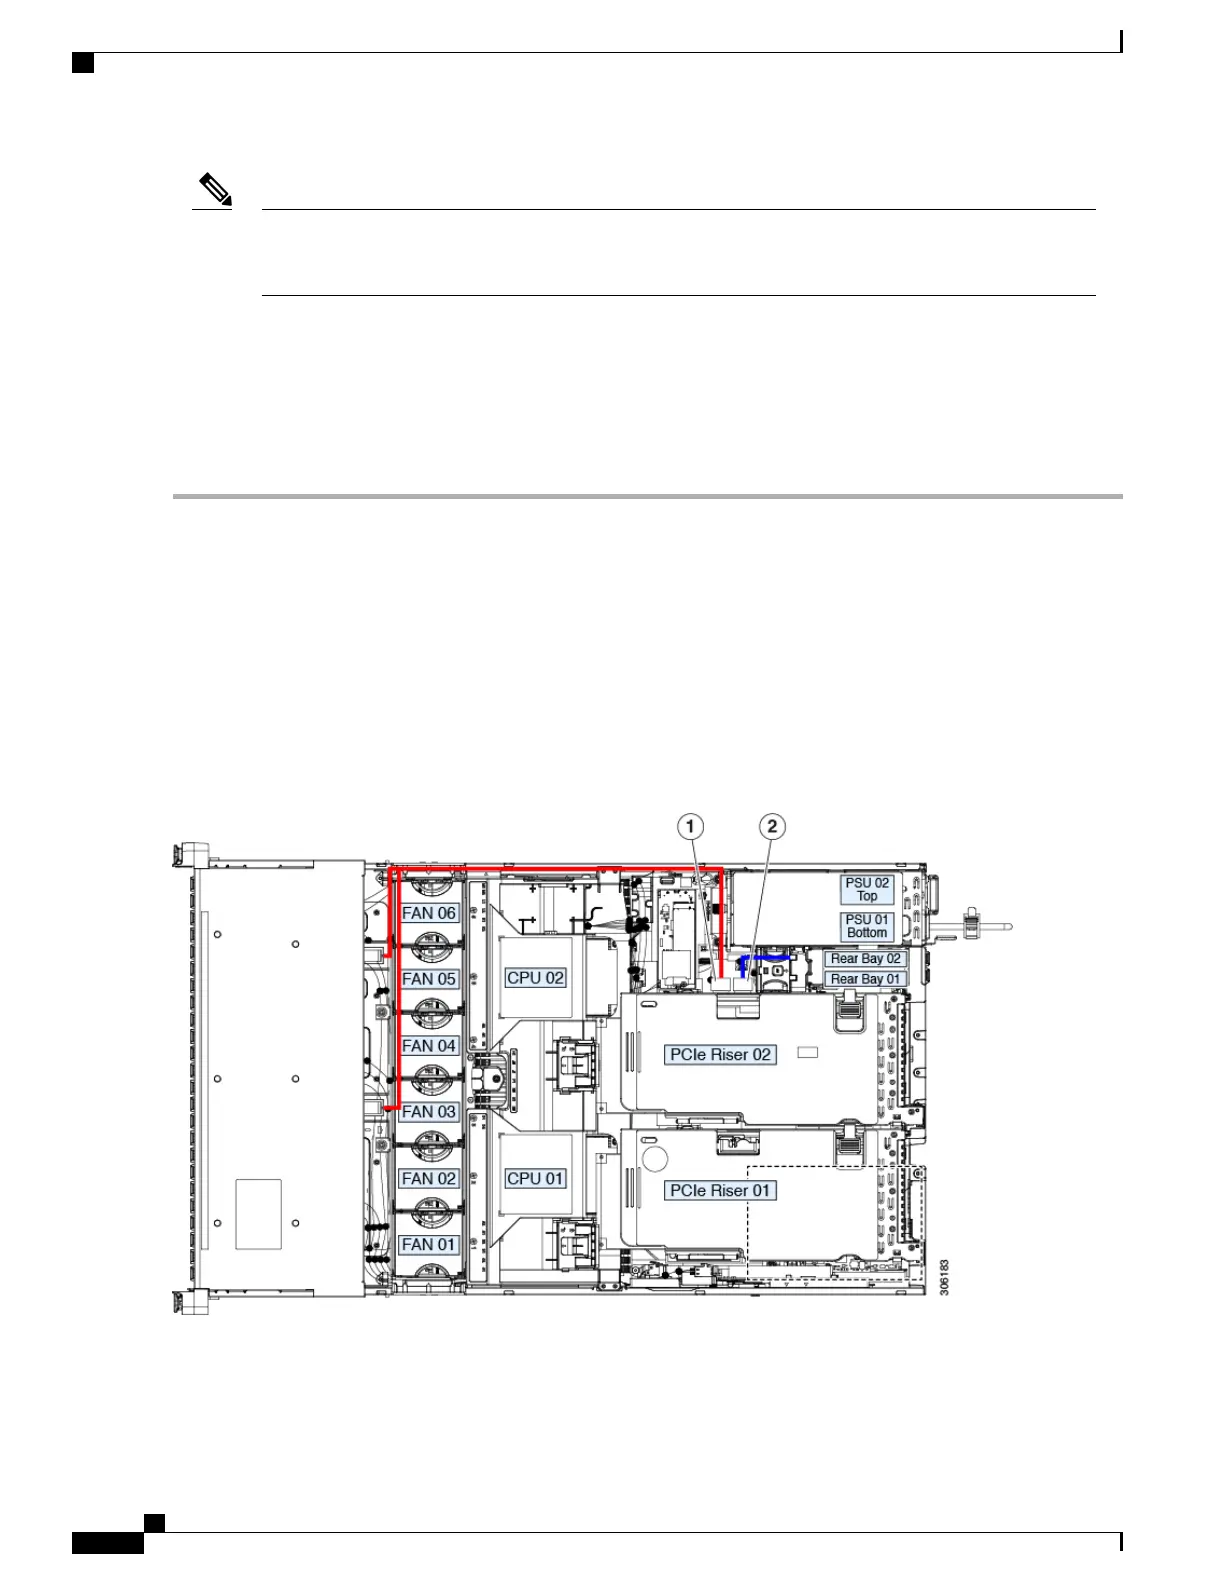
Route the cables through the chassis cable guides to the rear of the server as shown below.
Step 4
Connect the other end of the cable to the "Front NVMe" connector on PCIe riser 2C.
In the following figure, the colored lines represent cabling paths:
•
The red line represents the cable path from riser 2C to the front-drive backplane.
•
The blue line represents the cable path from riser 2C to the optional rear-drive backplane.
Figure 22: PCIe Cabling From PCIe Riser 2 to Drive Backplanes
Cisco UCS C240 M5 Server Installation and Service Guide
58
Maintaining the Server
Replacing Front-Loading NVMe SSDs
 Loading...