PCIe riser versions 2B and 2C have a connector that supports rear-loading NVMe SSDs. Riser 2C is kitted
with the required PCIe cable. For all versions of the server, use kit UCSC-RNVME-C240M5; You can
also order the cable only: CBL-NVME-C24LRF. (Riser 2D is not orderable separately.)
Note
•
If the server was ordered with rear-loading NVMe SSDs, this kit was preinstalled at the factory. No
action is required.
•
If you are adding rear-loading NVMe SSDs for the first time, you must order and install the kit as
described in the following procedure.
Step 1
If necessary, remove the existing PCIe riser 2 version and replace it with PCIe riser 2B or 2C. (Riser 2D is not orderable
separately.) See Replacing a PCIe Riser, on page 93.
Step 2
Connect the two connectors on one end of the cable to the PCIe connectors on the rear drive backplane.
Step 3
Route the cables to PCIe riser 2B or 2C.
Step 4
Connect the two connectors on the other end of the cable to the "Rear NVMe" connector on PCIe riser 2Bor 2C.
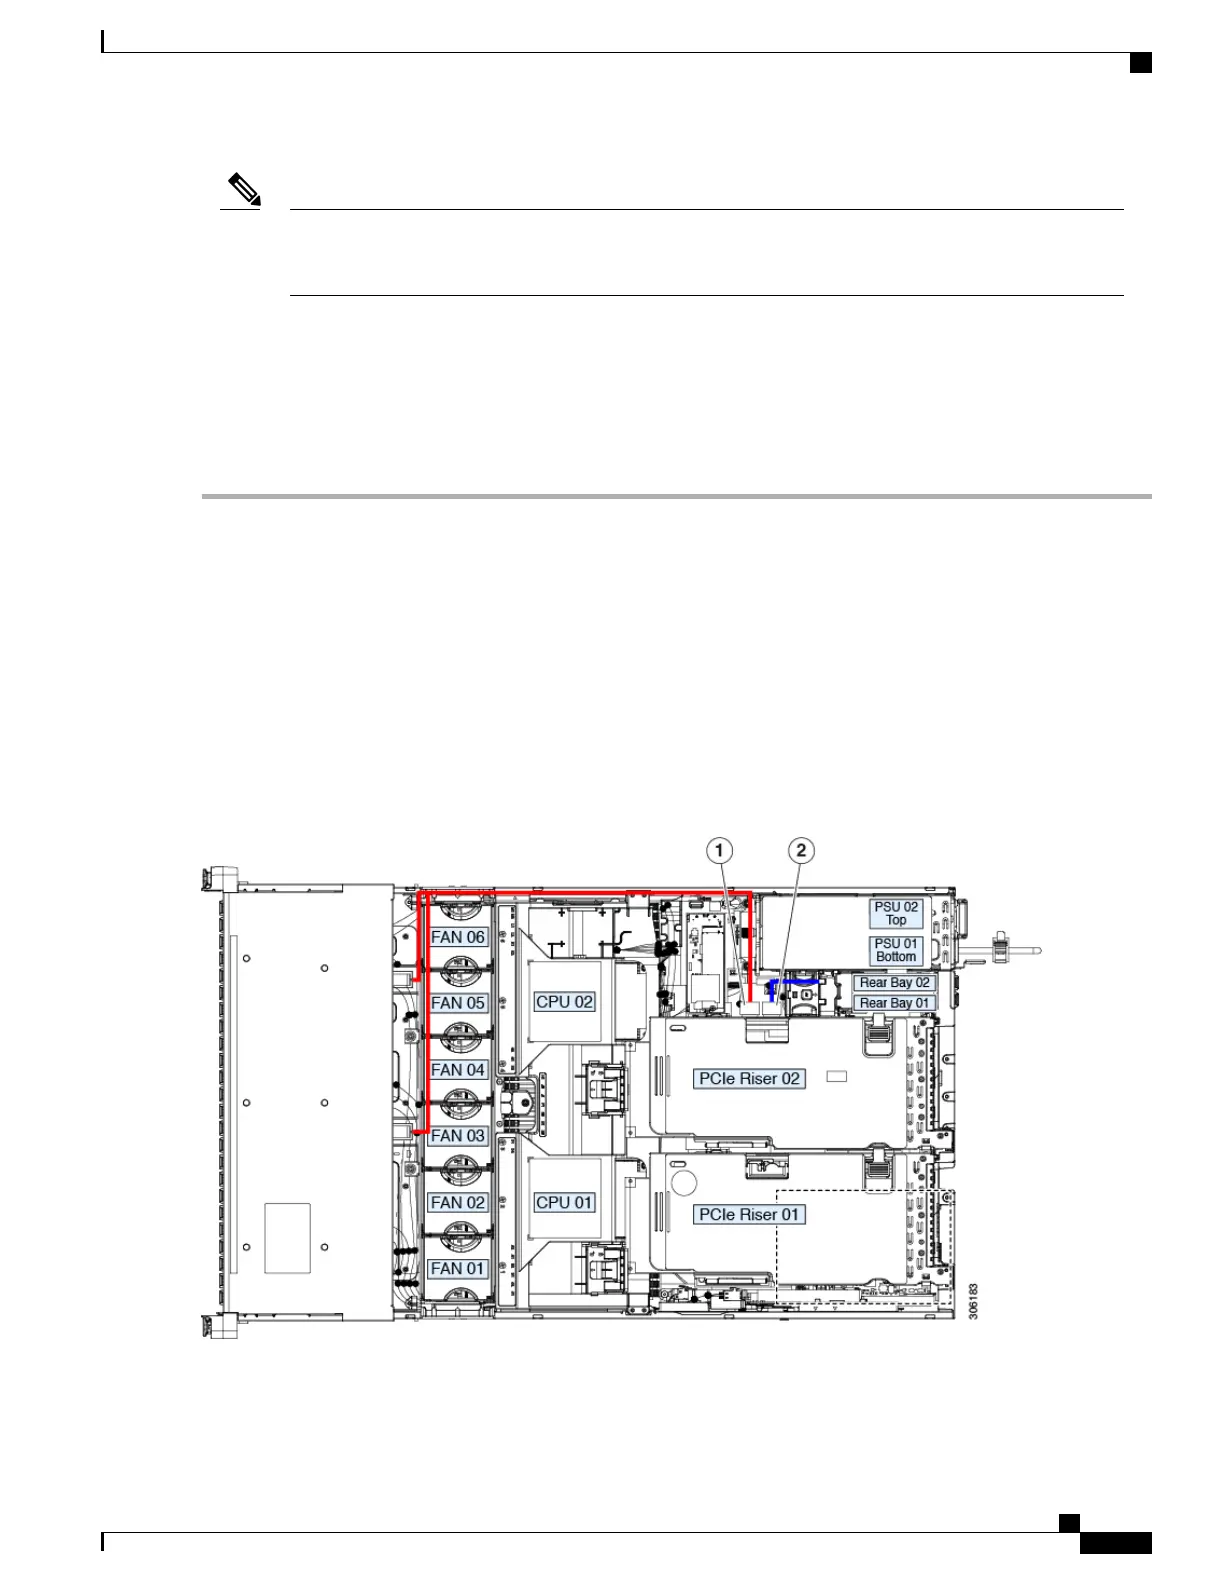
In the following figure, the colored lines represent cabling paths:
•
The blue line represents the cable path from riser 2B or 2C to the optional rear drive backplane.
•
The red line represents the cable path from riser 2C (only) to the front drive backplane.
Figure 24: PCIe Cabling From PCIe Riser 2 to Drive Backplanes
Cisco UCS C240 M5 Server Installation and Service Guide
63
Maintaining the Server
Replacing Rear-Loading NVMe SSDs
 Loading...