An instructive video is available for this procedure: CPU and Heatsink Replacement in Cisco UCS M5 Servers
Step 1
Remove the existing CPU/heatsink assembly from the server:
a) Shut down and remove power from the server as described in Shutting Down and Removing Power From the Server,
on page 39.
b) Slide the server out the front of the rack far enough so that you can remove the top cover. You might have to detach
cables from the rear panel to provide clearance.
If you cannot safely view and access the component, remove the server from the
rack.
Caution
c) Remove the top cover from the server as described in Removing the Server Top Cover, on page 41.
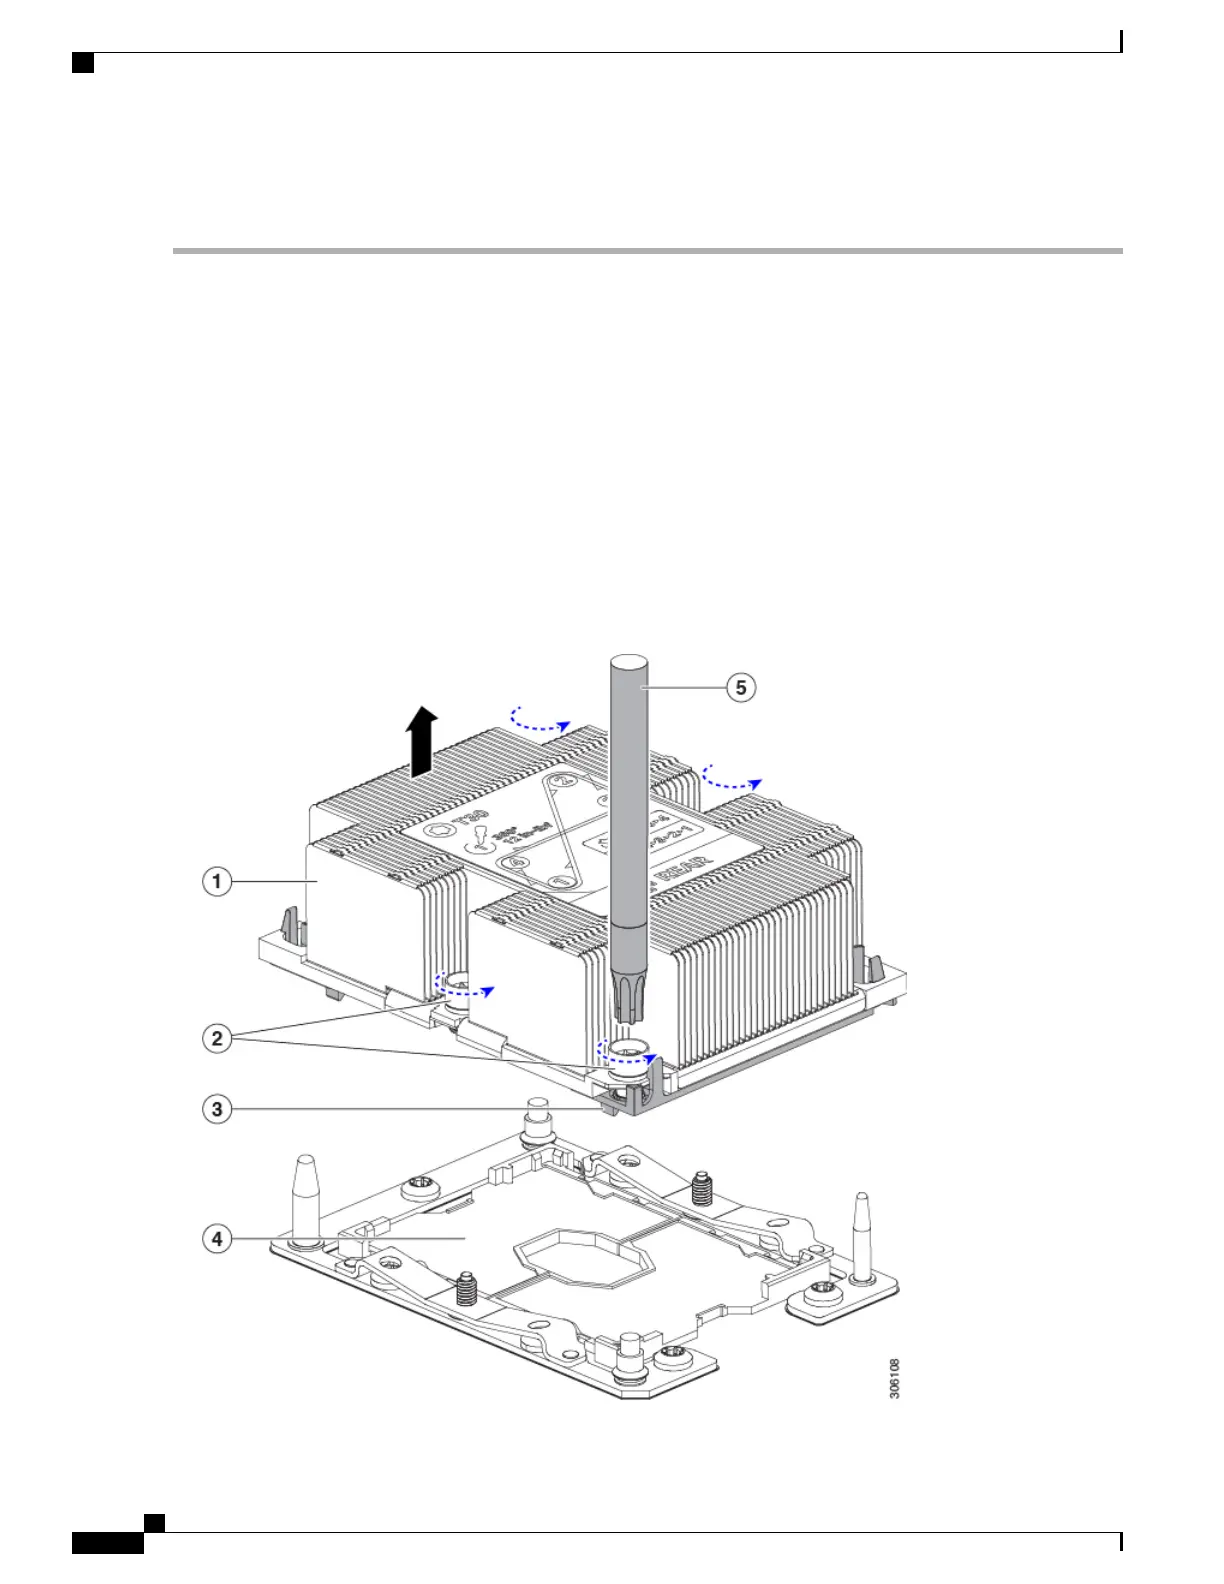
d) Use the T-30 Torx driver that is supplied with the replacement CPU to loosen the four captive nuts that secure the
assembly to the motherboard standoffs.
Alternate loosening the heatsink nuts evenly so that the heatsink remains level as it is raised. Loosen the
heatsink nuts in the order shown on the heatsink label: 4, 3, 2, 1.
Note
e) Lift straight up on the CPU/heatsink assembly and set it heatsink-down on an antistatic surface.
Figure 29: Removing the CPU/Heatsink Assembly
Cisco UCS C240 M5 Server Installation and Service Guide
74
Maintaining the Server
Replacing CPUs and Heatsinks
 Loading...