Replacing a Rear-Drive Backplane Fan
The fan on the rear-loading drive backplane can be replaced separately from the backplane assembly.
Step 1
Shut down and remove power from the server as described in Shutting Down and Removing Power From the Server,
on page 39.
Step 2
Slide the server out the front of the rack far enough so that you can remove the top cover. You might have to detach
cables from the rear panel to provide clearance.
If you cannot safely view and access the component, remove the server from the
rack.
Caution
Step 3
Remove the top cover from the server as described in Removing the Server Top Cover, on page 41.
If there are drives installed in the rear drive backplane, do not operate the server with the rear drive fan
removed.
Caution
Step 4
Grasp the finger-grips on the top of the fan and pull straight up to disconnect it from its socket on the assembly.
Step 5
Align the new fan over the socket on the assembly. The arrow on the fan must point toward the rear of the server.
Step 6
Slide the fan down and press on its top until it is firmly connected to the socket on the assembly.
Step 7
Replace the top cover to the server.
Step 8
Replace the server in the rack, replace cables, and then fully power on the server by pressing the Power button.
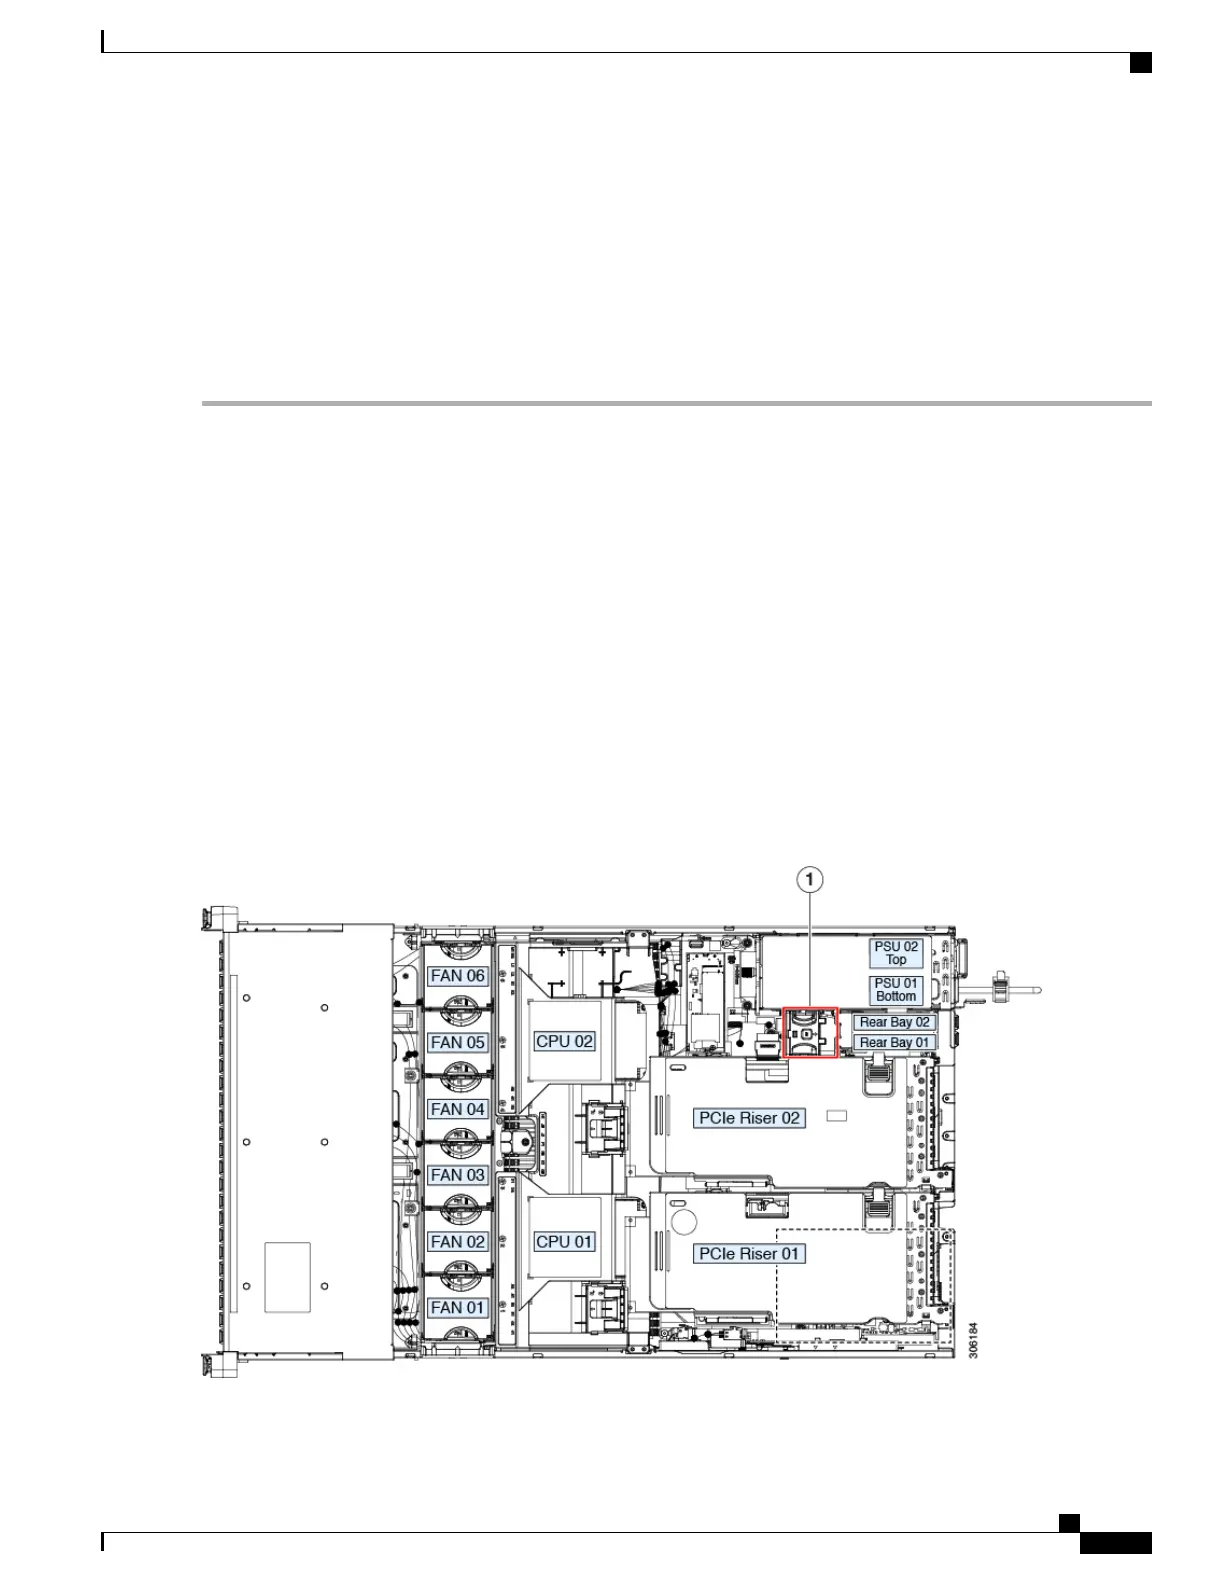
Figure 25: Rear Drive Backplane Fan
Cisco UCS C240 M5 Server Installation and Service Guide
65
Maintaining the Server
Replacing a Rear-Drive Backplane Fan
 Loading...