User's Manual
164
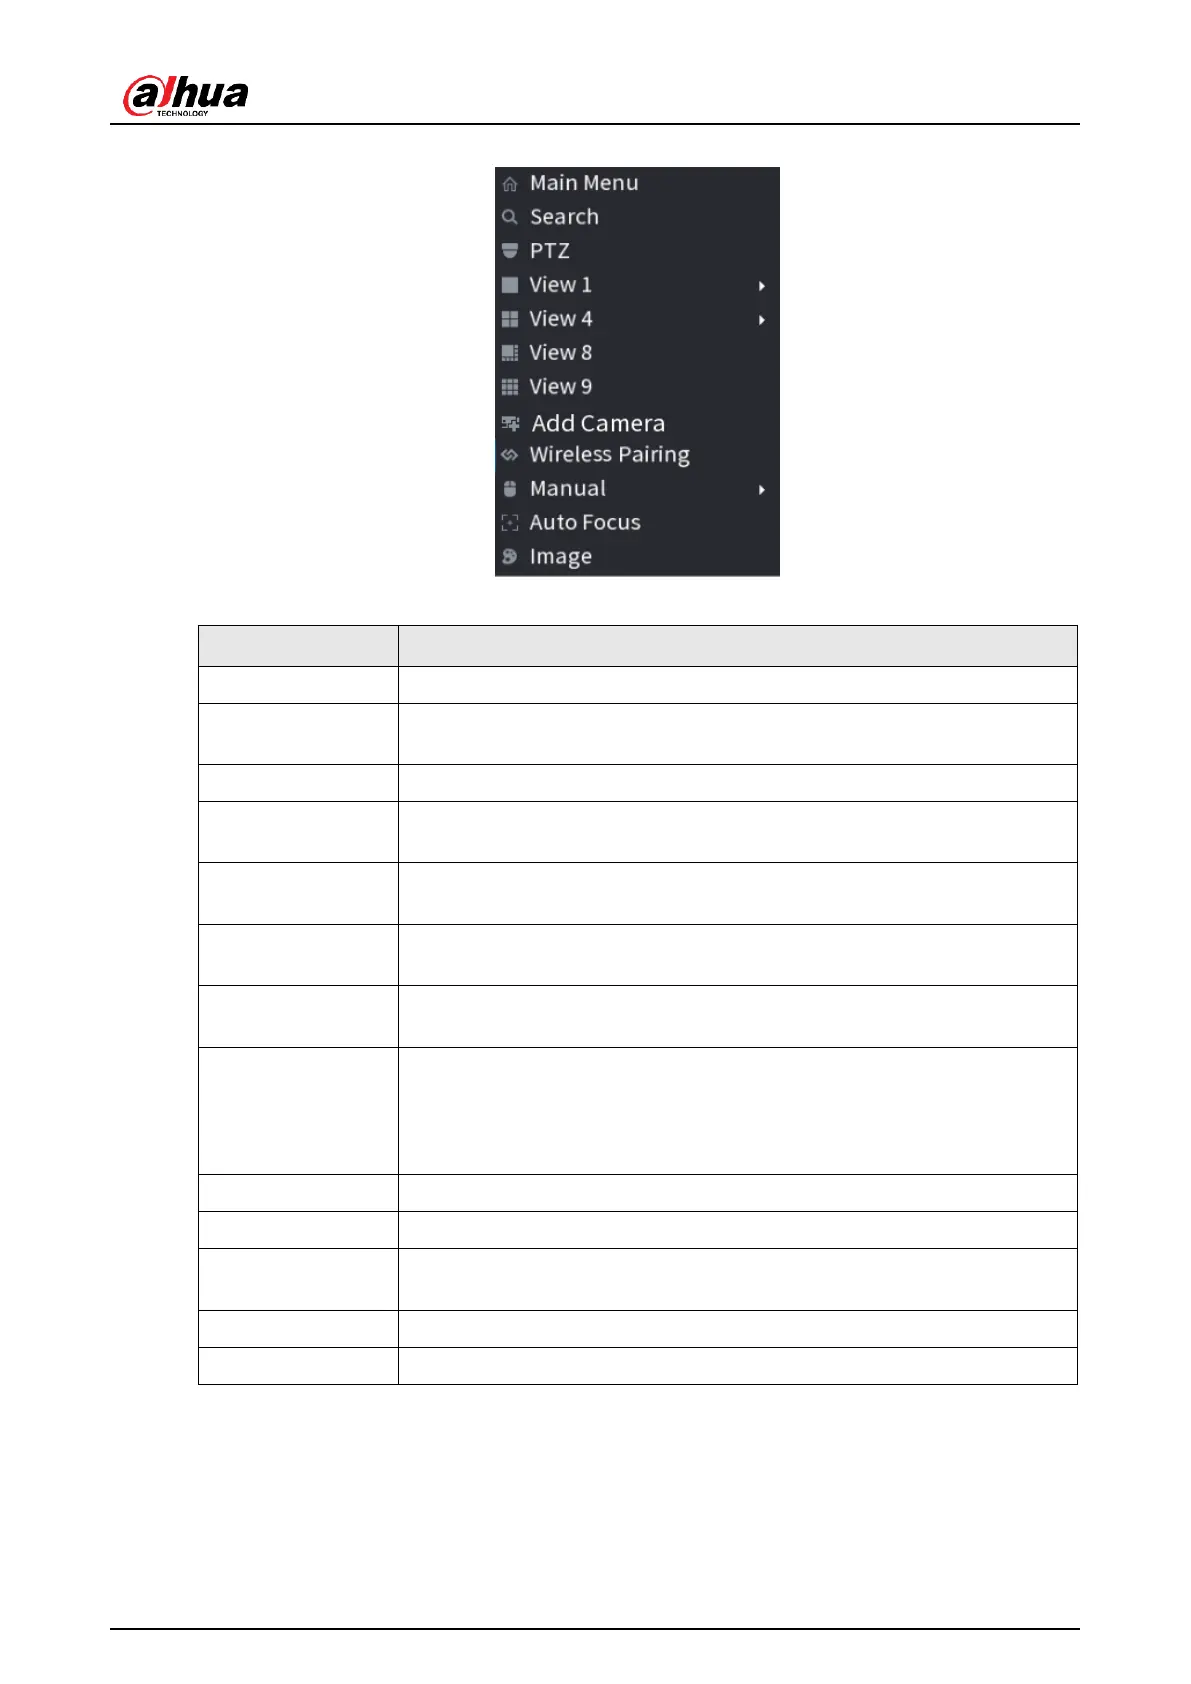
Figure 4-71
Table 4-22
Open
Main Menu
interface.
Open the
SEARCH
interface where you can search and play back
record files. For details, see "4.6 Playback and Search".
Open the PTZ interface. For details, see "4.4 PTZ".
Configure the live view screen as a single-channel layout or
multi-channel layout.
Set customized screen split mode and channels. For details, see
"4.3.5 Sequence".
Open the
Add Camera
interface. For details, see "4.1.4.4 Adding
Camera".
Right-click Wireless Paring to quickly add IPCs. For details, see "4.3.4
Wireless Paring".
● Select
Record Mode
, you can configure the recording mode as
Auto
or
Manual
, or stop the recording. You can also enable or
disable snapshot function
● Select
Alarm Mode
, you can configure alarm output settings.
There are two modes: General/AI mode.
Select enable/disable to start/stop crowd distribution function.
Click to realize auto focus function. Make sure the connected camera
supports auto focus function.
Click to modify the camera properties. For details, see "4.2.4 Image".
Click
Sub Port
, you can go to control the sub screen.
4.3.4 Wireless Paring
Right-click on the screen and select
Wireless Paring
. The
Wireless Pairing
interface is
displayed. See Figure 4-72.
The device enters a 120 seconds pairing countdown.
 Loading...