Recharge system voltage check
Look for any leakage
1) Access the battery by removing the specific compartment in the shield back plate.
2) Check that the battery does not show signs of losing fluid before checking the output voltage.
3) Turn the ignition key to position OFF, connect the terminals of the tester between the negative pole
(-) of the battery and the black cable and only then disconnect the black cable from the negative pole
(-) of the battery.
4) With ignition key still at OFF, the reading detected by the ammeter must be ≤ 0.5 mA.
Check the charging current
WARNING
BEFORE CARRYING OUT THE CHECK, MAKE SURE THAT THE BATTERY IS IN GOOD WORK-
ING ORDER.
1) Place the vehicle on its centre stand
2) With the battery correctly connected to the circuit, place the tester terminals between the battery
terminals..
3) Turn on the engine, increase the engine rpm and, at the same time, measure the voltage.
Electric characteristic
Control voltage
14 ÷ 14.7 V at 1000÷8000 rpm
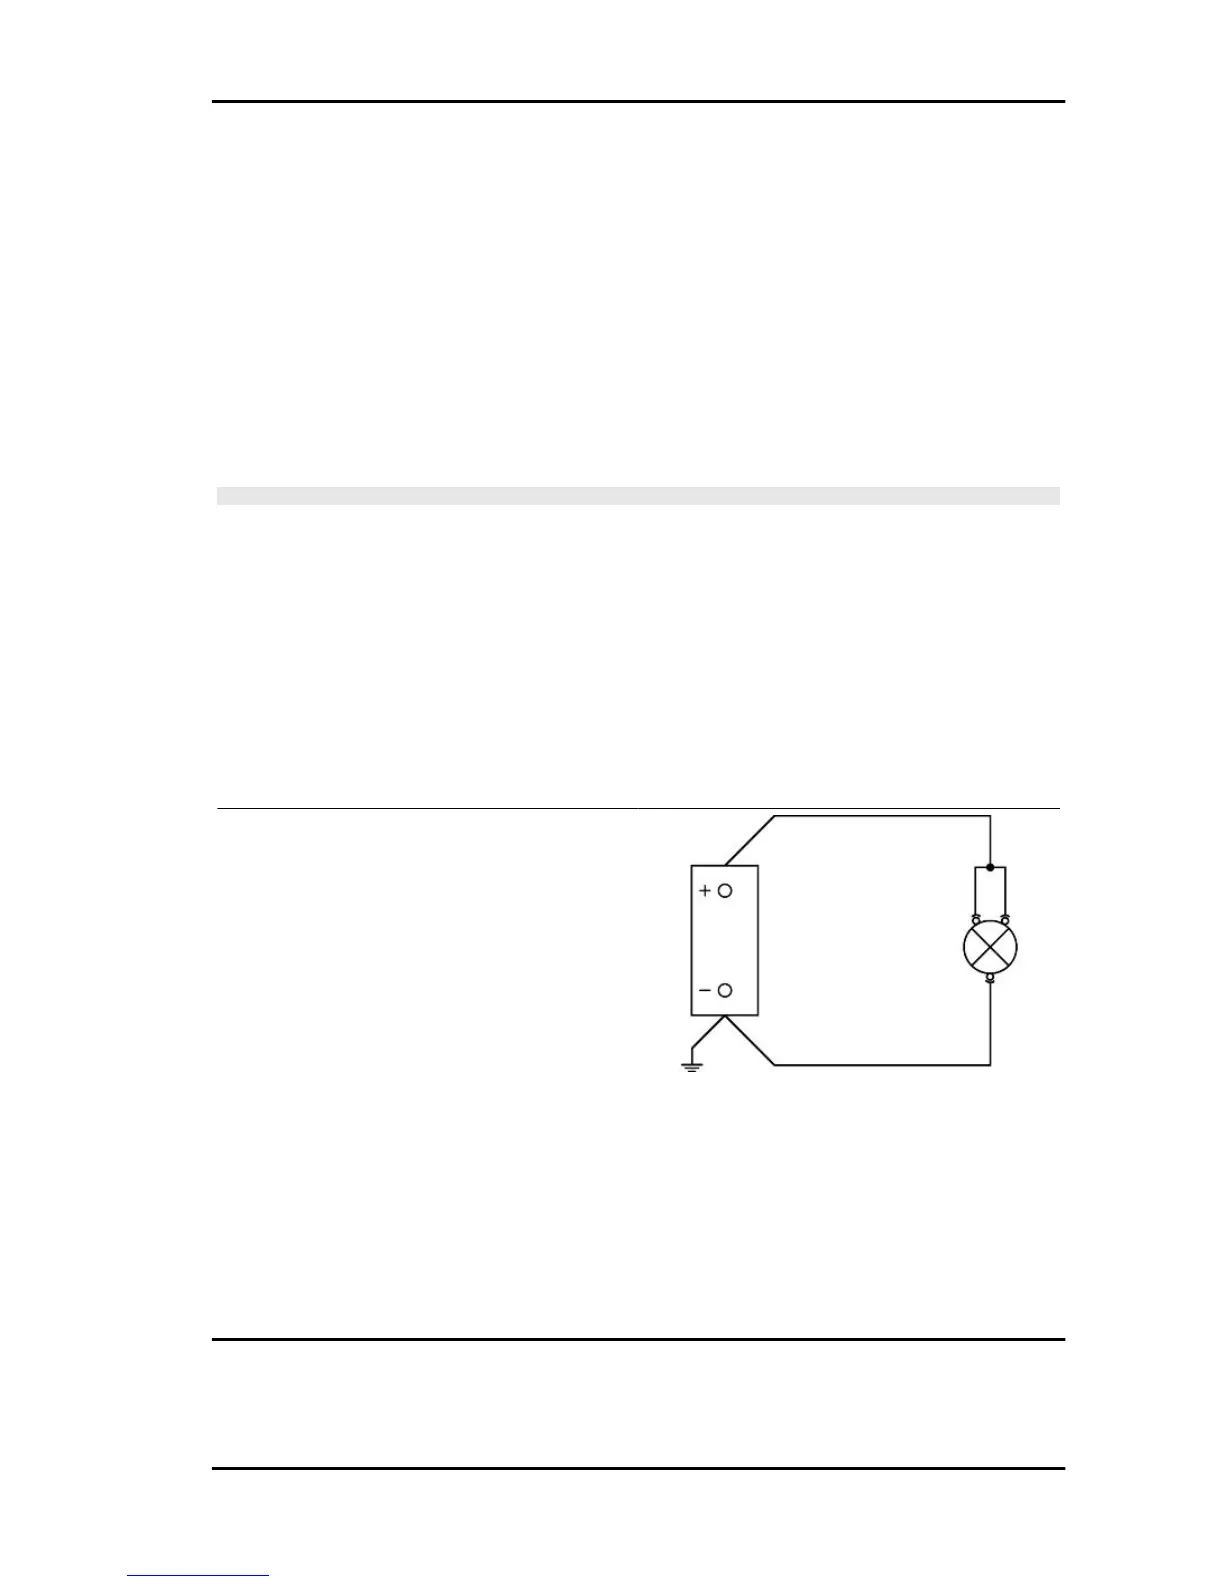
Maximum current output check.
- Connect a 12V-55W twin-filament bulb to the
battery poles as shown in the figure.
- Connect the diagnostic tester to the socket in the
battery compartment, power it and start the active
diagnosis for the electric fan.
- With the engine off and the panel set to «ON»
with the lights on, allow the battery voltage to stop
at 12V.
- Connect a DC ammeter clamp to the 2 recharge
positive poles in the regulator output.
- Start the engine and rev it up to a high engine
speed while reading the value on the pincer.
With an efficient battery a value must be detected:
> 20A
GP 800 i.e. Electrical system
ELE SYS - 35
 Loading...