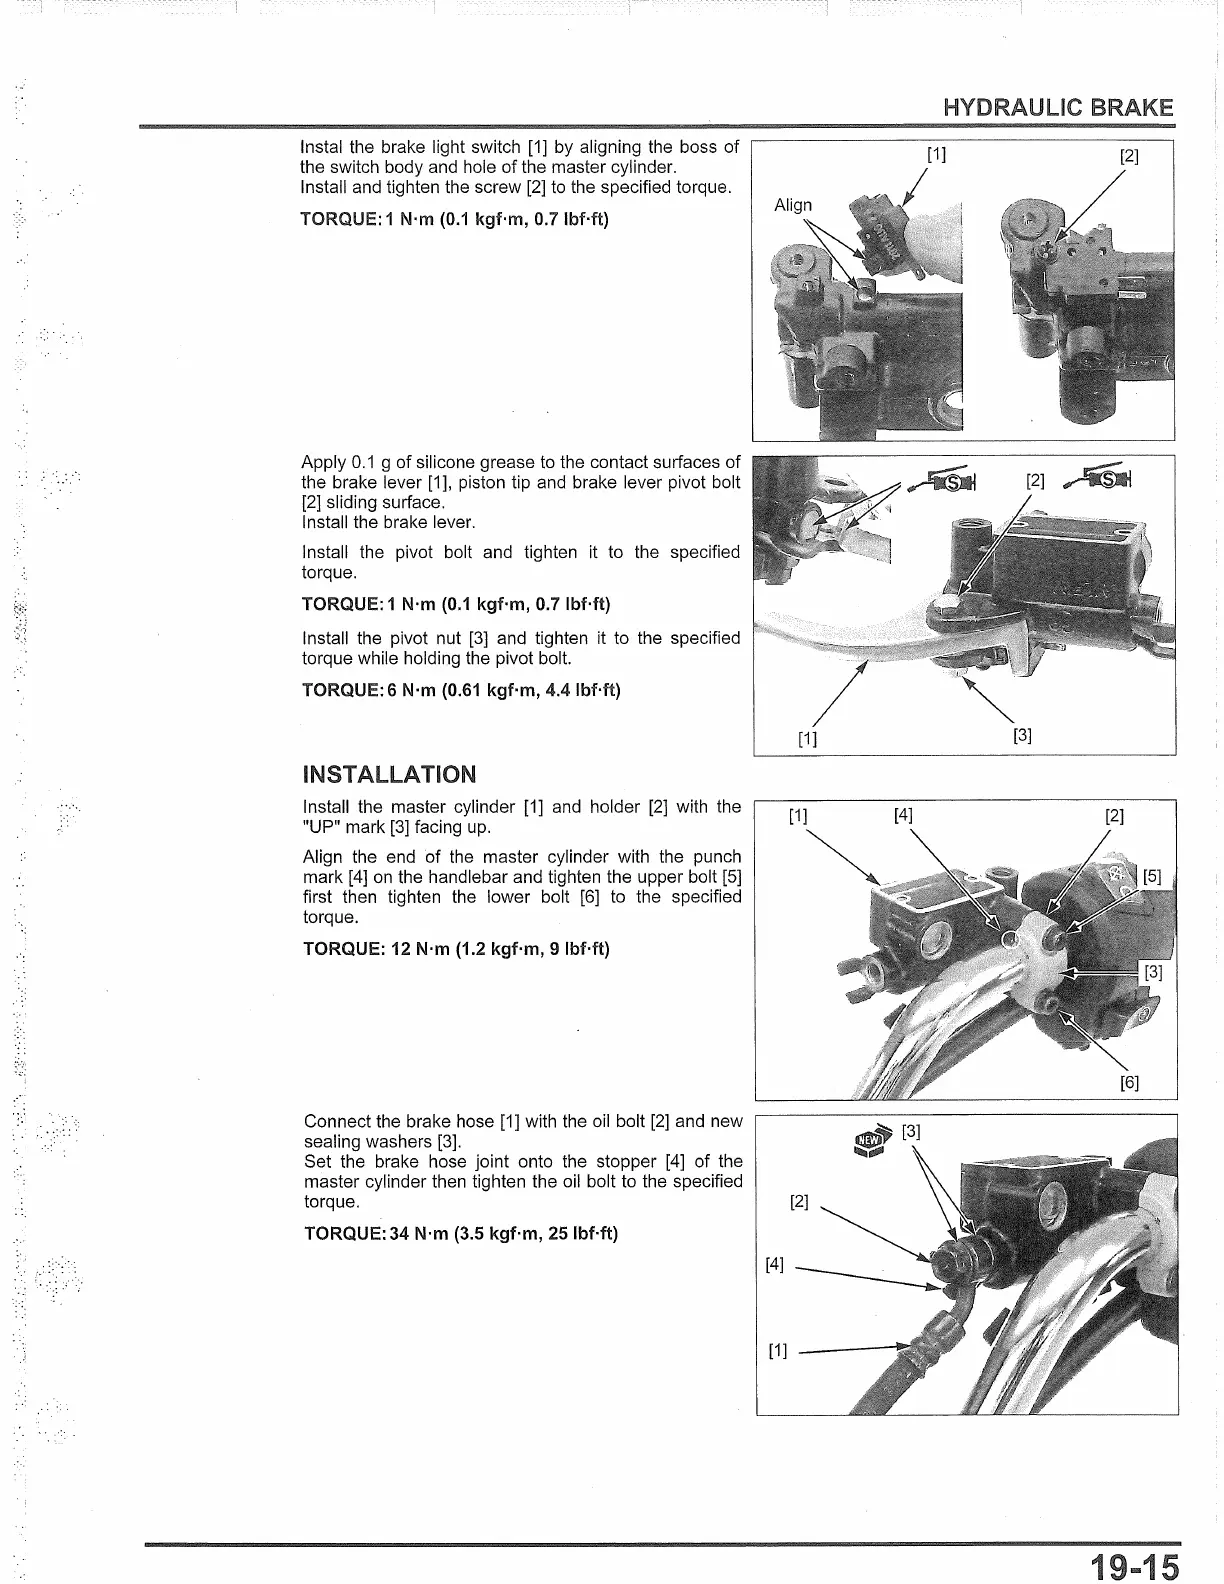
lnstal the brake light switch
[1]
by aligning the boss of
the switch body
and
hole of the master cylinder.
Install
and
tighten the screw
[2]
to
the specified torque.
TORQUE: 1 N·m
(0.1
kgf·m, 0.7
lbMt)
Apply
0.1
g of silicone grease
to
the contact surfaces of
the brake lever
[1],
piston tip
and
brake lever pivot bolt
[2]
sliding surface.
Install the brake lever.
Install the pivot bolt and tighten it
to
the specified
torque.
TORQUE: 1 N·m
(0.1
kgf·m, 0.7 lbMt)
Install the pivot nut
[3]
and
tighten it
to
the specified
torque while holding the pivot bolt.
TORQUE: 6 N·m (0.61 kgf·m, 4.4 lbMt)
INSTALLATION
Install the master cylinder
[1]
and
holder
[2]
with the
"UP" mark
[3]
facing
up.
Align the end of the master cylinder with the punch
mark
[4]
on
the handlebar and tighten the upper bolt
[5]
first then tighten the lower bolt
[6]
to
the specified
torque.
TORQUE: 12 N·m (1.2 kgf·m, 9 lbMt)
Connect the brake hose
[1]
with the
oil
bolt
[2]
and new
sealing washers
[3].
Set the brake hose joint onto the stopper
[4]
of the
master cylinder then tighten the
oil
bolt
to
the specified
torque.
TORQUE: 34 N·m (3.5 kgf·m, 25 lbMt)
[1]
[1] [4]
[2]
~.
[6]
[4]
1
 Loading...