·.·:
···.·
INSPECTION
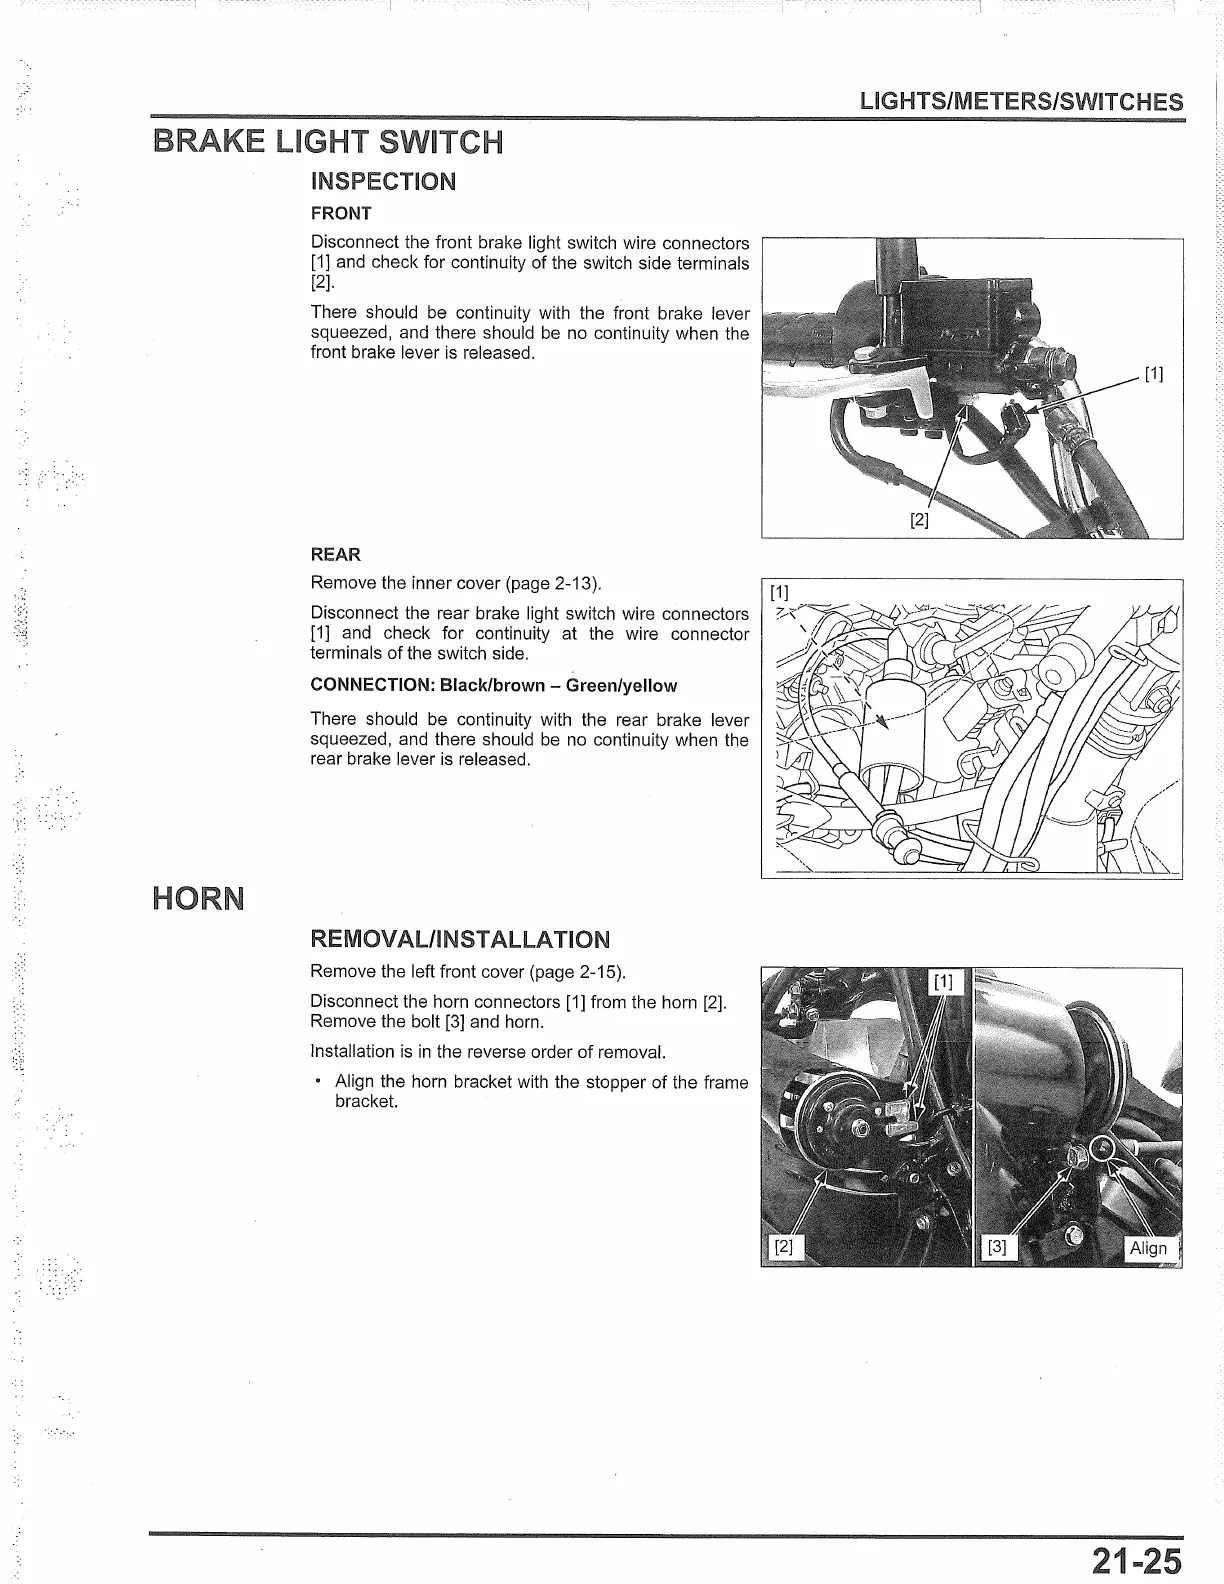
FRONT
Disconnect the front brake light switch wire connectors
[1]
and check for continuity of the switch side terminals
[2].
There should
be
continuity with the front brake lever
squeezed, and there should
be
no
continuity when the
front brake lever
is
released.
REAR
Remove the inner cover (page 2-13).
Disconnect the rear brake light switch wire connectors
[1]
and
check for continuity at the wire connector
terminals of the switch side.
CONNECTION: Black/brown - Green/yellow
There should
be
continuity with the rear brake lever
squeezed, and there should
be
no
continuity when the
rear brake lever
is
released.
REMOVAL/INSTALLATION
Remove the left front cover (page 2-15).
Disconnect the horn connectors
[1]
from the horn [2].
Remove the bolt
[3]
and horn.
Installation
is
in
the reverse order of removal.
Align the horn bracket with the stopper of the frame
bracket.
LIGHTS/METERS/SWITCHES
 Loading...