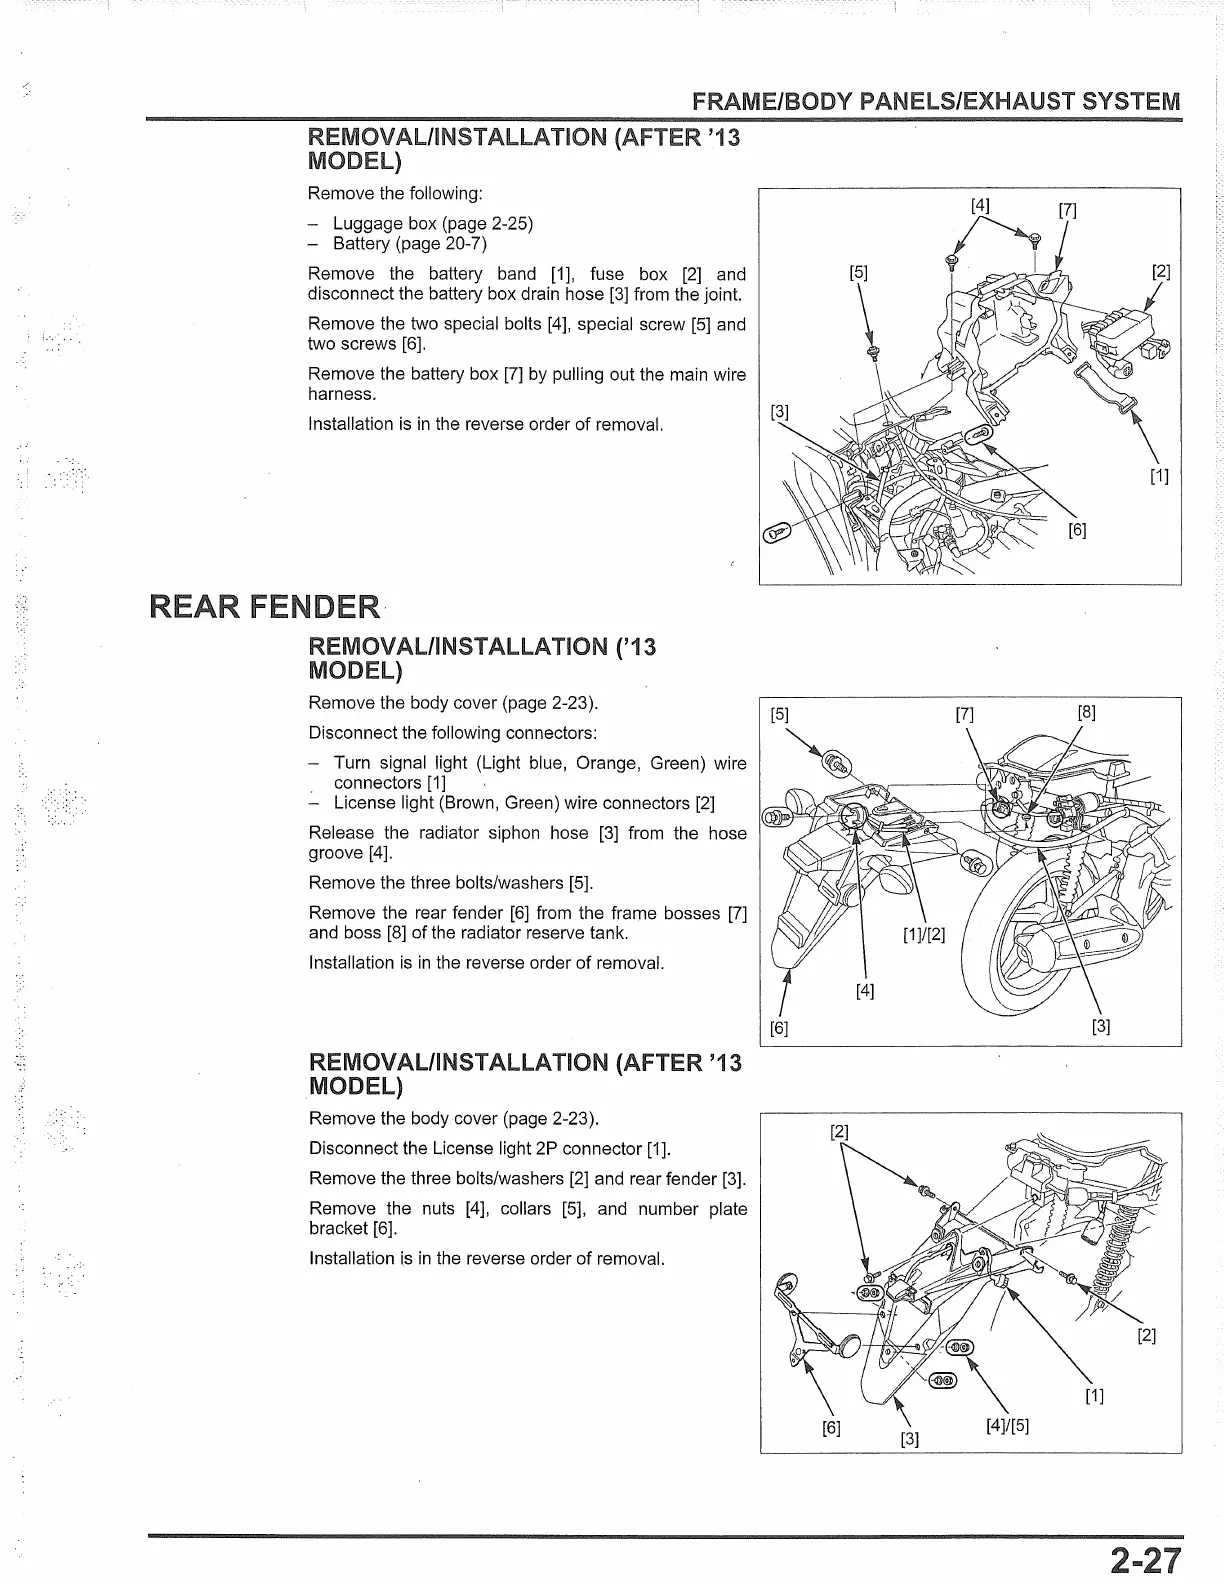
FRAME/BODY PANELS/EXHAUST
REMOVAL/INST
ALLA
Tl
ON
MODEL)
Remove the following:
- Luggage box (page 2-25)
- Battery (page 20-7)
'13
Remove the battery band [1], fuse box
[2]
and
disconnect the battery box drain hose
[3]
from the joint.
Remove the two special bolts [4], special screw
[5]
and
two screws [6].
Remove the battery box
[7]
by pulling out the main wire
harness.
Installation
is
in
the reverse order
of
removal.
REMOVAL/INSTALLATION ('13
MODEL)
Remove the body cover (page 2-23).
Disconnect the following connectors:
- Turn signal light (Light blue, Orange, Green) wire
connectors
[1]
- License light (Brown, Green) wire connectors [2]
Release the radiator siphon hose
[3]
from the hose
groove [4].
Remove the three bolts/washers [5].
Remove the rear fender
[6]
from the frame bosses
[7]
and boss
[8]
of
the radiator reserve tank.
Installation
is
in
the reverse order
of
removal.
REMOVAL/INSTALLATION (AFTER '13
MODEL)
Remove the body cover (page 2-23).
Disconnect the License light 2P connector [1].
Remove the three bolts/washers
[2]
and rear fender [3].
Remove the nuts [4], collars [5], and number plate
bracket [6].
Installation
i.s
in
the reverse order
of
removal.
[6]
[3]
 Loading...