REMOVAL/INSTALLATION
'13 model:
Remove the front meter panel (page 2-7).
Remove the main relay
[1]
from the 4P (Gray)
connector [2].
Installation
is
in
the reverse order
of
removal.
After
'13 model:
Remove the battery maintenance
lid
(page 20-7).
Remove the fuse box cover
[1]
and main relay [2].
Installation
is
in
the reverse order
of
removal.
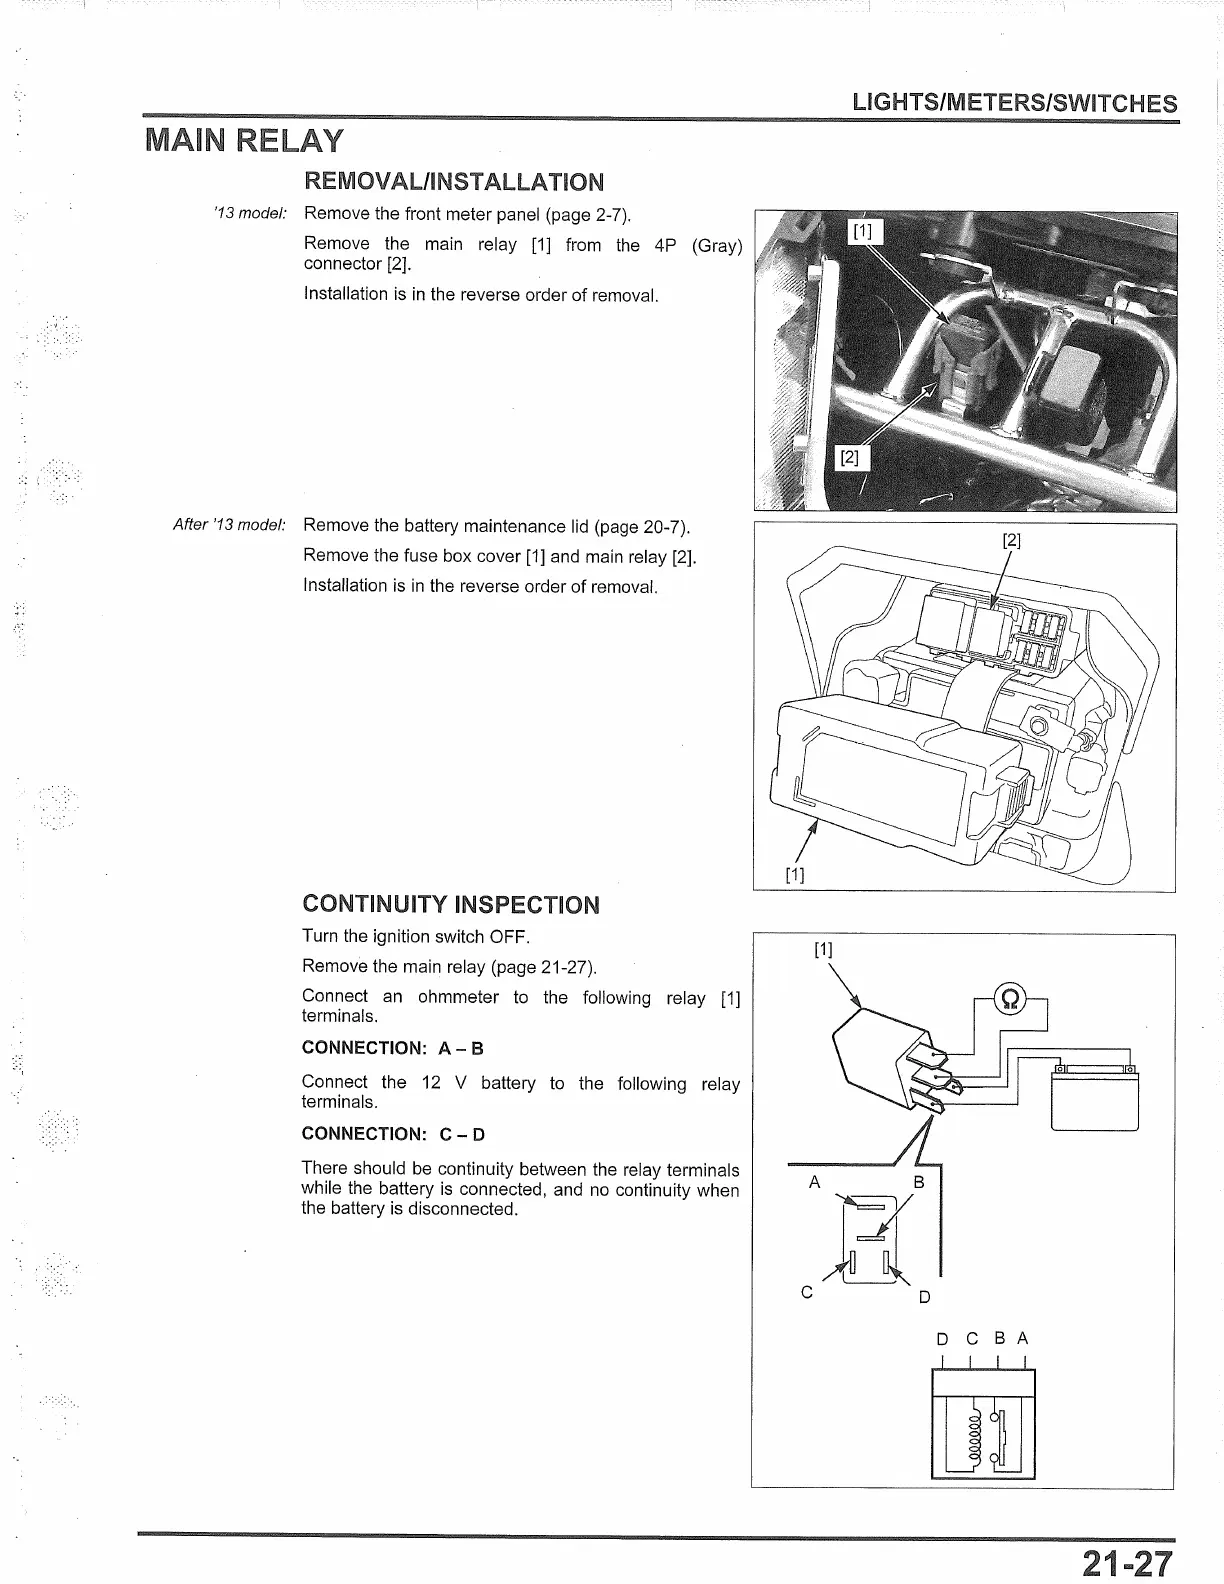
CONTINUITY INSPECTION
Turn the ignition switch OFF.
Remove the main relay (page 21-27).
Connect
an
ohmmeter to the following relay
[1]
terminals.
CONNECTION: A - B
Connect the 12 V battery to the following relay
terminals.
CONNECTION: C - D
There should be continuity between the relay terminals
while the battery
is
connected, and
no
continuity when
the battery
is
disconnected.
LIGHTS/METERS/SWITCHES
[1]
D C
BA
 Loading...