I/O Drawer Power Distribution Board
Removal
1. Turn off power as described in “Powering Off the System” on page 415.
2. Place the I/O drawer in the rear service position, as described in “Rear Service Position” on page
463.
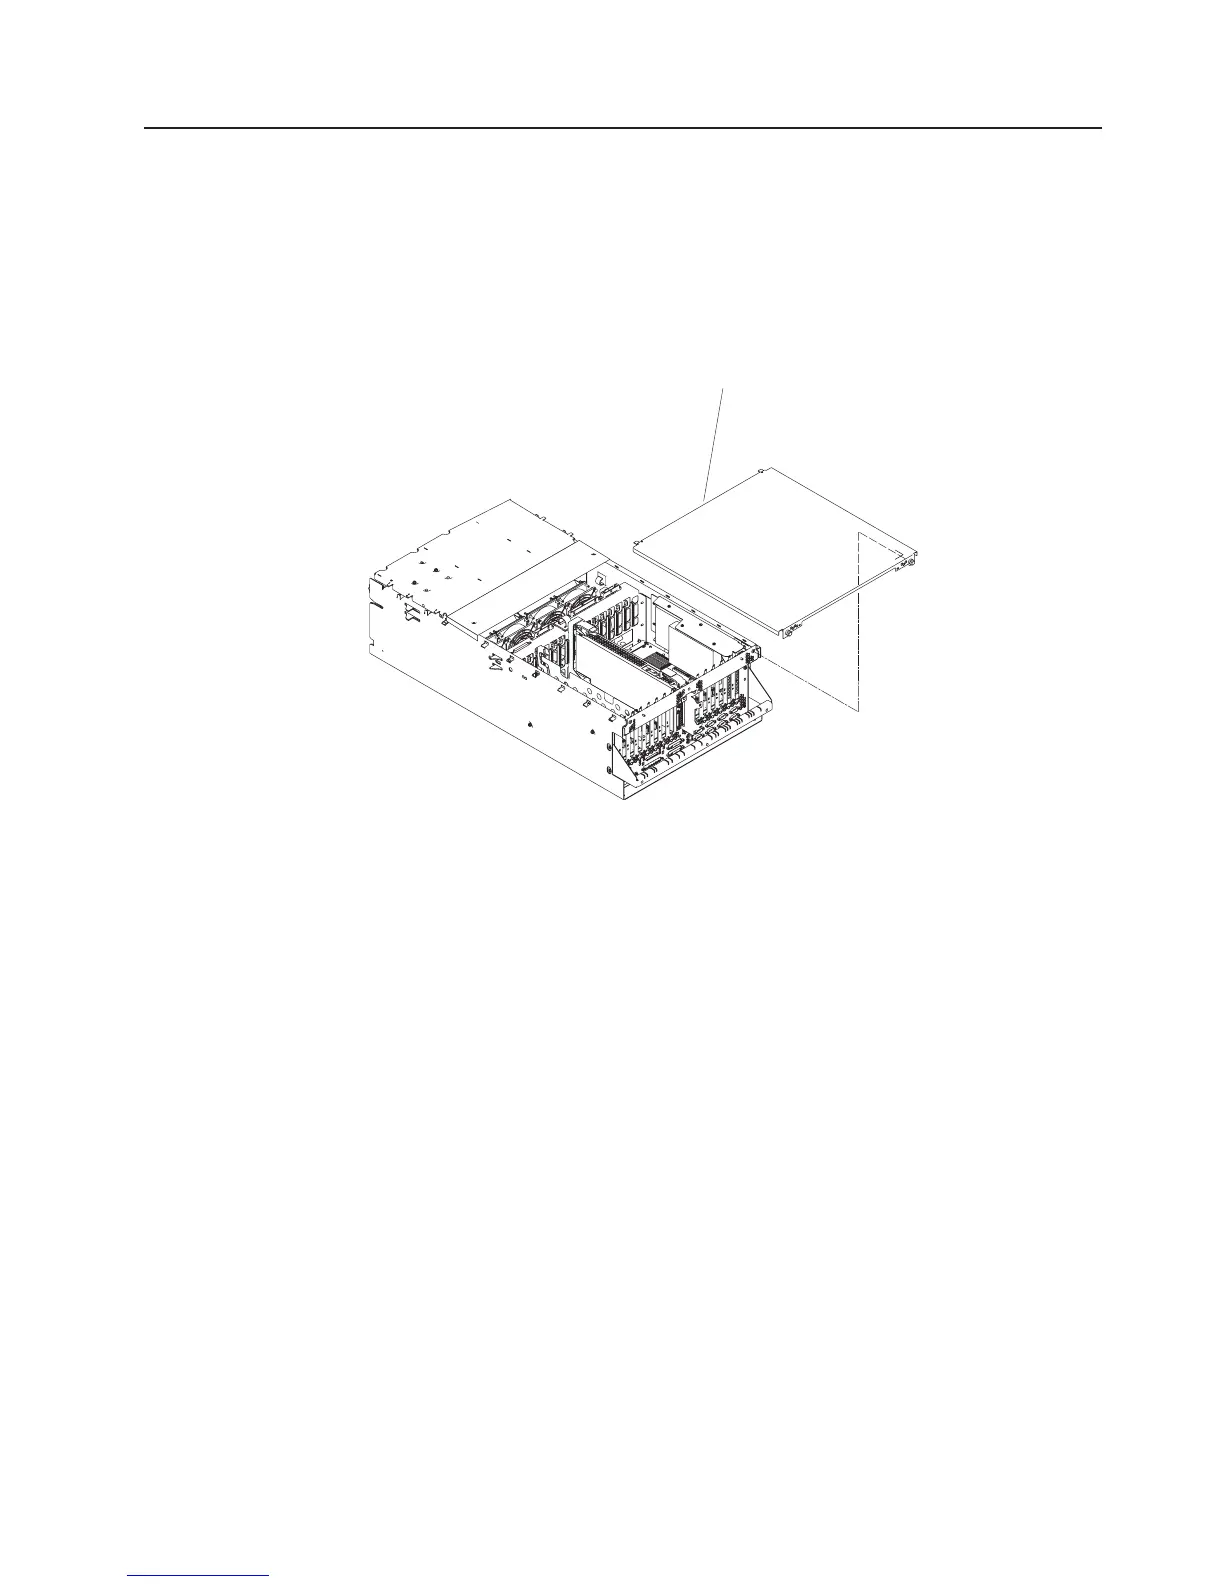
3. Remove the two thumbscrews and remove the rear cover.
Rear
Cover
4. Remove any adapters or files installed in slots 12, 13, or 14.
5. Disconnect the four I/P cables from the I/O tray.
6. Remove two screws from each side of the I/O drawer board assembly.
7. Disconnect the miscellaneous power cable from PCI board connector J21.
8. Slide the I/O drawer board assembly to the rear to disconnect the assembly from the power
distribution board bus bar.
9. Place the I/O drawer in the front service position as described in “Front Service Position” on page
464.
10. Remove the power supplies as described in “I/O Drawer Power Supplies and Power Supply Fan
Assemblies” on page 448.
Chapter 10. Removal and Replacement Procedures 447
 Loading...


