1.6 SPECIFICATIONS
Detailed Model 617 specifications may be found immedi-
ately preceding the table of contents of the manual. Note
that accuracy specifications assume that the insinxnent has
been properly zero corrected, as discussed in Section 2.
1.7 USING THIS INSTRUCTION MANUAL
This manual contains all the information necessary for you to
operate and service your Model 617 Programmable Elec-
trometer. The manual is divided into the following sections:
l Section 1 contains general information about your instru-
ment including that necessary to unpack the instrument and
get it operating as quickly as possible.
l Section 2 contains detailed operating information on how to
use the front panel controls and programs, make connec-
tions, and basic measuring techniques for each of the
available measuring functions.
l Information necessary to connect the Model 617 to the
IEEE-488 bus and program operating modes and functions
from a controller is contained in Section 3.
l Typical applications for the Model 617 are included ‘in Sec-
tion 4. At least one application for each of the measuring
functions is included in this section.
l Performance verification procedures for the instrument
may be found in Section 5. This information will be helpful
if you wish to verify that the instrument is operating in
compliance with its stated specifications.
l Section 6 contains a complete description of operating
theory for the Model 617. Analog, digital, power supply,
and IEEE-488 interface operation is included.
l Should your instrument ever require servicing, refer to the
information located in Section 7. This section contains in-
formation on fuse replacement, line voltage selection,
calibration. and troubleshooting.
l Replacement parts may be ordered by using the information
contained in Section 8. Parts lists as well as schematic
diagrams and component layouts are located in this section.
1.8 UNPACKING AND INSPECTION
The Model 617 Programmable Electrometer was carefully in-
spected before shipment. Upon receiving the instrument,
carefully unpack all items from the shipping carton and check
for any obvious signs of physical damage that might have oc-
curred during shipment. Report any damage to the shipping
agent at once. Retain the original packing material in case
reshipment becomes necessary.
The following items aw included with every Model 617 ship-
ment:
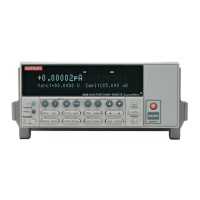
Model 617 Programmable Electrometer
Model 617 Instruction Manual.
Model 6011 Triaxial Input Cable
Additional accessories as ordered
If an additional instruction manual is required, order the
manual package (Keithley Part Number 617-901-W). The
manual package includes an instruction manual and all perti-
nent addenda.
1.9 GElTING STARTED
The Model 617 Programmable Electrometer is a highly
sophisticated instrument with many capabilities. Although
there are a number of complex aspects about the instrument,
you can use the following procedure to get your instrument
up and running quickly. For more detailed information, you
should consult the appropriate section of the manual.
1.
2.
3.
4.
5.
6.
Carefully unpack your instrument as described in
paragraph 1.8.
Locate the power cord and plug it into the rear panel
power jack. Plug the other end of the line cord into an ap-
propriate power source. See Section 2 for more complete
information.
Connect the supplied triaxial cable to the rear panel input
jack. Make sure the rear panel V, R GUARD switch is in
the off position.
Press in the front panel POWER switch to apply power to
the instrument. The instrument will power up the the
autorange volts mode with zero check enabled. Thus, you
could simply connect the red and black input leads to a
voltage source and take a voltage reading at this point by
disabling zero check. Remember that the Model 617
measures DC voltages up to 2COV.
To change to a different measuring function, simply press
the desired function button. For example, to measure
resistance. simply press the OHMS button.
Complete detailed operation concerning Model 617 front
panel operation may be found in Section 2. If you wish to
control these functions over the IEEE-488 bus, consult
Section 3.
1.10 PREPARATION FOR USE
Once the instrument is unpacked, it must be connected to an
appropriate power source as described below.
l-2
 Loading...