SECTION 2
OPERATION
2.1 INTRODUCTION
Operation of the Model 617 may be divided into two general
categories: front panel operation and IEEE-488 bus operation.
This section contains information necessary to use the instru-
ment on a front-panel basis. Note that many of these func-
tions can also be programmed over the IEEE-488 bus, as
described in Section 3.
The following paragraphs contain a complete description of
Model 617 front panel operation. First a complete description
of each front and rear panel function is presented. Next the
complete procedure for each of the measuring functions is
presented, followed by a description of the built in voltage
source. Finally, the analog output and guard functions are
described along with a method to apply external feedback.
2.2 POWER UP PROCEDURE
Use the procedure below to connect the Model 617 to line
power and power up the instrument.
1. Connect the female end of the power cord to the AC recep-
tacle on the rear panel of the instrument. Connect the other
end of the cord to a grounded AC outlet.
WARNING
The Model 617 is equipped with a 3-wire
power cord that contains a separate ground
wire and is designed to be used with
grounded outlets. When proper connec-
tions are made, instrument chassis is con-
nected to power line ground. Failure to use
a grounded outlet may result in personal in-
jury or death because of electric shock.
CAUTION
Be sure that the power line voltage agrees
with the indicated range on the rear panel
of the instrument. Failure to observe this
precaution may result in instrument
damage. If necessary, the line voltage may
be changed as decribed in Section 7.
2. Turn on the power by pressing in the front panel POWER
switch. The switch will be at the inner most position when
the instrument is turned on.
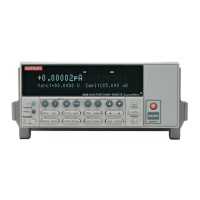
3. The instrument will power up in the volts function, in the
autorange mode aqd with zero check enabled, as indicated
by the associated front panel LEDs. All other LEDs will be
off when the instrument is first turned on.
2.3 POWER UP SELF TEST AND DISPLAY
MESSAGES
The RAM memory is automatically tested as part of the
power up procedure. If a RAM memory error occurs, the “rr”
message will remain on the display. If the instrument was not
able to read the stored calibration constants and configura-
tion, the decimal points in the two exponent digits will flash.
If such errors occur, the instrument may be partially or com-
pletely inoperative. Refer to Section 7 for more complete
details.
A power up self test may be run and the software revision
level may be displayed by pressing and holding the TRIG but-
ton when the unit is first turned on. During the test, all front
panel LEDs and the display segments will turn on as in the ex-
ample below:
The instrument will then display the software revision level
when TRIG is released, for example:
E.4
The instrument will then enter the diagnostic mode, which is
used as an aid in troubleshooting problems within the instru-
ment. See Section 7 for details. The power must be turned off
to remove the instrument from the diagnostic mode.
NOTE
If the instrument is still under warranty (less
than one year from the date of shipment), and
problems develop, it should be returned to
Keithley Instruments for repair. See paragraph
1.11 for details on returning the instrument.
2-I
 Loading...