Chapter 5 Laser Unit
5.3 C-LU3EX Three-laser Unit EX
1-125
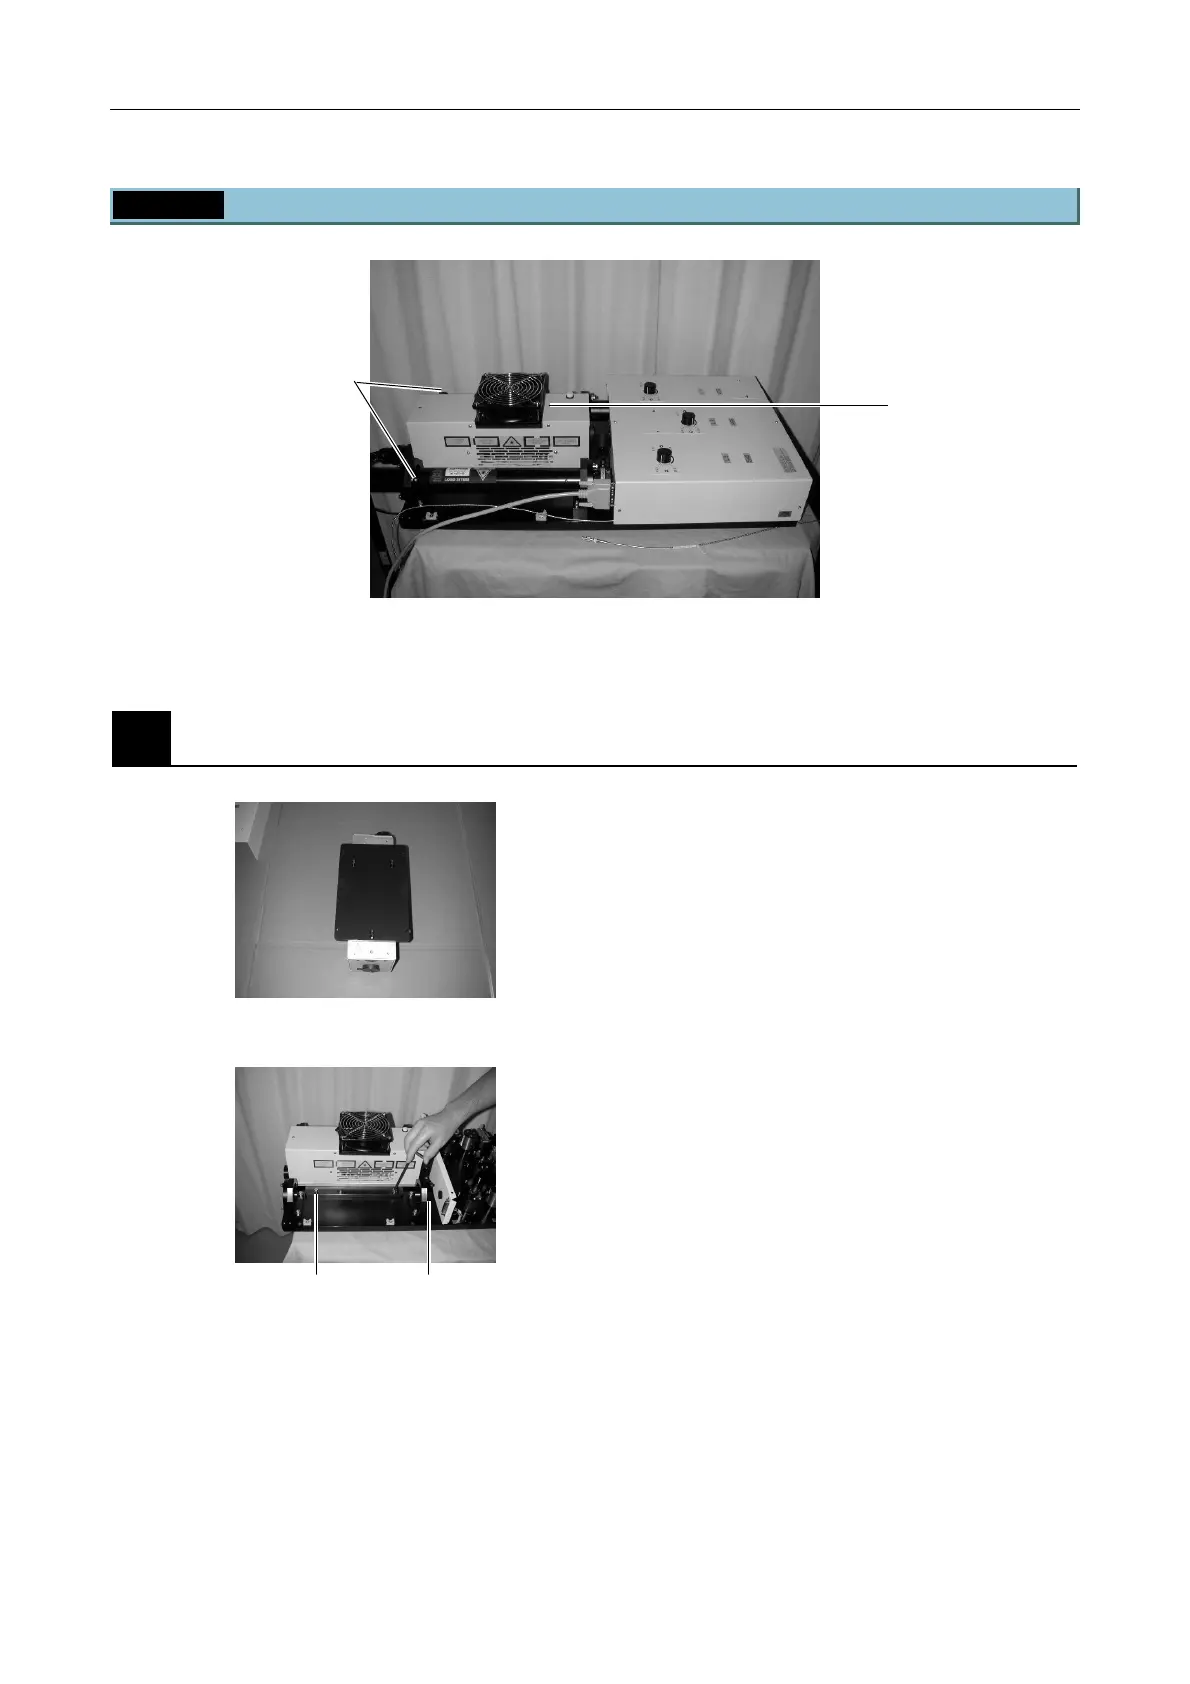
5.3.2 Laser Installation
Overall laser unit diagram DSCN103
Figure 5.3-7
1
Installing the Ar laser
Figure 5.3-8
1. Detach the mounting plate from the laser unit.
2. Attach the mounting plate to the Ar laser.
Note that the mounting plate screw positions differ
for the 488 multi-line Ar (black) and 488 single-line
Ar (white).
• Front three holes: 488 multi-line Ar
• Rear three holes: 488 single-line Ar
Figure 5.3-9
3. Place the Ar laser at the specified position in the
laser unit.
Be sure to press the laser emitter end against the
black ring just enough to compress the ring to
prevent leakage of scattered laser light. Temporarily
secure the Ar laser to the laser unit using the screws.
4. Check that the laser head shutter is closed (at the
CLOSE position).
r lase
He-Ne laser
405 laser
(cylindrical type)
Black ring
ttach while p
essing
against the black ring just
enough to compress it.

 Loading...