Chapter 4 Setting Up the Microscope
4.2 Setup Procedure
1-85
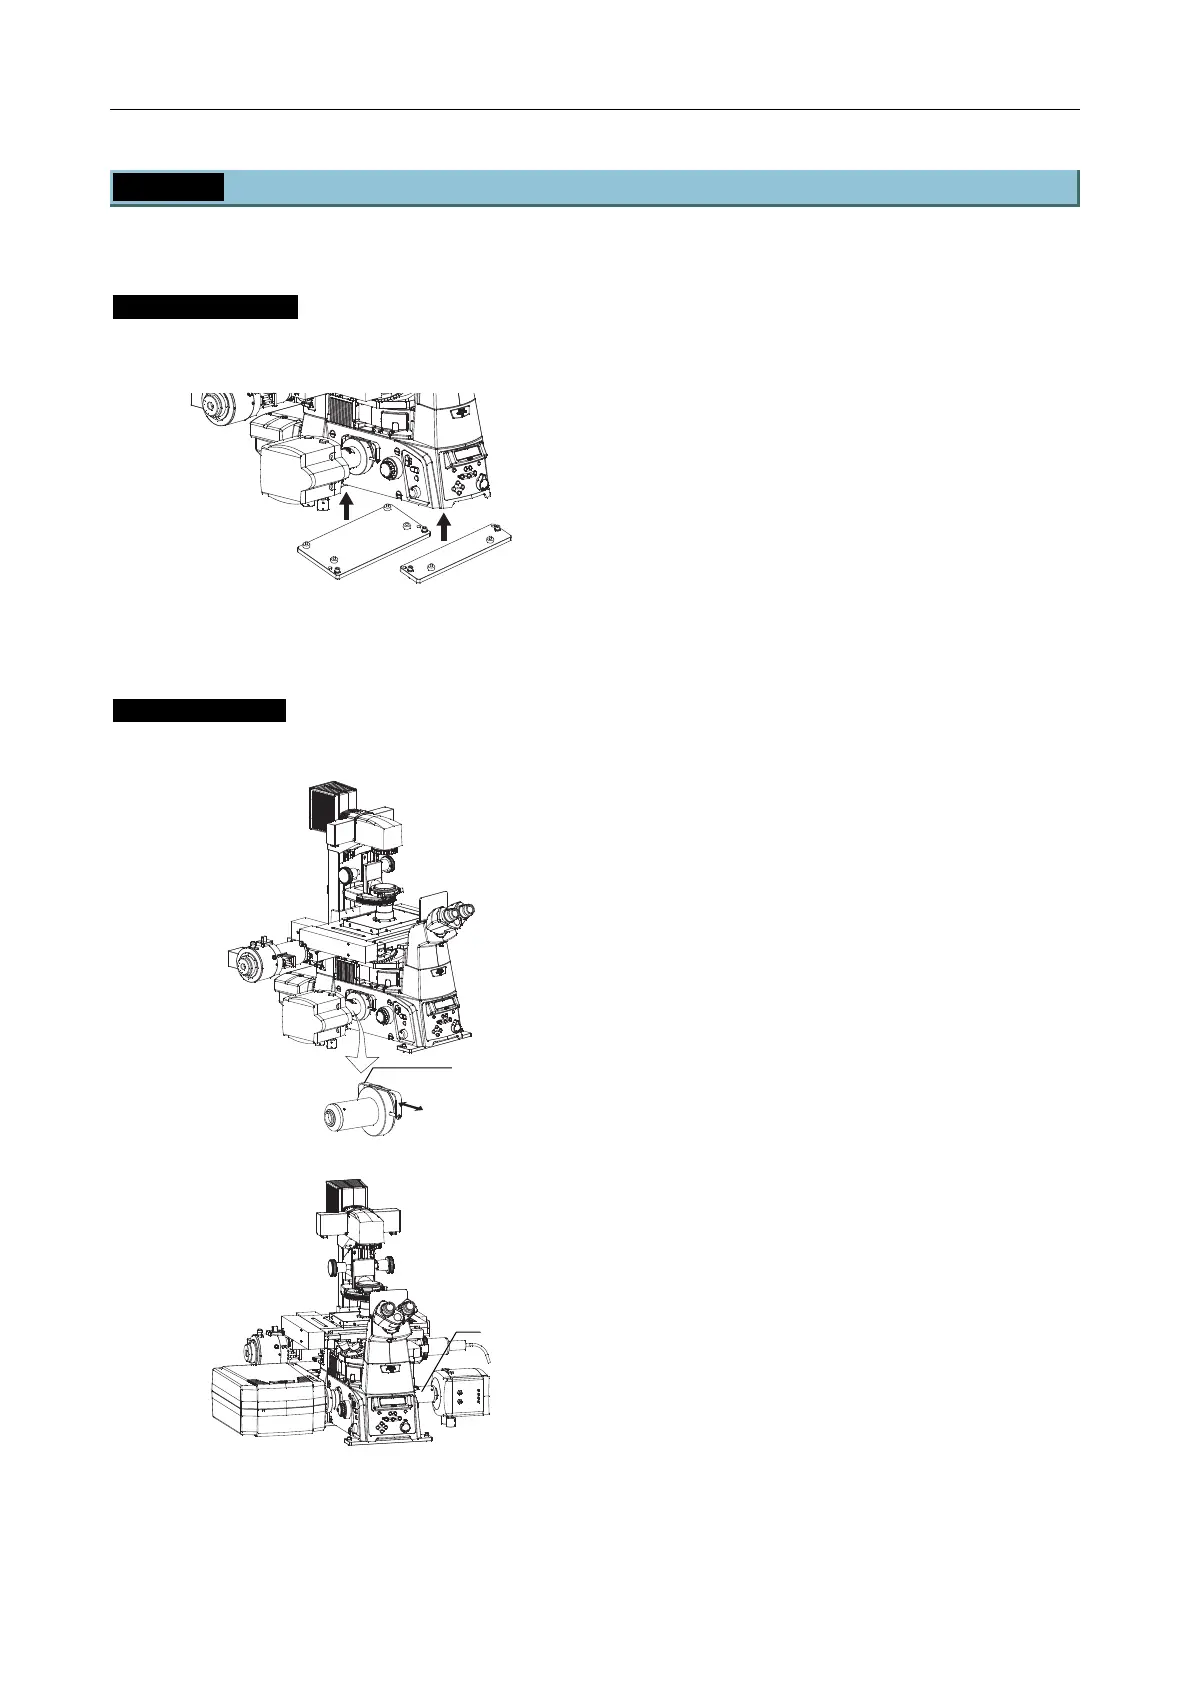
4.2.2 Attaching the N-STORM Kit
Install the following parts to the microscope to perform N-STORM microscopy.
Ti-E fixing plates
Attach plates to fix the microscope to the anti-vibration table.
Ti-E fixing plates
Figure 4.2-20
Detach the front and rear rubber feet at the
bottom of the microscope and secure the fixing
plates (front and rear).
Install the microscope to the anti-vibration table
according to the inch holes or centimeter holes.
3D-STORM port
Attach an optical system for N-STORM to the microscope.
3D-STORM port
Combination of A1 and 3D-STORM port
Figure 4.2-21
Detach the plastic cover on the side port of the
microscope and install the 3D-STORM port.
When using the port independently, install it in
the left side port. When using the port together
with the confocal microscope A1, install it in the
right side port.
Note: The 3D-STORM port cannot be installed
in the bottom port or the back port.
Cylindrical lens
IN/OUT handle
IN
OUT
3D-STORM port
(Front) (Rear)

 Loading...