Chapter 5 Laser Unit
5.4 LU4A Four-laser Module A
1-161
5.4.2 Laser Installation
1
Ar laser installation
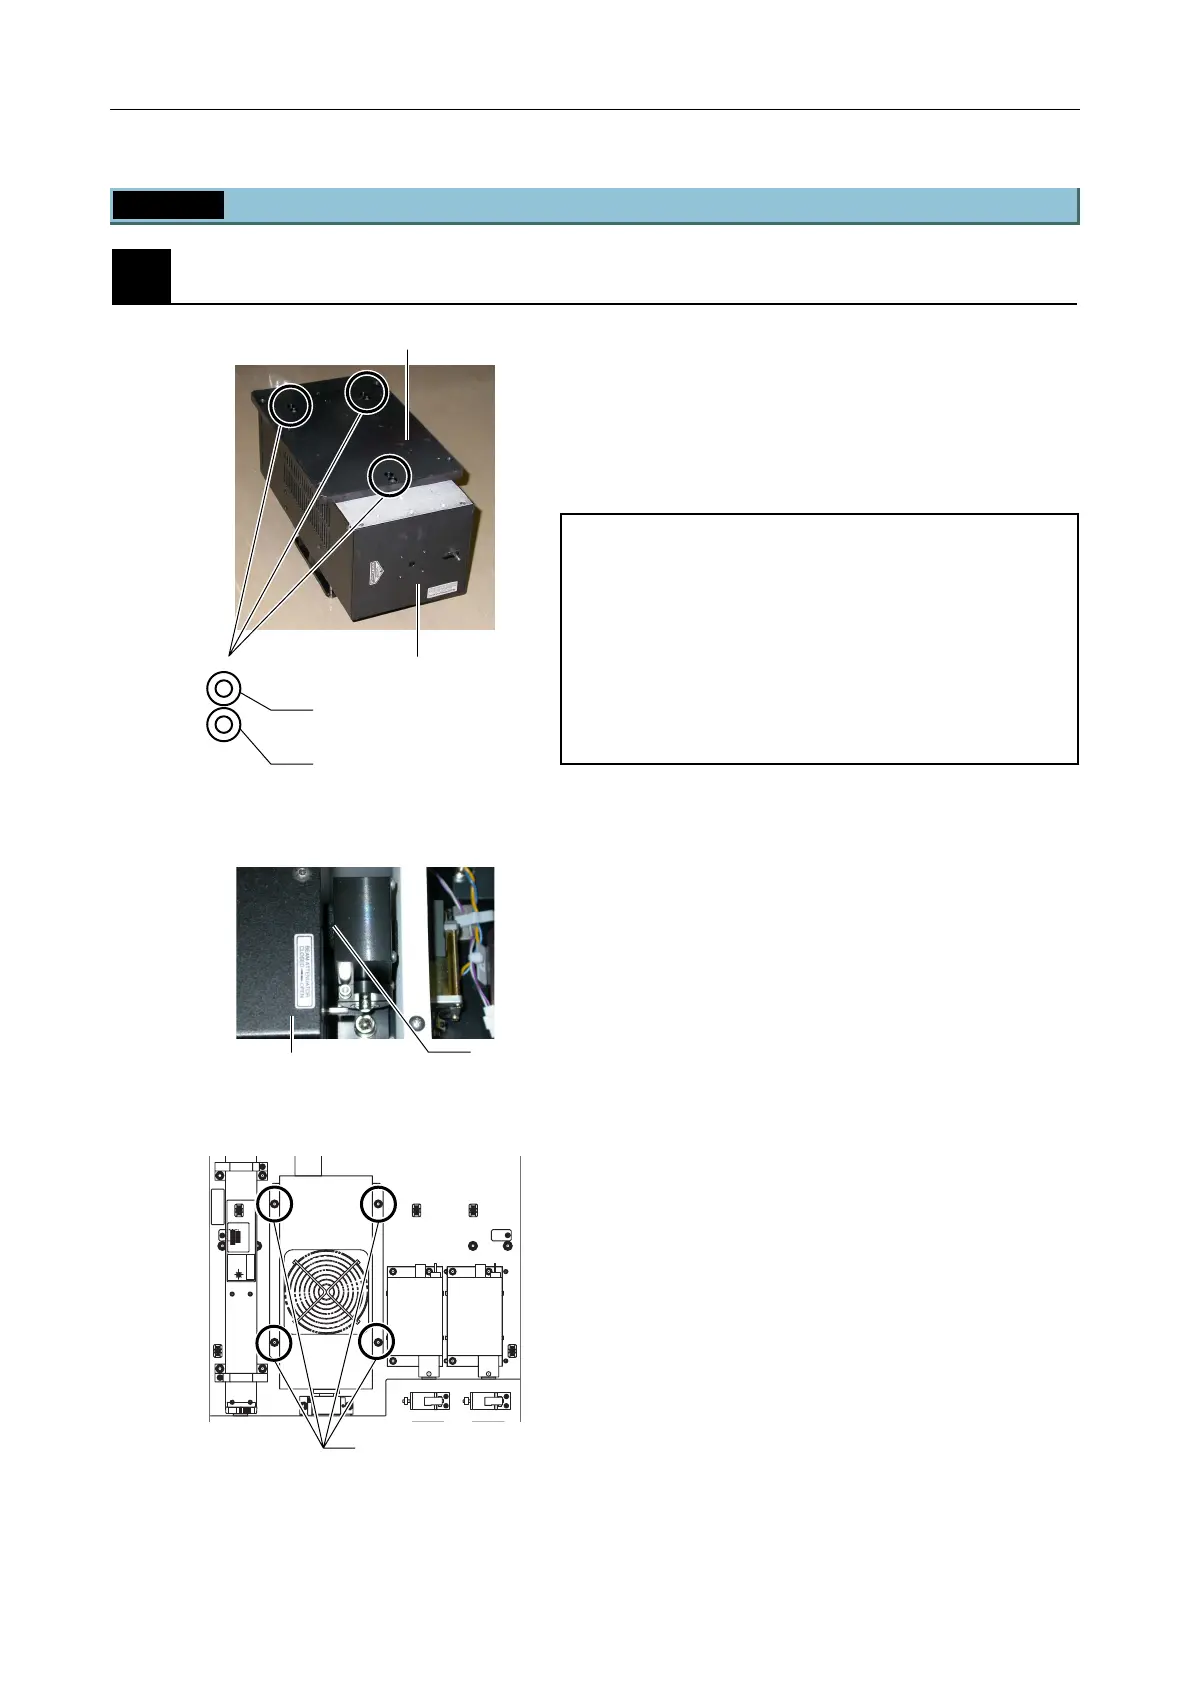
1. Unscrew the four hexagonal bolts on the 488-nm
laser adapter attached to the four-laser module A
body. And then, detach the 488-nm laser adapter
from the four-laser module A body.
2. Attach the laser adapter detached in step 1 onto the
Ar laser.
Precautions
Note that the screw positions of the laser adapter
for the 488-nm multiple lines Ar laser (black body)
differ from that for the 488-nm single line Ar laser
(white body).
• For 488-nm multiple lines Ar laser:
Three near-side holes
• For 488-nm single line Ar laser:
Three far-side holes
Figure 5.4-13
Figure 5.4-14
Figure 5.4-15
3. Mount the Ar laser to the L3 position on the
four-laser module A. The laser emission port must
contact the black ring to prevent scattered light of
laser from leaking. Press the laser emission port
against the black ring. The black ring becomes
flattened. Fix the laser body temporarily with four
hexagonal bolts of step 1.
488-nm laser adapter
Ar laser side (near side)
Screw holes for 488-nm
single line Ar laser
Screw holes for 488-nm
multiple lines Ar laser
Attach while pressing against the
black ring just enough to compress it.
4 locations
Black ring

 Loading...