Chapter 5 Laser Unit
5.4 LU4A Four-laser Module A
1-189
5.4.5 Final Adjustment for the Ar Laser Light with the Optical Fiber
1
Centering the Ar laser
Figure 5.4-91
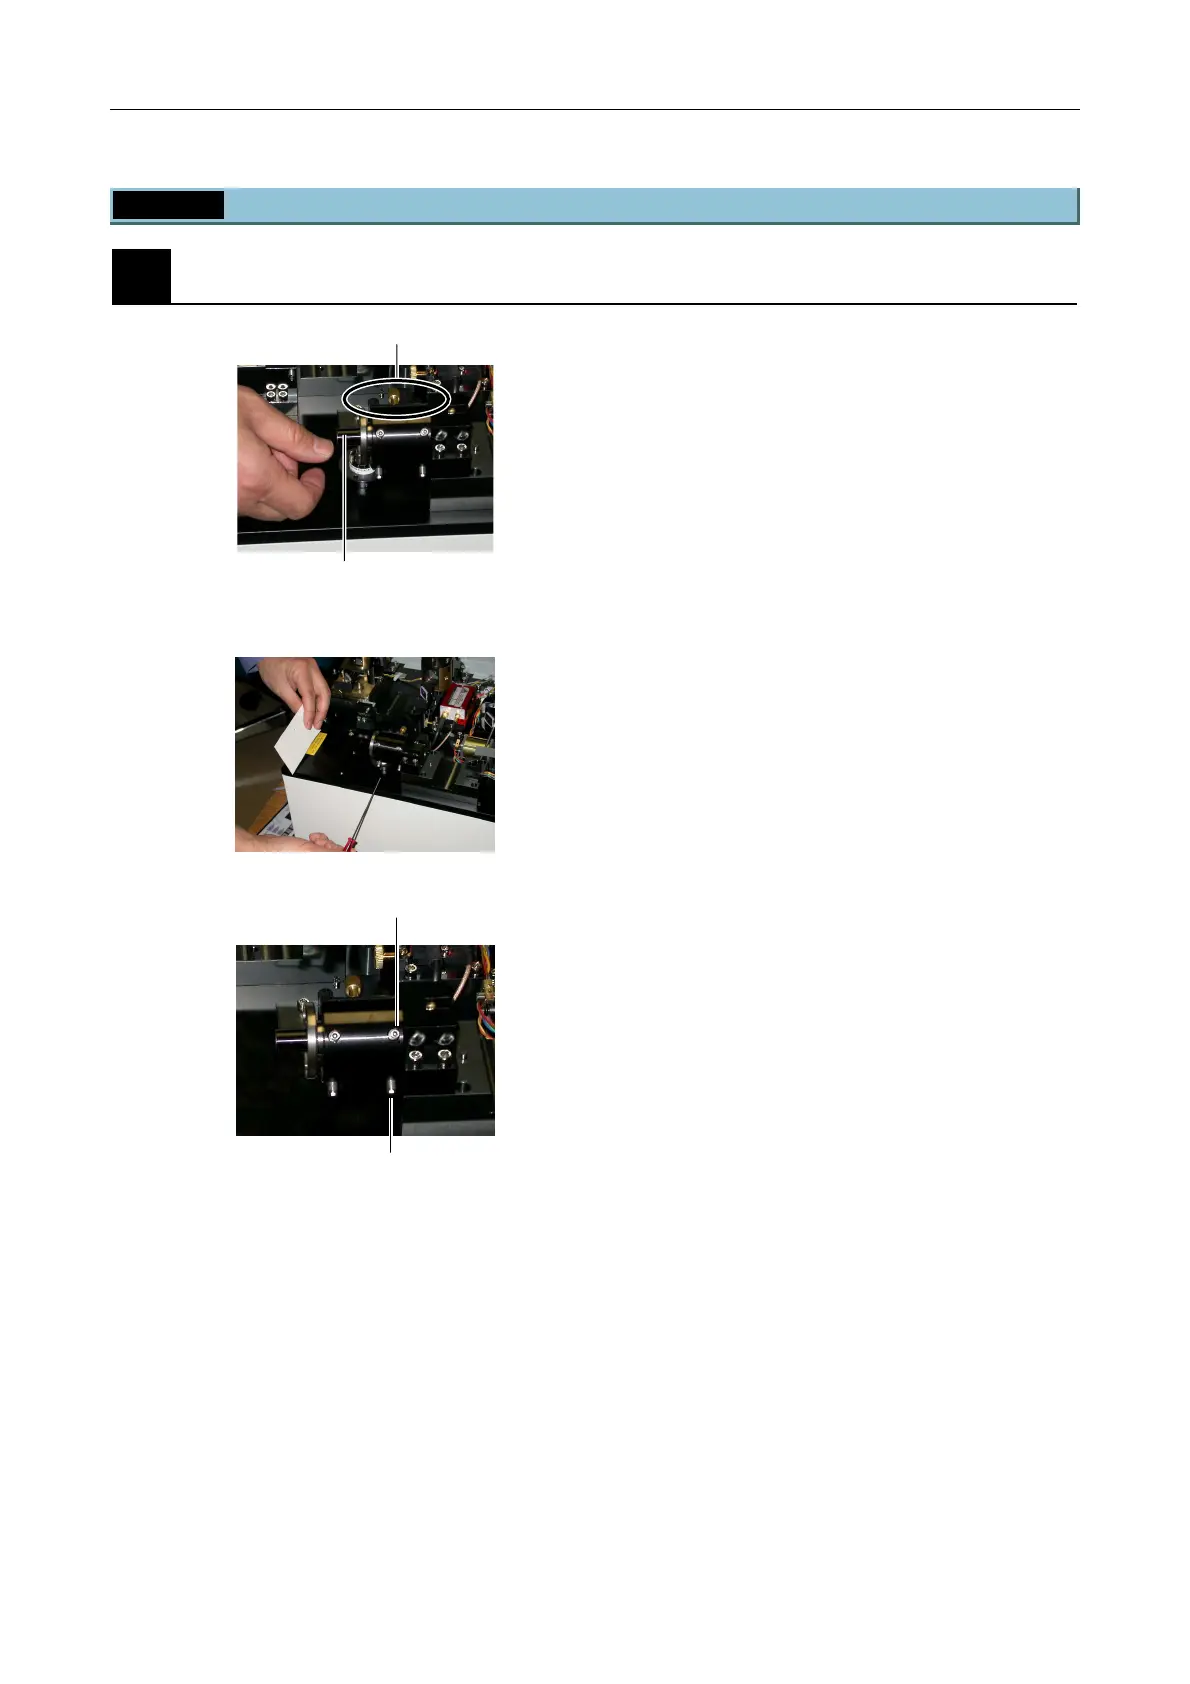
1. Loosen three knurled screws at the optical fiber
coupling device.
2. Insert the coupler centering tool into the optical fiber
coupling device so that its pinhole side faces the
laser incident side.
Figure 5.4-92
Figure 5.4-93
3. Put a target such as a piece of paper away from the
laser outlet. Manually open the L3 laser shutter and
the L4 laser shutter.
4. Rotate the adjustment screws "H" and "V" on the
laser incident side to maximize the laser intensity.
5. Pull out the coupler centering tool once. And then,
insert the coupler centering tool into the optical fiber
coupling device so that its pinhole side faces the
laser outlet side.
Knurled screws
Coupler centering tool
Adjustment screw on the H laser incidence side
Adjustment screw on the V laser incidence side

 Loading...