Chapter 6 Connection between the Laser Unit and the Microscope
6.2 Attaching the Optical Fiber to the Light Source
1-222
6.2 Attaching the Optical Fiber to the Light Source
Using straight fiber (part used in PAU illuminator unit)
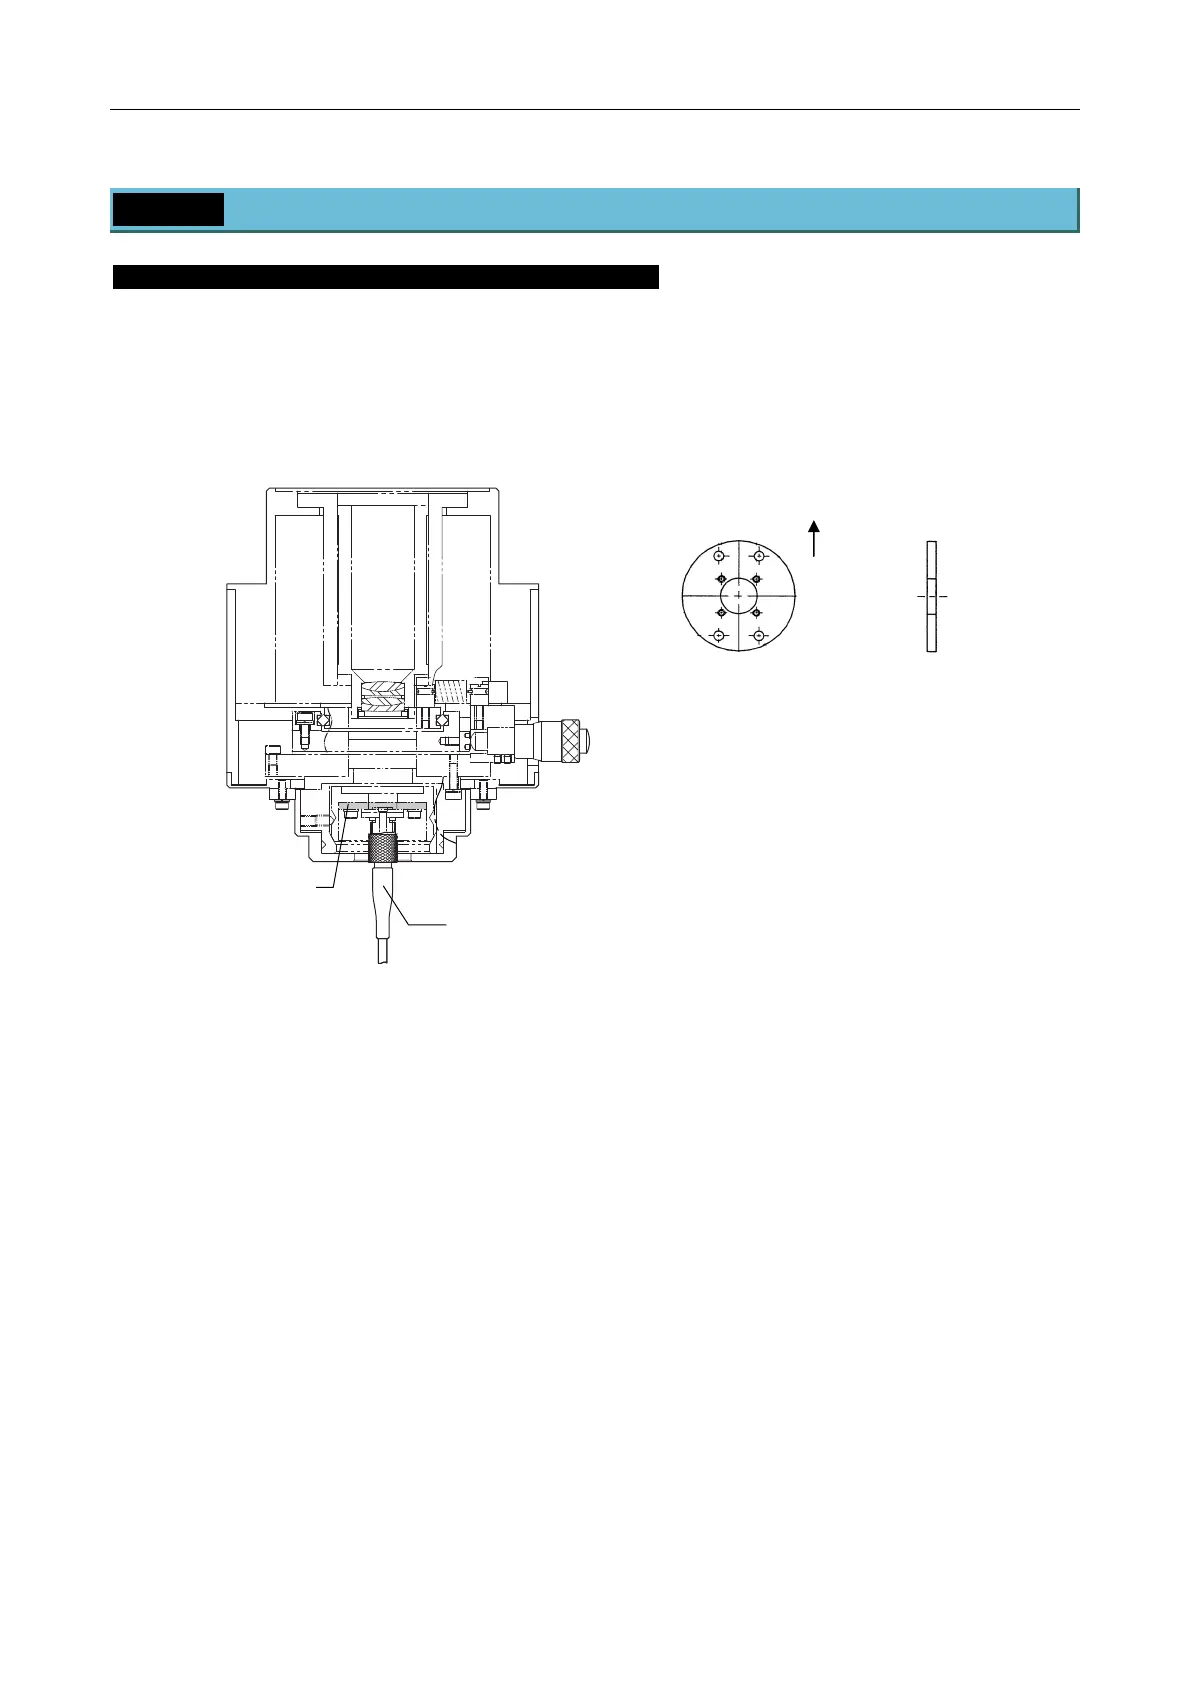
Attach the straight fiber adapter when using a straight fiber, which has a straight tip, rather than C1
single-mode fiber (note that you cannot connect using this method with the photo activation illuminator unit).
1. Remove the FC connector. Below that, remove all the screws for the round plate attached to the stage.
2. In place of the round plate, use the same screws to secure the straight fiber adapter into place. See
Figure 6.2-1 for the up-down positioning.
3. Re-attach the FC connector.
Figure 6.2-1
Straight fiber adapter
Up
Straight fiber
Straight fiber
adapter

 Loading...