Dust Control/DustGuard
™
Systems 91Service Manual – CS7000
To Clean the Dust Control Filter
Caution: • Wearsafetyglasseswhencleaningthelter.
• Cleanthelterinawell-ventilatedarea.
• Becarefulnottopuncturethelterelement.
1. Check the lter surfaces, and urethane gasket on the bottom of the lter for signs damage. If the lter
surfaces or gasket are damaged, replace the lter.
2. Clean the dust control lter using either of the two methods below:
Method 1:
a. Vacuum any loose dust from the lter.
b. Gently tap the lter against a at surface (with the dirty side down) to remove loose dust and dirt.
Method 2:
a. Vacuum any loose dust from the lter.
b. Blow compressed air (maximum pressure 100 psi) into the clean side of the lter (in the opposite
direction of the airow).
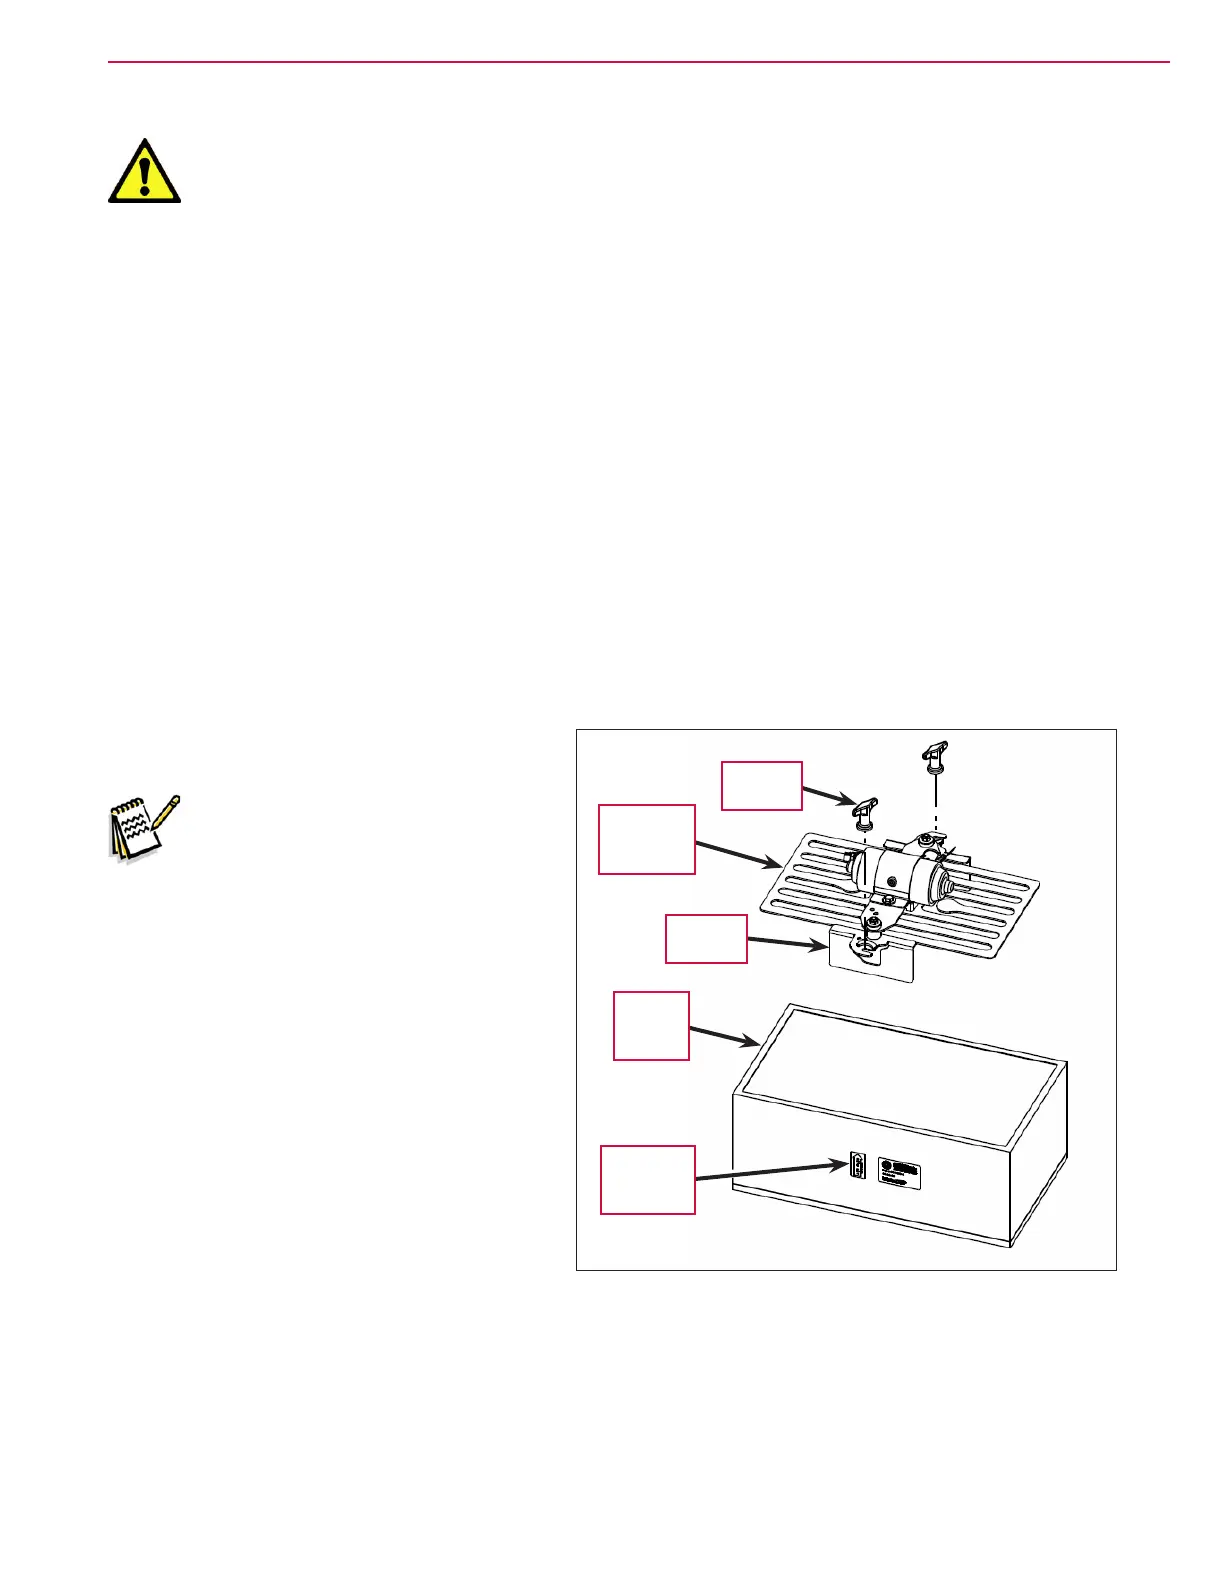
To Reinstall the Dust Control Filter
1. Install the Dust Control Filter into the
recess in the upper hopper.
Note: Make sure the arrow on the
“Air Flow” Indicator Decal
on the side of the lter is
pointing upward.
2. Install the Filter Shaker Assembly onto the
Dust Control Filter. Make sure the shaker
motor electrical connector is positioned
toward the rear of the machine.
3. Slide the Filter Shaker Assembly toward
the right so the Filter Clamps engage the
Thumb Nut studs on the upper hopper.
4. Tighten the two Thumb Nuts.
5. Reconnect the Shaker Motor Electrical
Connector
.
6. Close the hopper cover.
“Air Flow”
Indicator
Decal
Dust
Control
Filter
Filter
Shaker
Assembly
Filter
Clamp (2)
Thumb
Nut (2)
 Loading...