Purging
Cleaning cartridges that contain liquid cleaner will be provided as service parts. These cleaning
cartridges will be used in the field to purge ink paths, print head, sub tanks, and nozzles. Do this
procedure to clean the print heads before storing the repaired printer for one month or longer.
• This procedure should be done at the Repair Center before storing a repaired printer until it can be
reused. This procedure is not intended for use at the job site for the customer.
Preparation
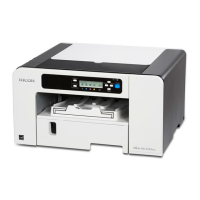
You will need an ink collection tank and four cleaning cartridges.
•
The ink collection tank must be replaced after cleaning. Before you start the cleaning procedure,
make sure that an ink collection tank is available.
• Four cleaning cartridges, one for each ink tank.
1. Turn the printer on.
2. When the printer enters standby mode, enter the Service Menu.
3. Select "2. ENGINE MAINTE".
4. Select "3009001" and push [#Enter].
5. When you see "WASHING" push [#Execute].
6. Open the ink cartridge cover, remove the ink cartridges, replace them with the cleaning cartridges,
and close the ink cartridge cover.
7. Confirm that "WASHING" and "EXEC" are still displayed, then push [#Enter].
8. When you see "OK?" push [#Enter].
• "RUNNING" displays while the cleaning sequence executes.
• When cleaning is finished, the display returns to "WASHING" and "EXEC"
• If the "Alert" lamp lights red, this indicates that an error has occurred. At this step you
cannot see the error displayed on the printer operation panel.
•
Complete the procedure to return to standby mode, read the number of the error
displayed to determine the cause of the error.
9. Press [Escape] to return to the "2. Engine Maint." display.
10. Select "3. END" and push [#Enter] to return to standby.
11. Switch the printer off.
12. Remove the cleaning cartridges and store the printer.
• The initial ink fill counter resets at the end of washing. The next time the ink cartridges are
installed and the printer is switched on, the initial filling sequence will begin.
Refurbishing
159
 Loading...