CONTROL UNIT
75
11
11-1 HOW TO REMOVE CONTROL UNIT
When changing the volume or microswitches in the Control Unit you must rst remove the Control Unit. Performing
these operations with the Control Unit still attached is difcult and may damage parts or wires.
The following tools are needed for the following procedure.
- Phillips head screwdriver (for M6)
- Wrench or screwdriver for tamperproof screws (for M4)
- A 7 millimeter spanner, hexagonal screwdriver, or socket wrench
1
Turn off the power.
2
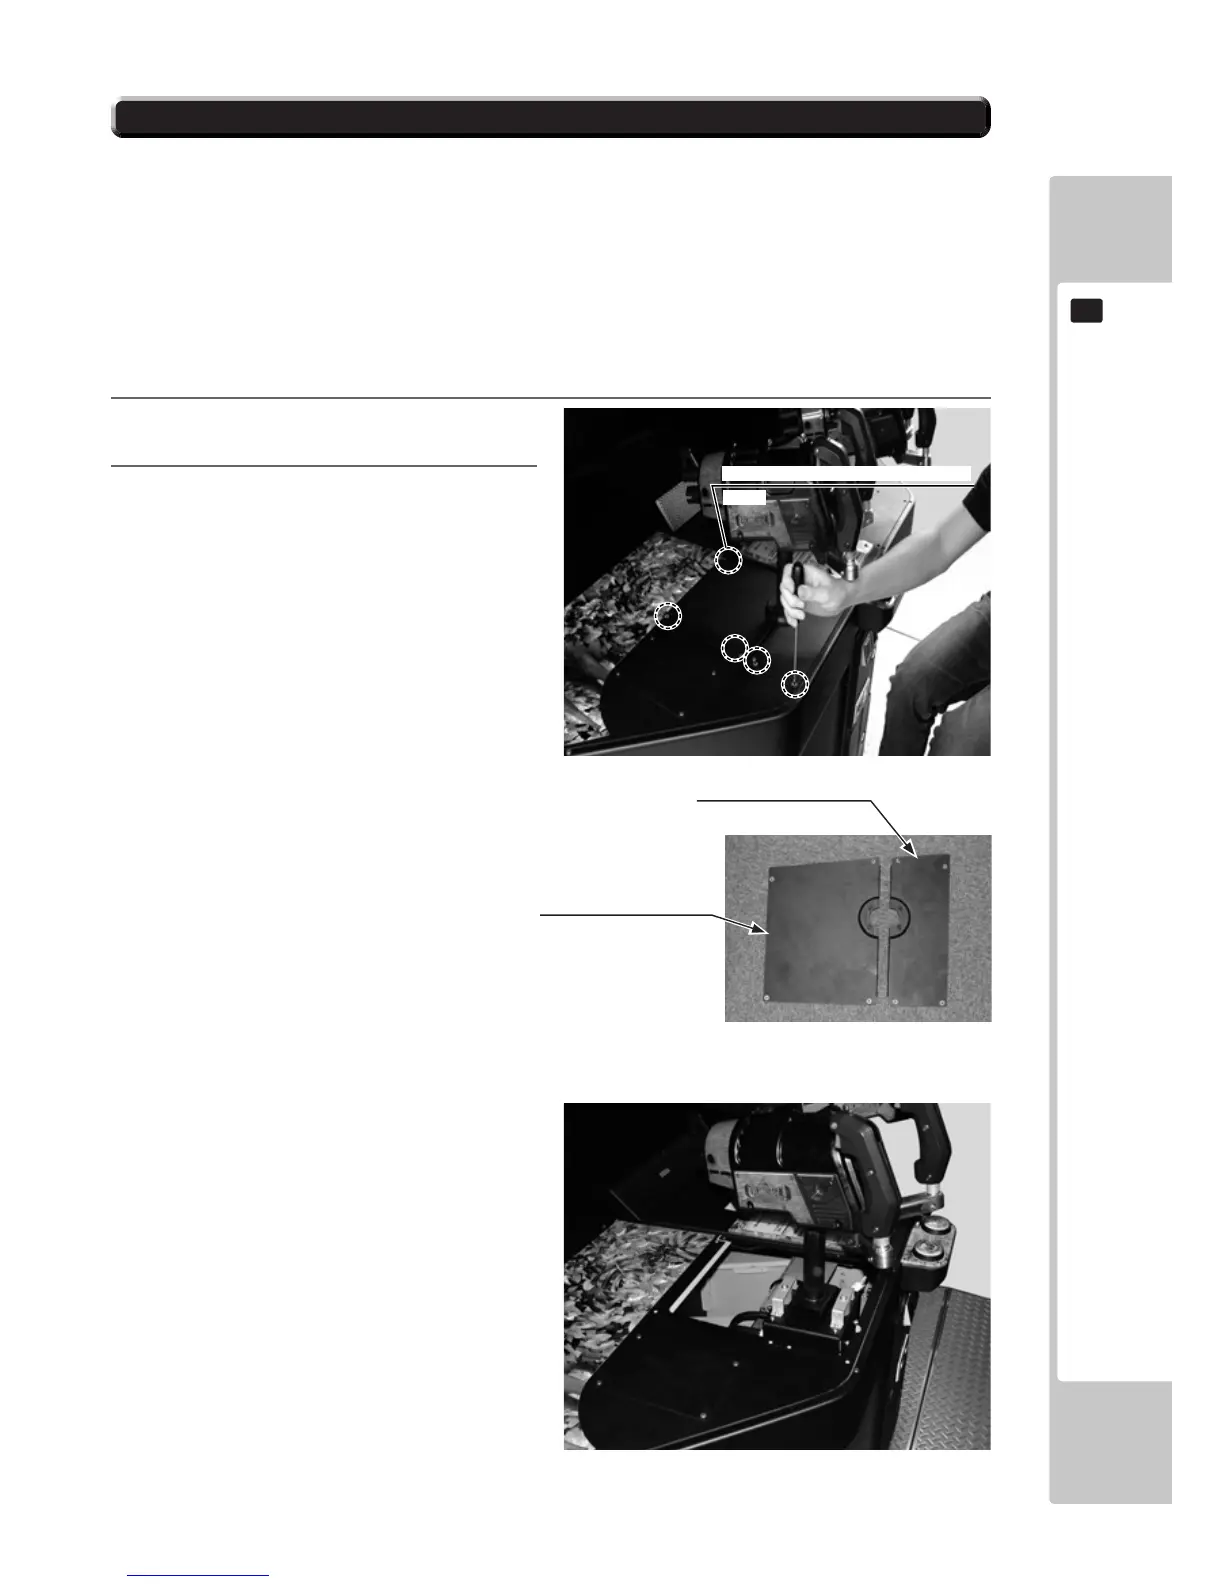
Remove the Gun Covers in front and behind
the Control Unit base. Remove the four tam-
perproof screws. The diagram is of the 1P side,
meaning the front Gun Cover is AL and the
back cover BL.
On the 2P side, the front Gun Cover is AR and
the back Gun Cover BR.
FIG. 11-1a
FIG. 11-1b
FIG. 11-1c
TAMPERPROOF SCREW (4 ea.), black
GUN COVER AL (1P SIDE)
GUN COVER AR (2P SIDE)
GUN COVER BL (1P SIDE)
GUN COVER BR (2P SIDE)
M4x16

 Loading...