13
FUNCTION menu
This menu is used to configure functions
a
ssigned to buttons using shortcuts.
For details, see “Setting Specific Functions
using Shortcuts (excluding ILME-FR7)”
(page 59).
For an ILME-FR7 target camera, see “Setting
Specific Functions using Shortcuts (ILME-
FR7)” (page 60).
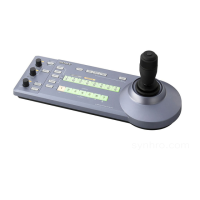
Basic menu operations
Buttons and knobs used for RM menu
operations
*1 A confirmation message appears for settings that
display an EXEC item.
*2 If the CANCEL button is pressed before attempting to
sa
ve, the menu display goes back one level and
restores the existing setting.
*3 For details about items saved with a preset number,
ref
er to the operating instructions for each camera.
Typical RM menu operation
1
Press the RM MENU button, turning it on
(button is lit yellow).
The RM menu top menu appears.
2
Turn the SELECT knob to move the cursor
to the desired item to set.
The cursor moves up/down as the SELECT
knob
is turned.
3
Press the SELECT button.
The menu for the selected item appears.
4
Turn the SELECT knob to move the cursor
to the desired setup menu item.
The cursor moves up/down as the SELECT
knob
is turned.
5
Press the SELECT button.
The selected menu item and its setup items
ap
pear.
Operation Buttons and knobs used
OPERATION
me
nu
CONFIG, AUTO IP
SETUP, or
MAINTENANCE
menu
Display the
to
p menu.
Press the RM MENU button.
Select a top
me
nu item.
Turn the SELECT knob.
Confirm the
me
nu item
selection.
Press the SELECT button.
Select a
set
up menu
item.
Turn the SELECT knob.
Confirm the
set
up menu
item
selection.
Press the SELECT button.
Select a
set
up menu
sub item.
Turn the SELECT knob.
Change the
se
tting of the
setup menu
sub item.
Turn the VALUE knob.
*1
Confirm the
changed
setting.
Confirmation not
required.
Press the VALUE
button.
*1
Save
settings.
Saved on the
camera using the
camera preset
memory
function.
*3
Save on the unit.
Go back one
level in the
menu.
Press the CANCEL
bu
tton.
Press the CANCEL
button.
*2

 Loading...