48
2
Press the preset button in which the
operations were recorded.
The camera orientation is set to the position
at the
start of the trace.
3
Press and hold the same preset button.
Playback of the recorded trace operations
starts.
Number recall
With the DIRECT RECALL button off (button is not
lit), you enter the preset number using the
PRESET 1 to PRESET 10/0 buttons and then press
the RECALL button to start playback of a trace.
1
Check that the preset mode is set to
TRACE.
2
Enter the preset button in which the
operations were recorded.
The entered preset number is displayed at
the
bottom right of the LCD panel of the
menu control block.
3
Press the RECALL button.
The camera orientation is set to the position
at the
start of the trace.
4
Enter the same preset number, and press
and hold the RECALL button.
Playback of the recorded trace operations
starts.
Note
When the target camera is switched by both the
GPI I/O connector and NORMAL TALLY mode
setting, the trace operation of the previous
camera stops at the same time. For details about
GPI I/O and TALLY MODE settings, see page 34
and page 75.
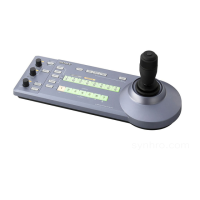
Operating the Camera
Setup Menu from the
Unit (Camera Menu
Operation Mode)
(excluding ILME-FR7)
You can operate the setup menu on the camera
using the knobs and buttons on the menu
control block and the joystick.
Notes
• In camera menu operation mode, the menu is
displayed on the monitor output of the camera.
Nothing is displayed on the LCD panel of the
unit.
• Operation according to the camera
sp
ecifications is required to save settings.
Buttons and knobs used for
camera menu operations
* For details about items saved with a preset number,
refer to the operating instructions for the camera.
Operation Buttons and knobs used
Activate
ca
mera menu
mode.
Press and hold the CAM MENU button.
Select a setup
me
nu item.
Turn the SELECT knob or tilt up/down
using the joystick.
Confirm the
set
up menu
item
selection.
Press the SELECT button or the joystick
but
ton.
Select a setup
menu sub
item.
Turn the SELECT knob or pan left/right
using the joystick.
Change the
se
tting of the
setup menu
sub item.
Turn the VALUE knob or press the
joy
stick button.
Confirm the
changed
setting.
Save settings. Saved on the camera using the camera
pr
eset memory function.
*
Go back one
level in the
menu.
Press and hold the CAM MENU button
or
press the CANCEL button.

 Loading...