Fuel System: 1G-23
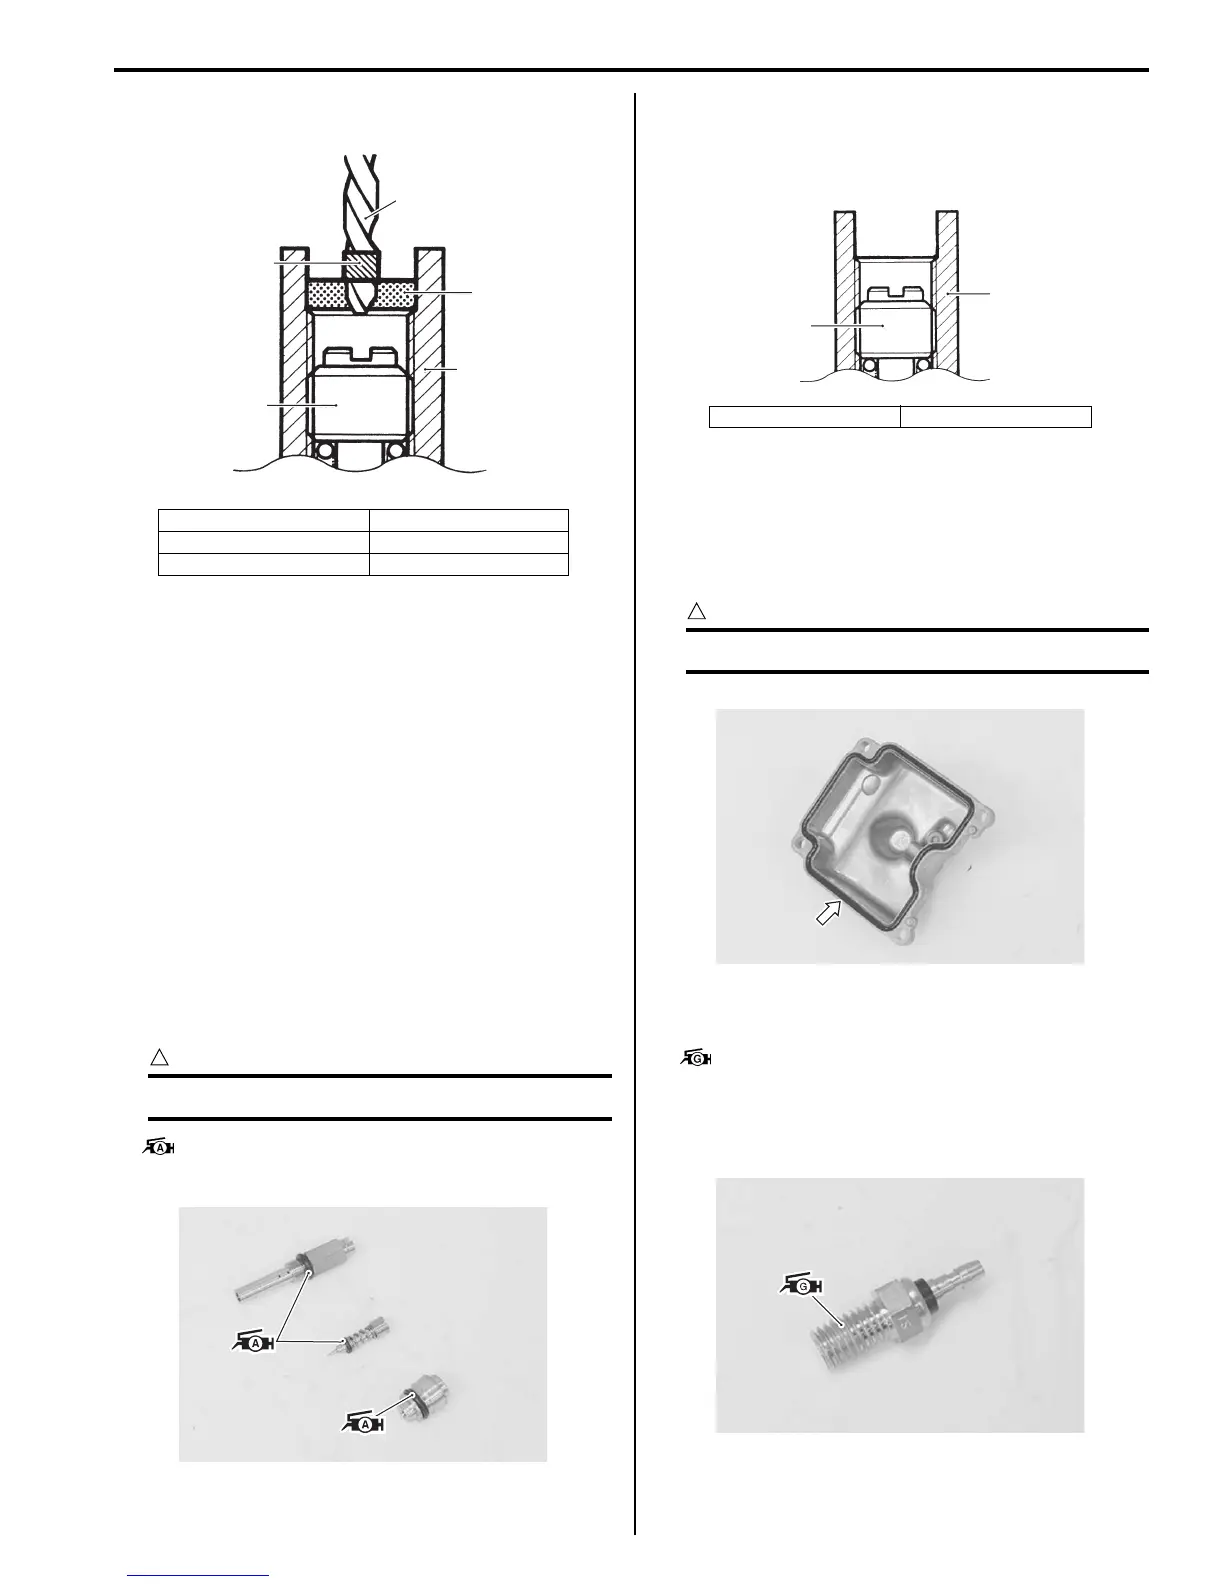
3) Carefully drill through the plug (2).
4) Thread a self-tapping sheet metal screw into the
plug (2).
5) Pull on the screw head with pliers to remove the
plug.
6) Carefully clean any metal shavings from the area.
7) Slowly turn the pilot screw clockwise and count the
number of turns until the screw is lightly seated.
Make a note of how many turns were made so the
screw can be reset correctly after cleaning.
8) Remove the pilot screw along with the spring,
washer, and O-ring.
Carburetor Assembly
B649G11706011
Reassemble the carburetors in the reverse order of
disassembly. Pay attention to the following points:
• Apply thin coat of the grease to each new O-ring.
CAUTION
!
Replace the O-rings with new ones.
: Grease 99000–25010 (SUZUKI SUPER
GREASE A or equivalent)
• After cleaning, reinstall the pilot screw to the original
setting by turning the screw (1) in until it lightly seats,
and then backing it out the same number of turns
counted during disassembly.
• Install a new plug by tapping it into place with a punch.
(For with tampering plug type)
• Check the float height. Refer to “Float Height
Inspection and Adjustment: ”.
• Install a new O-ring to its groove properly.
CAUTION
!
Replace the O-ring with a new one.
• Apply thermo-grease to the threads and tighten the
carburetor heater. (For E-02, 19)
: Grease 99000–59029 (THERMO-GREASE or
equivalent)
Tightening torque
Carburetor heater: 3.0 N·m (0.3 kgf-m, 2.0 lb-ft)
1. Drill bit 4. Carburetor body
2. Tampering plug “A”: Drill-stop
3. Pilot screw
2
3
4
“A”
1
I649G1170046-01
I649G1170049-01
1. Pilot screw 2. Carburetor body
1
2
I649G1170050-01
I649G1170051-01
I649G1170052-01

 Loading...