1D-49 Engine Mechanical:
Piston Ring Removal and Installation
BA02J21406030
Removal
1) Remove the piston. Refer to “Engine Top Side
Disassembly” (Page 1D-27).
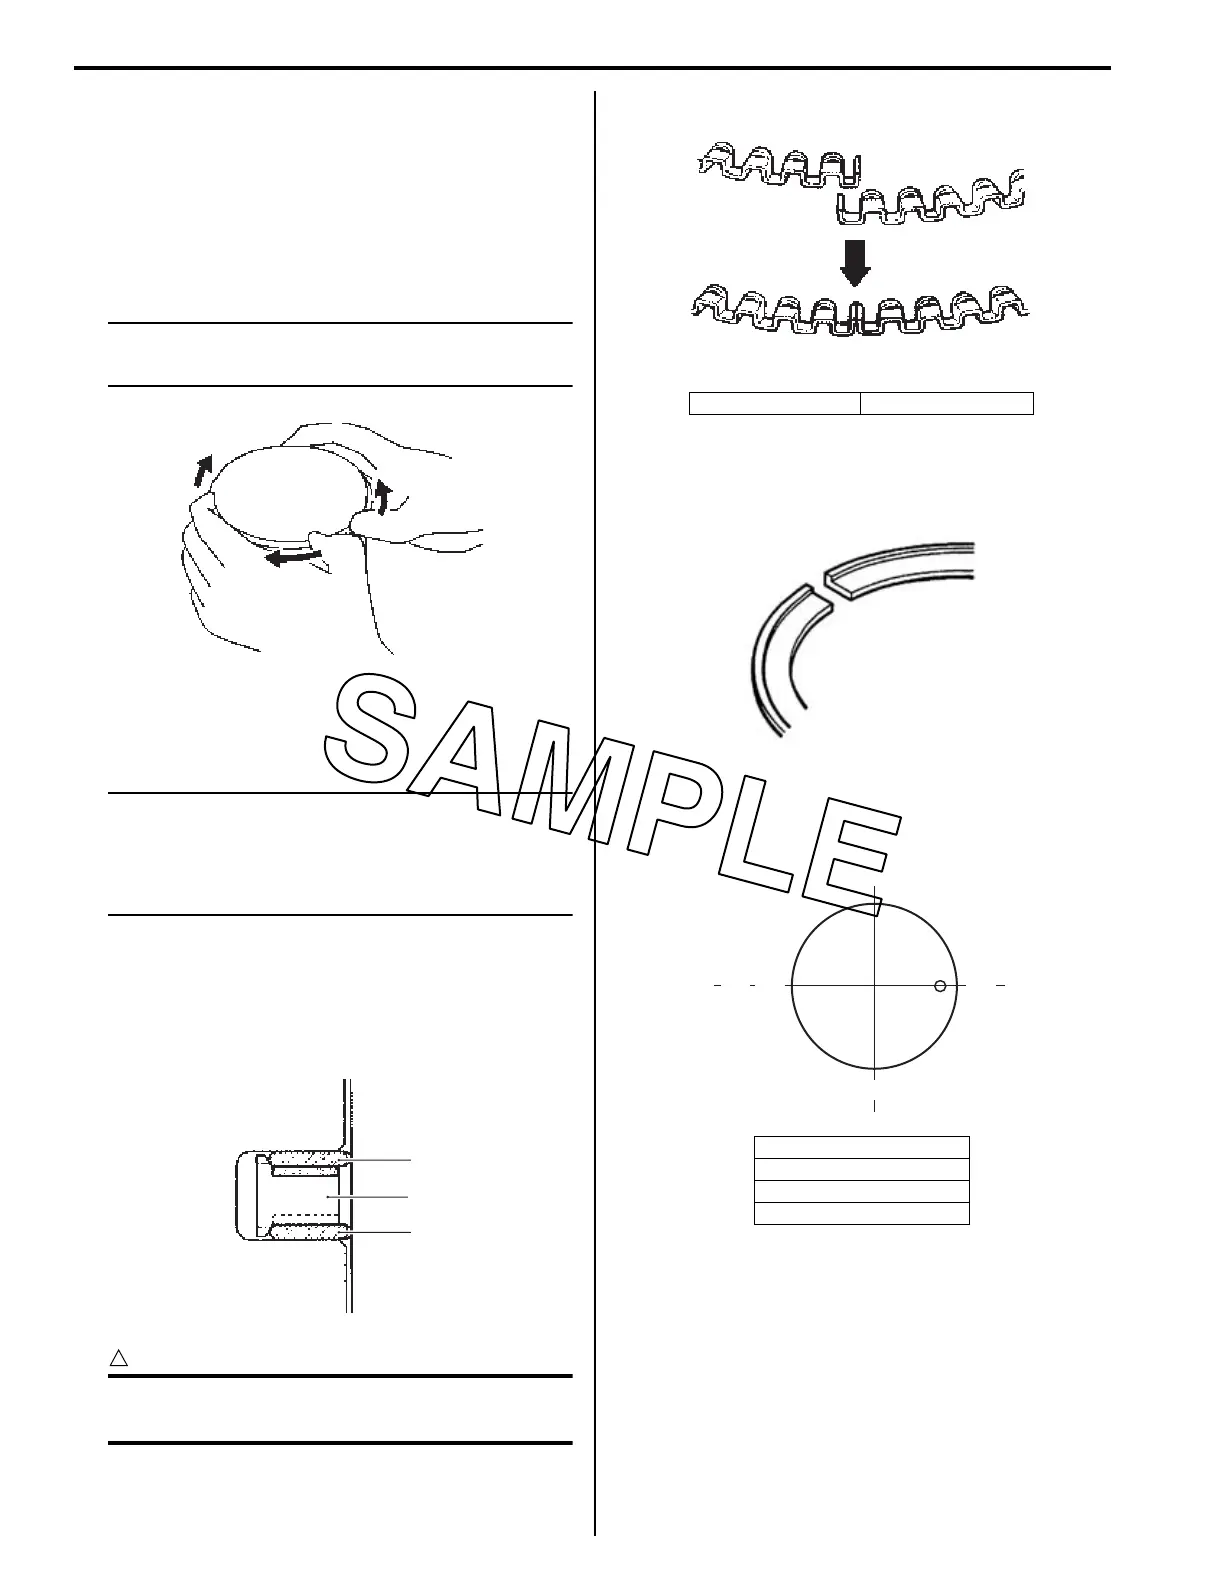
2) Carefully spread the ring opening with your thumbs
and then push up the opposite side of the 1st ring to
remove it.
NOTE
Do not expand the piston ring excessively
since it is apt to be broken down.
3) Remove the oil ring in the same manner.
Installation
NOTE
• When installing the piston ring, be careful
not to damage the piston.
• Do not expand the piston ring excessively
since it is apt to be broken down.
1) Install the piston rings in the order of the oil ring and
top ring.
a) The first member to go into the oil ring groove is
the spacer (1).
After placing the spacer, fit the two side rails (2).
CAUTION
!
When installing the spacer, be careful not to
allow its two ends to overlap in the groove.
b) Be sure to bring the concave side of 1st ring to
the top when fitting it to the piston.
2) Position the gaps of the two rings and side rails as
shown. Before inserting piston into the cylinder,
check that the gaps are located so.
3) Install the piston and piston pin. Refer to “Engine Top
Side Assembly” (Page 1D-30).
I831G1140178-01
1
2
2
I718H1140143-02
“A”: INCORRECT “B”: CORRECT
“C”: 1st ring
“D”: Upper side rail
“E”: Spacer
“F”: Lower side rail
A
B
“A”
“B”
I705H1140170-02
IA02J1140040-01
IN
EX
“C”
“E”
“F”
“D”
IA02J1140041-01