Starting System: 1I-4
Starter Motor Removal and Installation
BA02J21906002
Removal
1) Turn off the ignition switch.
2) Disconnect the battery (–) lead wire. Refer to
“Battery / Battery Protector Removal and Installation”
in Section 1J (Page 1J-9).
3) Remove the exhaust pipe. Refer to “Muffler /
Exhaust Pipe Removal and Installation” in Section
1K (Page 1K-2).
4) Remove the ECT sensor (1). Refer to “ECT Sensor
Removal and Installation” in Section 1C (Page 1C-
5).
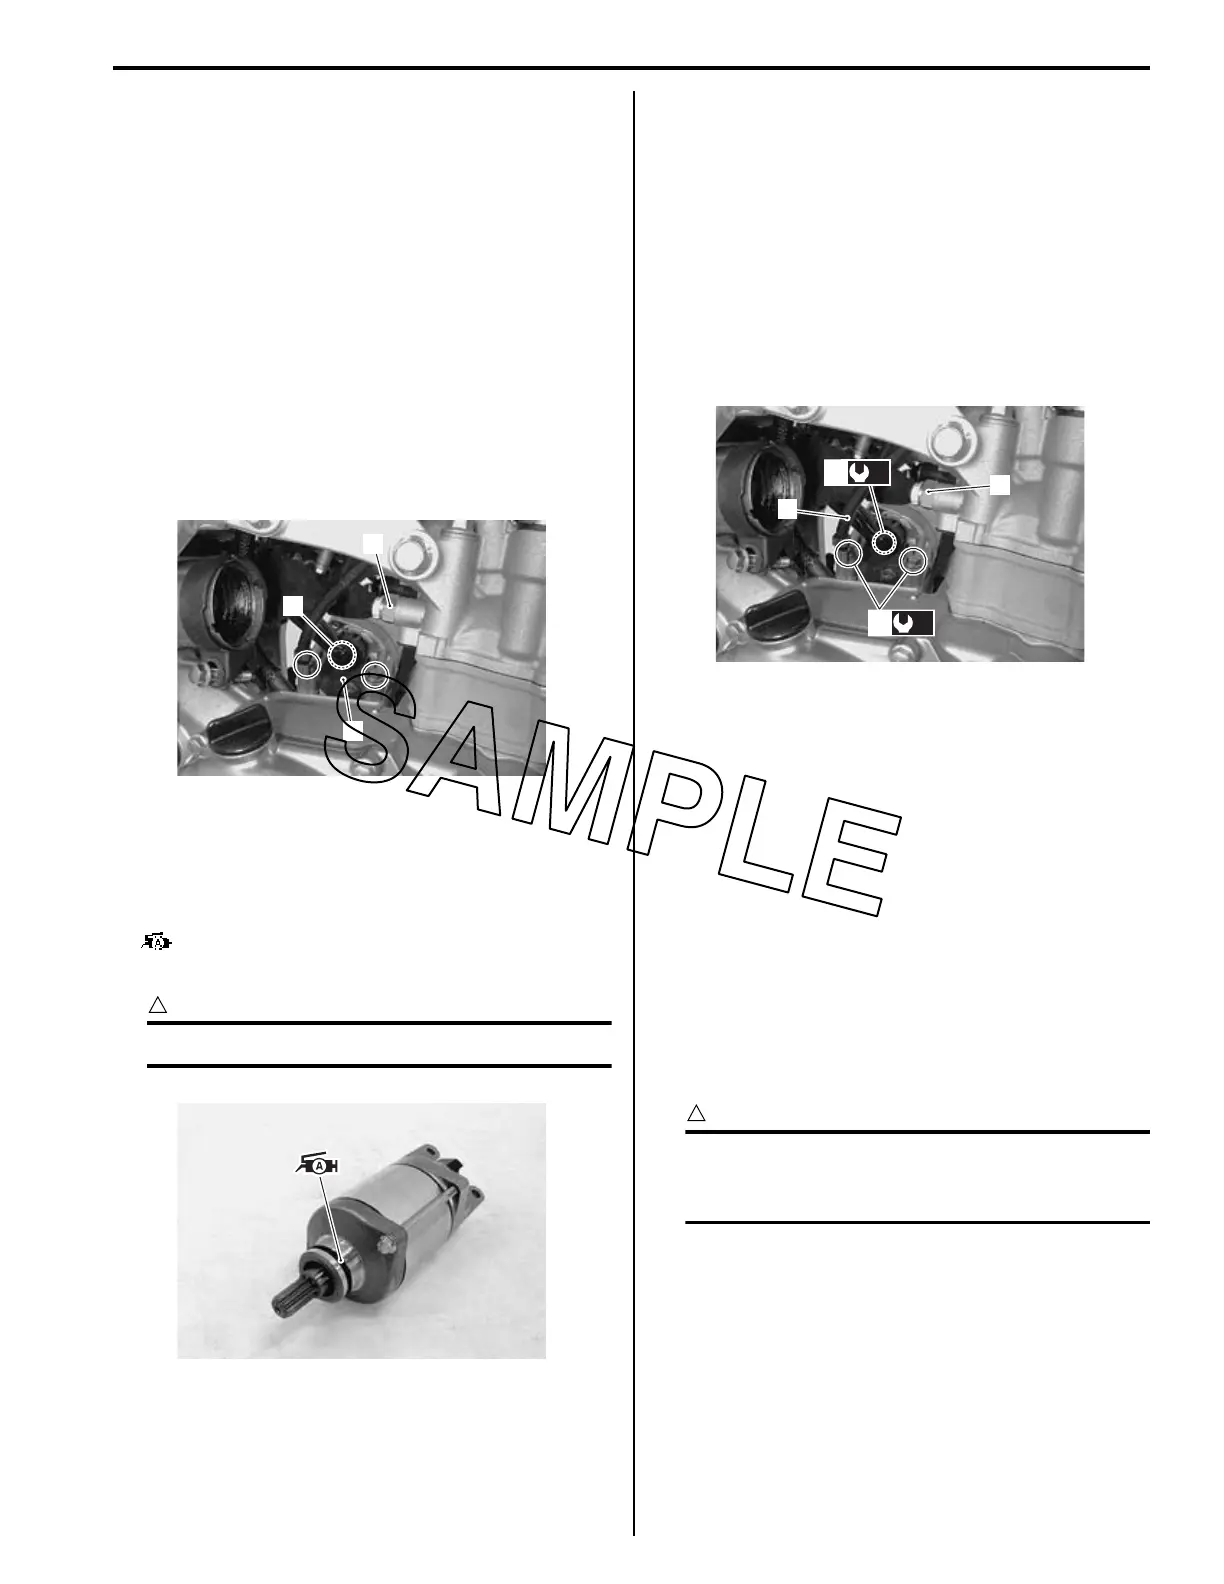
5) Remove the starter motor lead wire (2).
6) Remove the starter motor (3).
Installation
Install the starter motor in the reverse order of removal.
Pay attention to the following points:
• Apply grease to the O-ring.
: Grease 99000–25010 (SUZUKI SUPER
GREASE “A” or equivalent)
CAUTION
!
Replace the O-ring with a new one.
• Tighten the starter motor lead wire nut (1) and starter
motor mounting bolts (2) with the battery (–) lead wire
(3) to the specified torque. Refer to “Wiring Harness
Routing Diagram” in Section 9A (Page 9A-2).
Tightening torque
Starter motor mounting bolt (a): 11 N·m (1.1 kgf-
m, 8.0 lbf-ft)
Starter motor lead wire nut (b): 6 N·m (0.6 kgf-m,
4.5 lbf-ft)
• Install the ECT sensor (4). Refer to “ECT Sensor
Removal and Installation” in Section 1C (Page 1C-5).
• Install the exhaust pipe. Refer to “Muffler / Exhaust
Pipe Removal and Installation” in Section 1K
(Page 1K-2).
Starter Motor Disassembly and Assembly
BA02J21906003
Refer to “Starter Motor Removal and Installation”
(Page 1I-4).
Disassembly
Disassemble the starter motor as shown in the starter
motor components diagram. Refer to “Starter Motor
Components” (Page 1I-3).
Assembly
Reassemble the starter motor in the reverse order of
removal. Pay attention to the following points:
CAUTION
!
Replace the O-ring and square-rings with
new ones to prevent oil leakage and
moisture.
1
3
2
IA02J1190066-03
IA02J1190002-02
4
3
(a)
1
(b)
2
IA02J1190067-02

 Loading...