Chapter 4 Operating ISPSoft
4-21
4.5.2
Basic Editing─Creating a Contact and a Coil
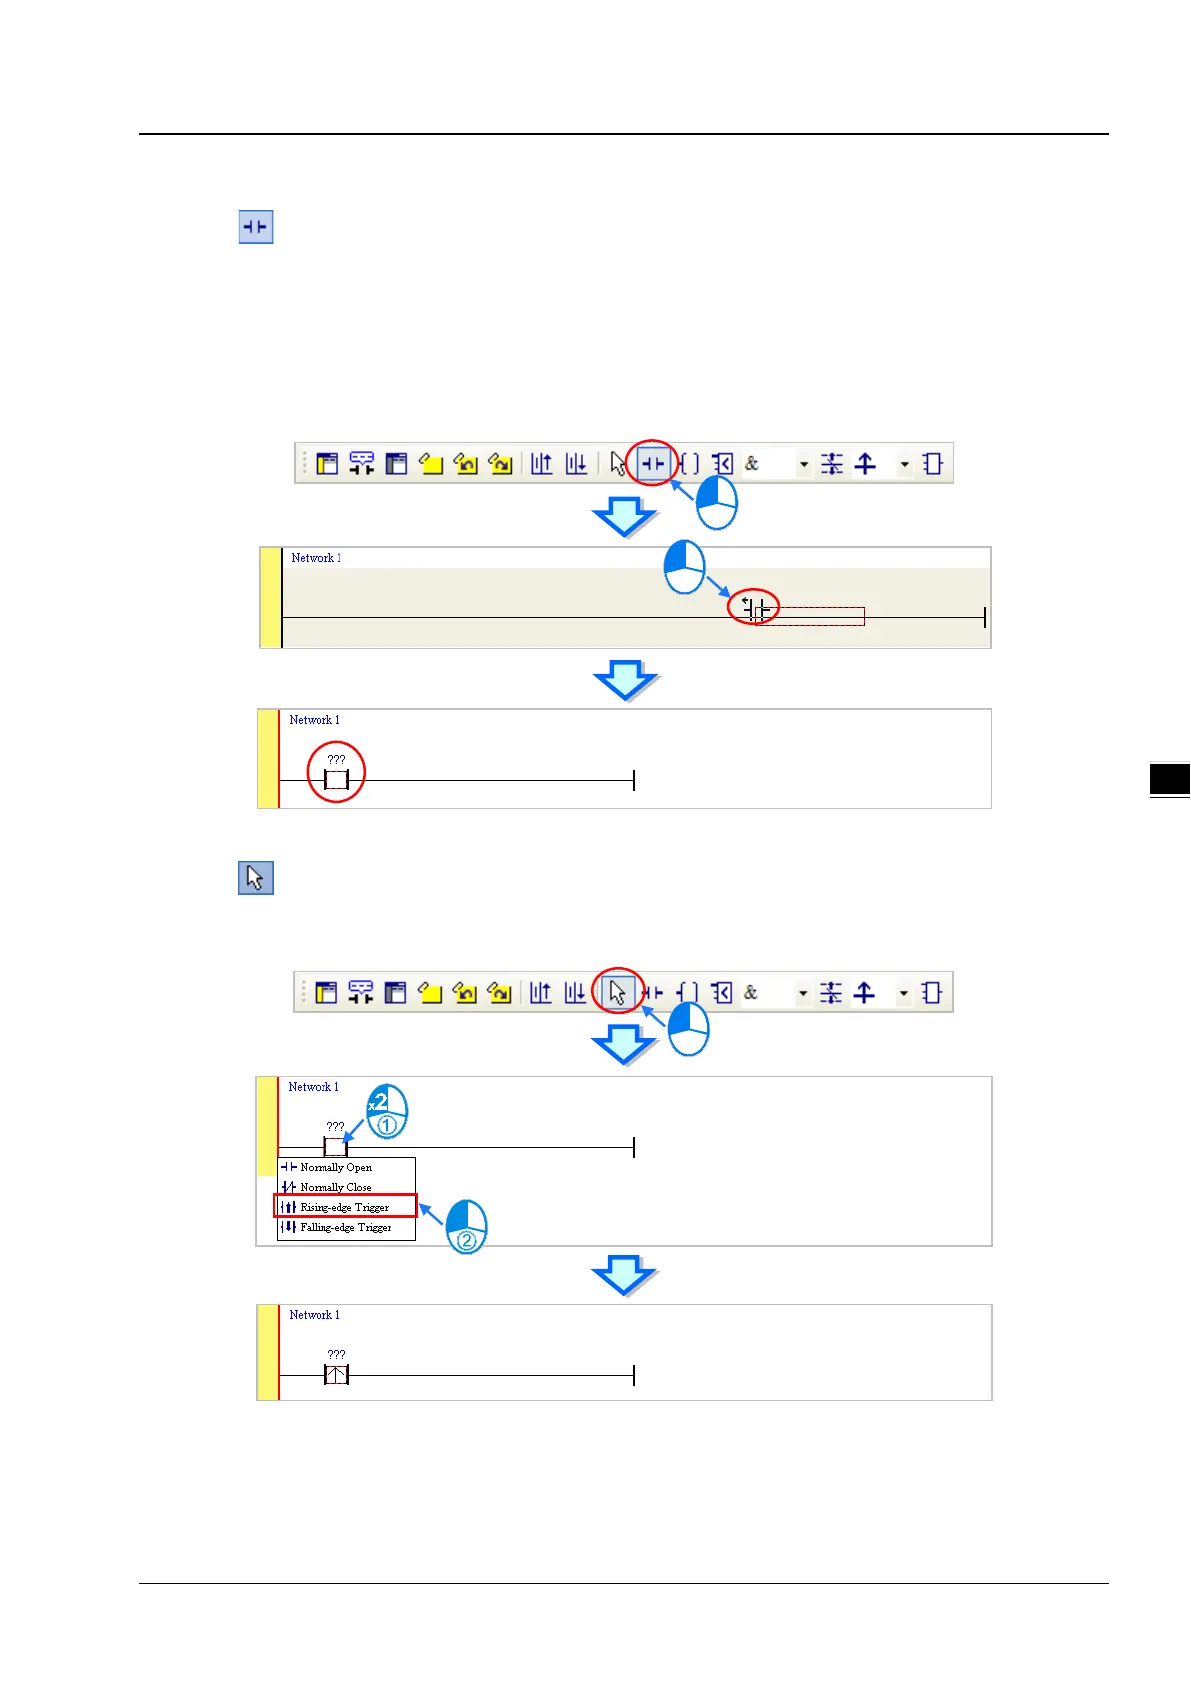
(1) Click on the toolbar, and then move the mouse cursor to the red frame in network 1. The mouse cursor
appears as a contact when the mouse cursor is moved to the left side of the red frame, the right side of the red
frame, or the bottom of the red frame. Users can decide where to insert a contact. If a ladder diagram is edited, the
mouse cursor must be near a position which is edited. Besides, an object inserted is arranged by the system
automatically. Users can not move the object at will.
In this example, users do not need to decide where to insert the contact. Therefore, the mouse cursor can be near
the red frame, and you can click the left mouse button.
(2) Click
on the toolbar, or press Esc on the keyboard. After the contact is double-clicked, a drop-down list will
appear. The items on the drop-down list are Normally Open, Normally Close, Rising-edge Trigger, and
Falling-edge Trigger. In this example, Rising-edge Trigger is selected.
 Loading...