125
Removing indicator lights:
1. The indicator light snaps around the lens and is
held against the control panel by spring loaded
prongs.
2. Disconnect power and remove the backguard back
panel. Disconnect the wires from the light and push
in and slide the light off the lens.
Light and lens
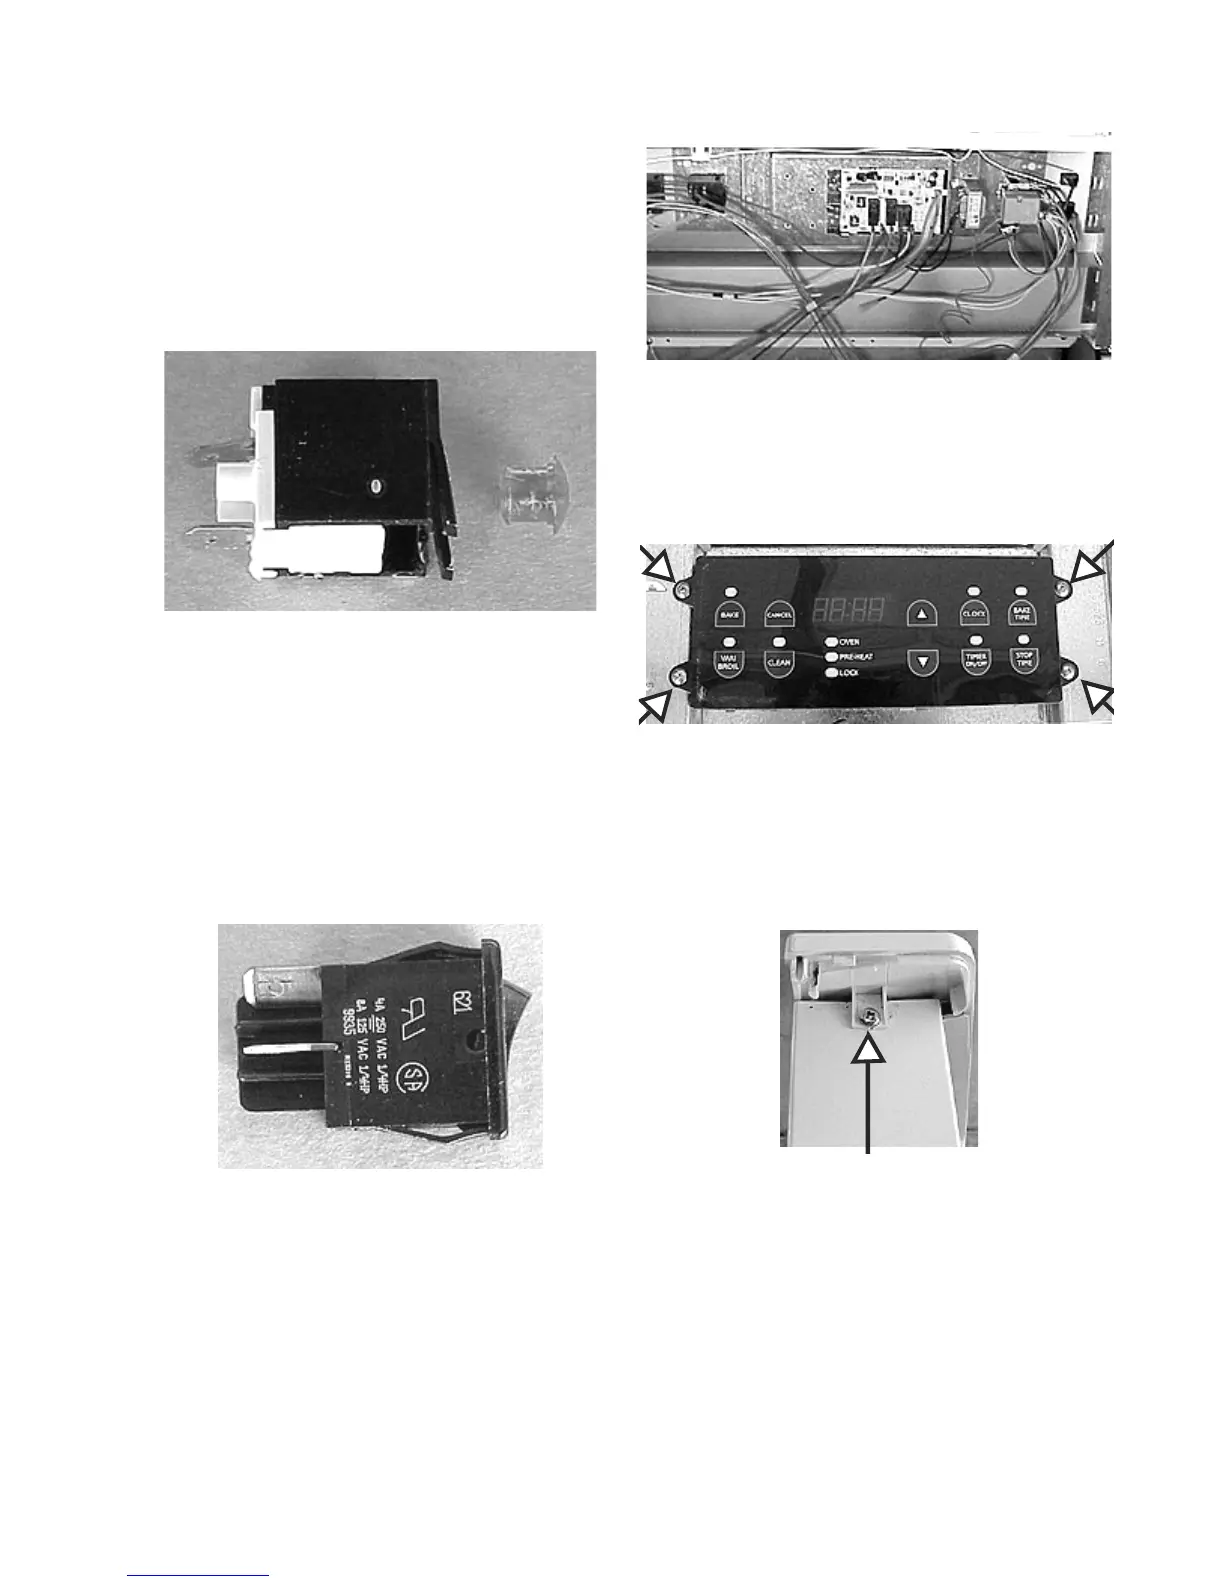
Removing the light switches:
1. The switches snap into the control panel from the
front.
2. Disconnect the power and remove the back panel of
the backguard. Disconnect the wires, squeeze the
tabs on the side of the switch and push the switch
out the front.
Light switch
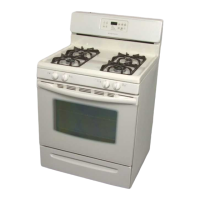
Removing the electronic oven control:
1. Disconnect power and remove the back panel of the
backguard.
2. Remove the screws holding the left front top element
switch and the small oven thermostat. Disconnect
the small oven indicator light from its lens. This will
release the electronic oven mounting plate from the
control panel.
Left front switch, thermostat and indicator light
3. Mark and disconnect the wires from the electronic
oven control. Remove the four screws holding the
electronic oven control to the control mounting plate.
Four screws
Removing the end cap:
1. Remove the top trim and the one screw holding the
end cap to the control panel. Push forward on the
top of the end cap to release the tabs.
One screws
Removing the control panel end bracket:
1. Disconnect power and remove the back panel of the
backguard and the end cap.
2. Remove the two screws holding the end bracket to
the side panel corner bracket and pull the bracket
out the rear.