Installation Guidelines
191
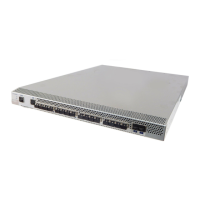
Port Side Exhaust Kit Installation Procedure
Installation Guidelines
To ensure adequate cooling, install the chassis with the air intake
(nonport side) facing the cool-air aisle.
Follow these general installation guidelines:
◆ The shelf in the kit is 1 U high, so you need a total of 9 U of
cabinet space to install the shelf and the ED-DCX-4S-B. 1U is
equal to 4.45 cm (1.75 in.).
◆ To allow the quick removal of all power from the chassis, use AC
power sources that are easily accessible and located near the
chassis.
◆ Verify that the additional weight of the chassis does not exceed
the weight limits of the cabinet.
◆ Plan for cable management before installing the chassis. Refer to
“Managing cables” on page 41 for more information.
◆ Ensure that one or two dedicated electrical branch circuits with
the following characteristics are available:
• 200-240 VAC, 50-60 Hz
• Protected by a circuit breaker in accordance with local
electrical codes
• Supply circuit, line fusing, and wire size are adequate,
according to the electrical rating on the chassis nameplate
• Grounded outlets are installed by a licensed electrician and
compatible with the power cords
• Located close to the enterprise-class platform chassis and
easily accessible
◆ To maximize fault tolerance, connect each power cord to a
separate power source.
◆ Ensure that all equipment installed in the cabinet is grounded
through a reliable branch circuit connection. Do not rely on a
secondary connection to a branch circuit, such as a power strip.
 Loading...