10 System Settings
334
System Settings
10
Note • Some operations may be restricted according to types of job flow owners, authentication
settings, and user types. For details, refer to Authentication for Job Flow Sheets and
Mailboxes (P.394).
Delete
Deletes the selected job flow sheet.
Copy
Makes a copy of the selected job flow sheet. From the copy of the job flow sheet, you can
create a new job flow sheet.
The method of creation is the same as when creating a new job flow sheet. For more information, refer
to Create Job Flow Sheet (P.332).
Edit
Edit the selected job flow sheet.
The changing method is the same as when creating a new job flow sheet. For more information, refer to
Create Job Flow Sheet (P.332).
Job Flow Sheet Keywords
Registering a keyword for Job Flow Search allows you to search for the job flow by
keyword. Up to 12 characters are allowed for a job flow search keyword.
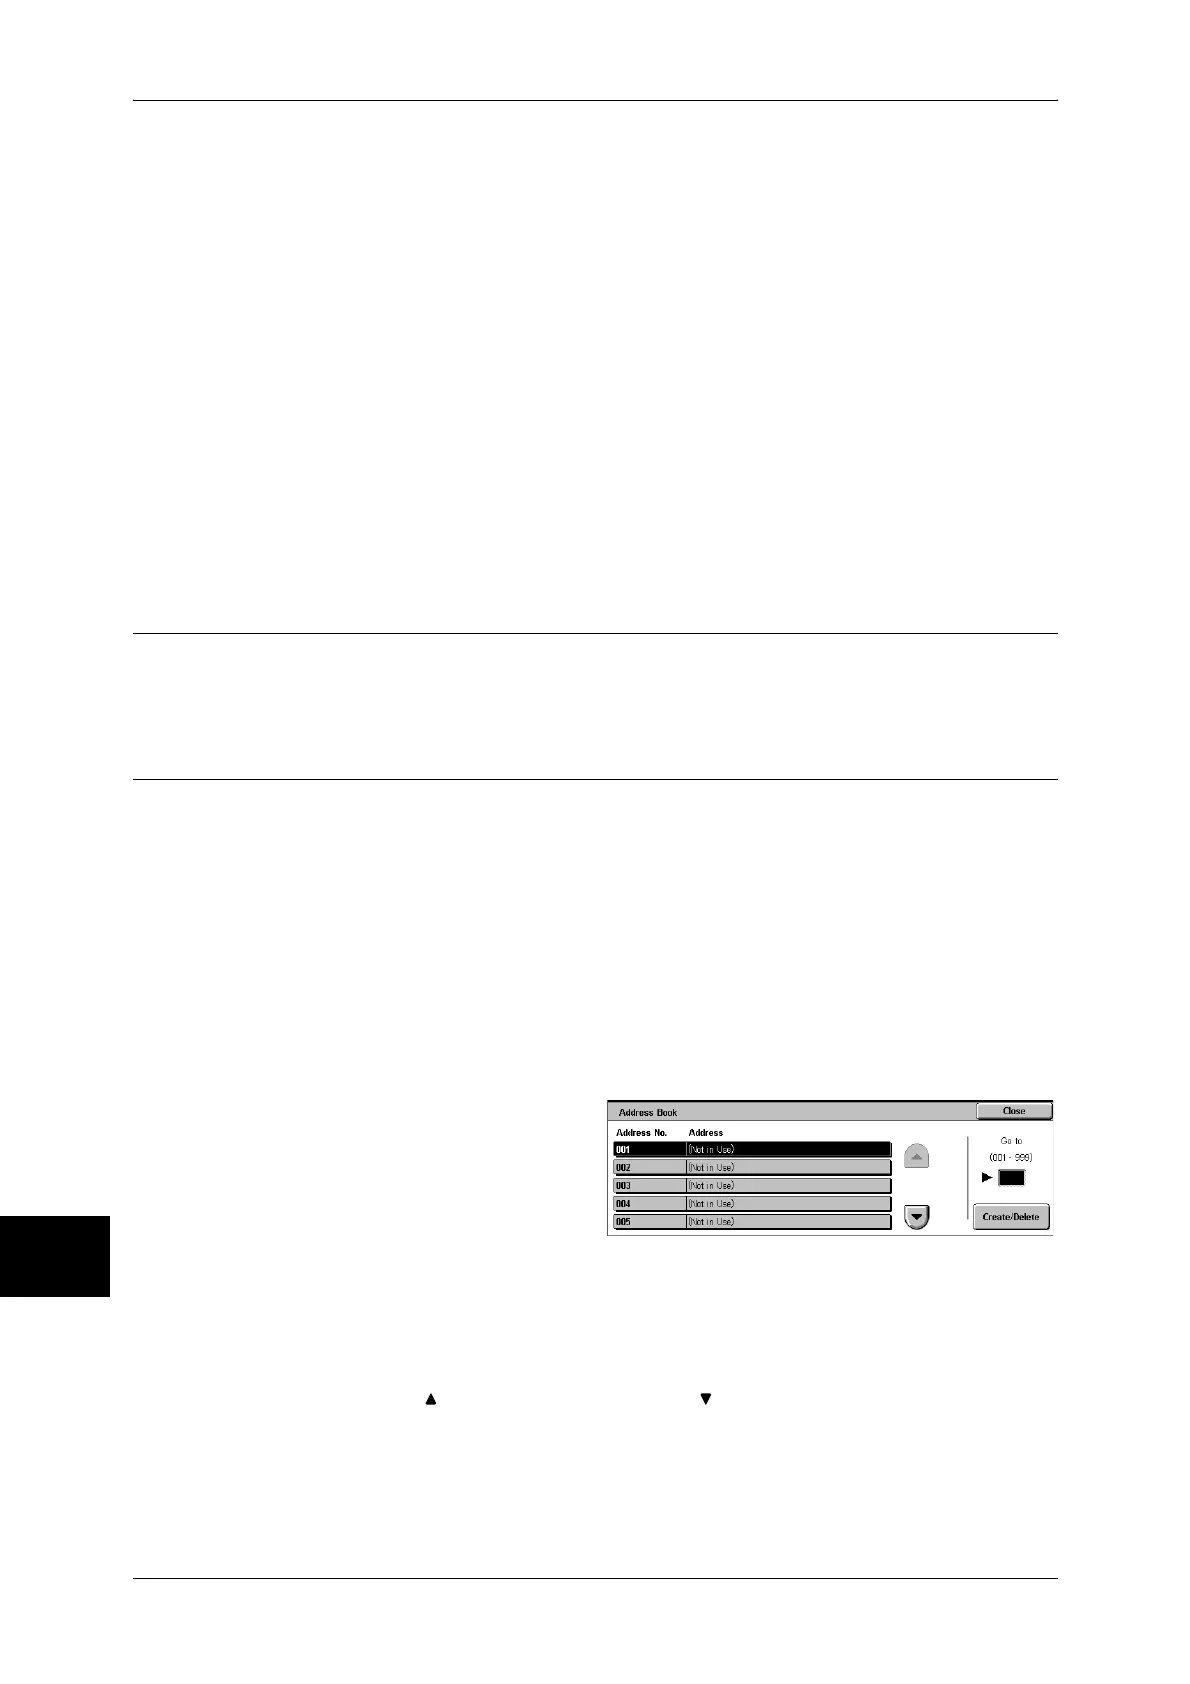
Address Book (Address Number)
You can store frequently used addresses in an address book. Select an address type
from fax, iFax, e-mail, and server (FTP/SMB).
When an address is registered, you can search for it with [Address Book] on the [Fax],
[iFax], and [E-mail] screens.
You can store a total of 500 addresses for fax, iFax, e-mail, and server (FTP/SMB).
Note • If the Speed Dial Extension Kit (optional) is installed, you can register up to 999 locations.
• Abbreviated address numbers (001 to 070) are supported by the one touch buttons. The one
touch buttons are available for fax and iFax.
• To specify an e-mail or server (FTP/SMB) address (for insertion in the address book), it is
not possible to use an address number specified with the numeric keypad, one-touch
dialing, or a group dial number.
1 Select [Address Book].
Note • To display the [Address Book]
screen, press the <Log In/
Out> button and enter the
user ID, and then select
[System Settings] > [Setup
Menu] > [Address Book]. If
[Setup Menu] is displayed on
the [Setup Menu] screen,
select [Setup Menu] >
[Address Book].
2 Press the abbreviated number you want to register, and select [Create/Delete].
Note • Select [ ] to return the previous screen or [ ] to move the next screen.
• By entering a three-digit number with the numeric keypad, you can specify the abbreviated
number directly.
 Loading...