4-11
4.6 Solenoid Valves Replacement Procedure
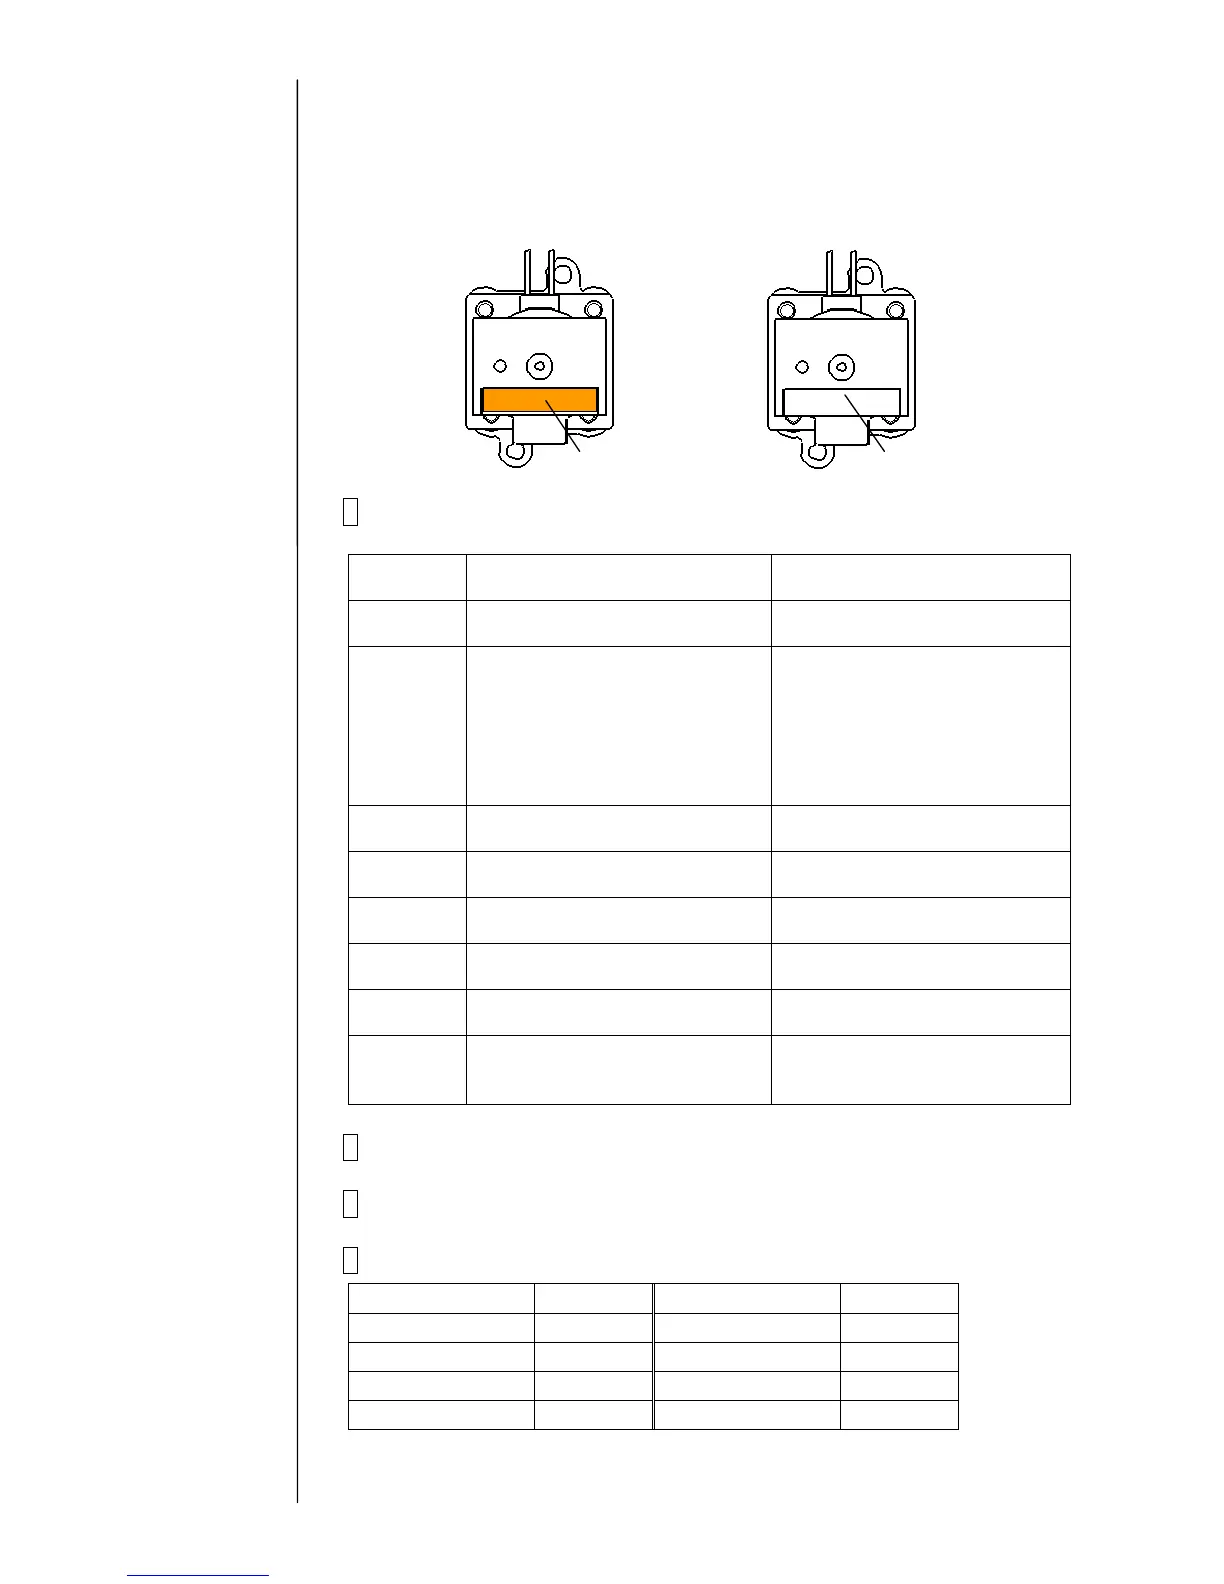
"Caution " : MV8 (Cleaning valve) is deferent from other valves.
Check the color of seal below.
1 Perform the following pre-replacement operation for each solenoid valve
that you are to replace.
Solenoid
valve No.
When the solenoid valve is
operated
When the solenoid valve is not
operated
MV1 Execute “Ink drainage”. Drain the ink in the main ink
tank from the drain tube.
MV2 (1) Remove the tube connection
block of the ink reservoir.
(2)Turn on the pump, MV2, and
MV6 in this order for about
one minute, and then turn
them off.
(Solenoid/Pump Test screen)
No operation is required.
(Take care about an ink drip.)
MV3 Execute “Gutter Cleaning”. No operation is required.
(Take care about an ink drip.)
MV4 Execute “Ink drainage”. No operation is required.
(Take care about an ink drip.)
MV5 Execute “Nozzle backwash”. No operation is required.
(Take care about an ink drip.)
MV6 Execute “Ink drainage”. No operation is required.
(Take care about an ink drip.)
MV7 Execute “Ink drainage”. Drain the ink in the main ink
tank from the drain tube.
MV8 Execute “Pressure relief”. No operation is required.
(Take care about an makeup
ink drip.)
2 Turn off the power supply.
3 Perform “4.1.3 Approach to the parts on the rear side of the equipment”.
4 Remove the connector of the solenoid valve to be replaced.
Solenoid valve No.. Wire color Solenoid valve No. Wire color
MV1 Brown MV5 Green
MV2 Red MV6 Blue
MV3 Orange MV7 Purple
MV4 Yellow MV8 Gray
MV8 (Cleaning valve) Other valves
White (Serial No.)
Orange (Serial No.)
 Loading...