6-12
6.6 Heating unit Replacement Procedure
When “Ink Heating Too High”, “Heating Unit Sensor Fault” and “Ink Heating Current Fault”
occur, the heating unit must be replaced.
(1)
Perform depressure.
(2)
Remove all of the covers.
(3)
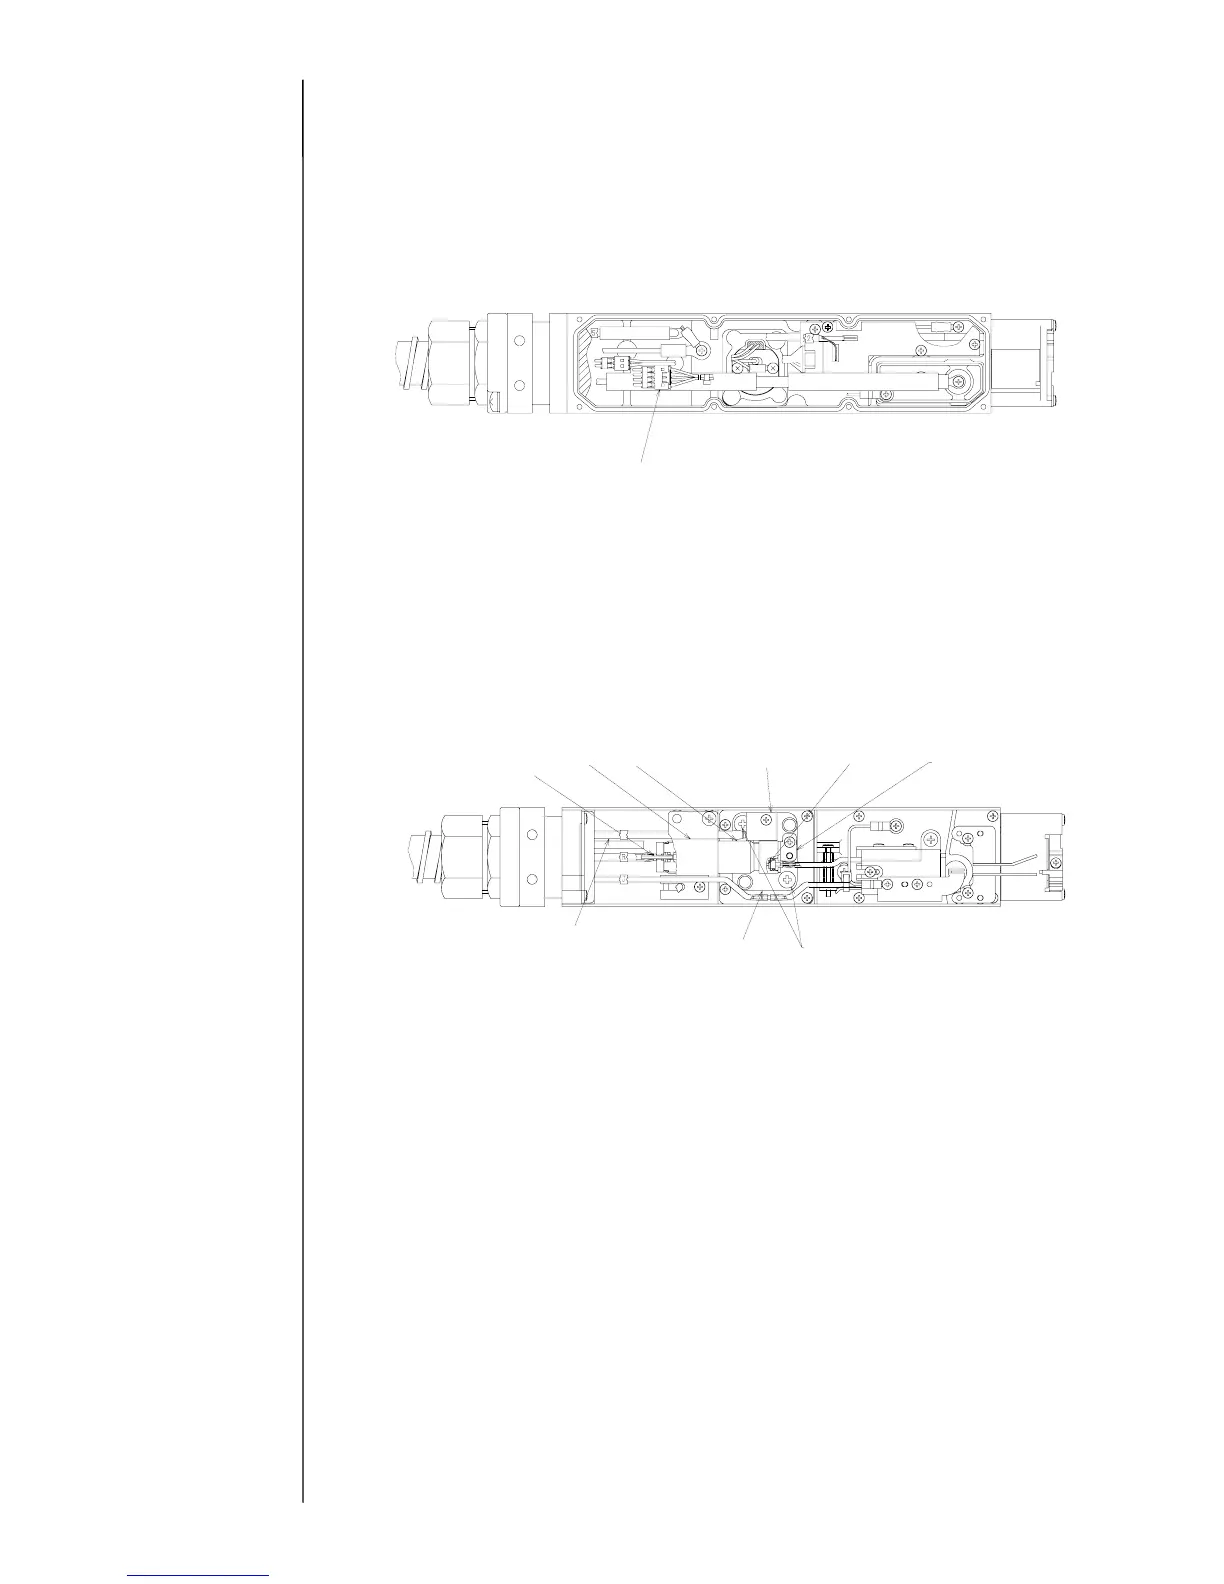
Remove the connector (4P, white) of the heating unit.
(4)
Remove the sealing valve. (Refer to the items 6.5 in the replacement procedure of
parts.)
(5)
Unloosen the heating unit joint presser foot and remove the ink-furnishing tube (E).
(6)
Unscrew two heating unit setscrews and remove the heating unit.
“Caution” Lead wires and tubes are laid over the heating unit. When the
heating unit is removed, do not pull them accidentally.
(7)
Prepare a new heating unit and put an O-ring in the terminal area of the ink-
furnishing tube (E).
“Caution”
(A) Use an O-ring of P 1.7 (hole diameter: about φ1.6).
(B) Be sure to put the O-ring so as not to jump out of the hole of the
joint portion.
(8)
Attach the heating unit.
“Caution” At the attachment, do not pinch lead wires and tubes.
Heating unit connecto
 Loading...