6-16
(16) Screw the video signal wire and the high voltage wire. After screwing the high
voltage wire, coat it with silicon.
With respect to the coating method, refer to the item 6.3.
(17)
Assemble each connector and close the base rear cover.
(18)
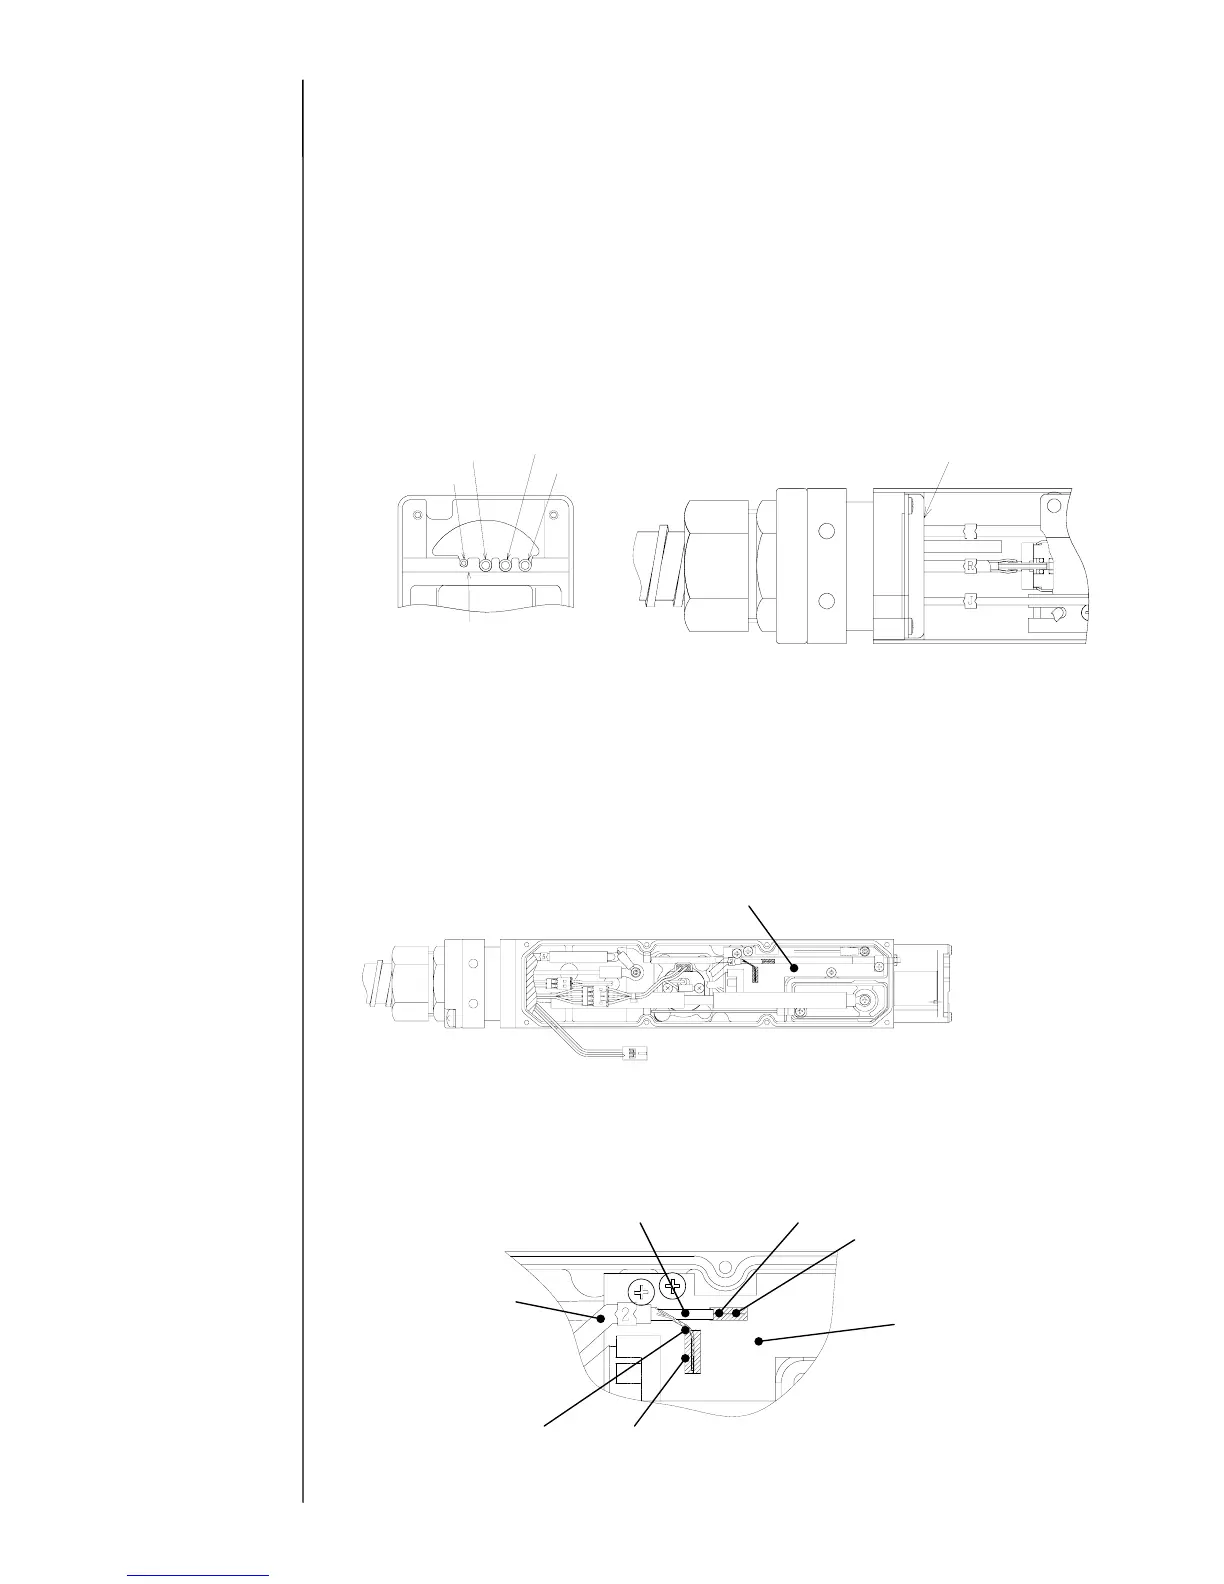
Attach the gutter base, the sealing valve and the nozzle. With respect to the
attaching method, refer to the items 6.2, 6.5 and 6.7.
(19)
Attach the cable seal plate, the deflecting electrode and the video signal wire.
“Caution” Be careful so as not to crush a tube.
(20)
Connect the excitation connector and attach all of covers so as not to enwind wires.
6.9 Replacing EZJ98 Board (APH Sensor Board)
(1) Remove the head cover and head base back cover.
(2) Use soldering iron to unsolder the coaxial cable.
Caution: Do not apply excessive heat: Doing so will melt the resin conductor,
which could cause a short-circuit between the core wire (signal line)
and shielding wire (ground).
 Loading...