5-19
5.14 Repairing method for each solenoid valve and pump using
solvent pump
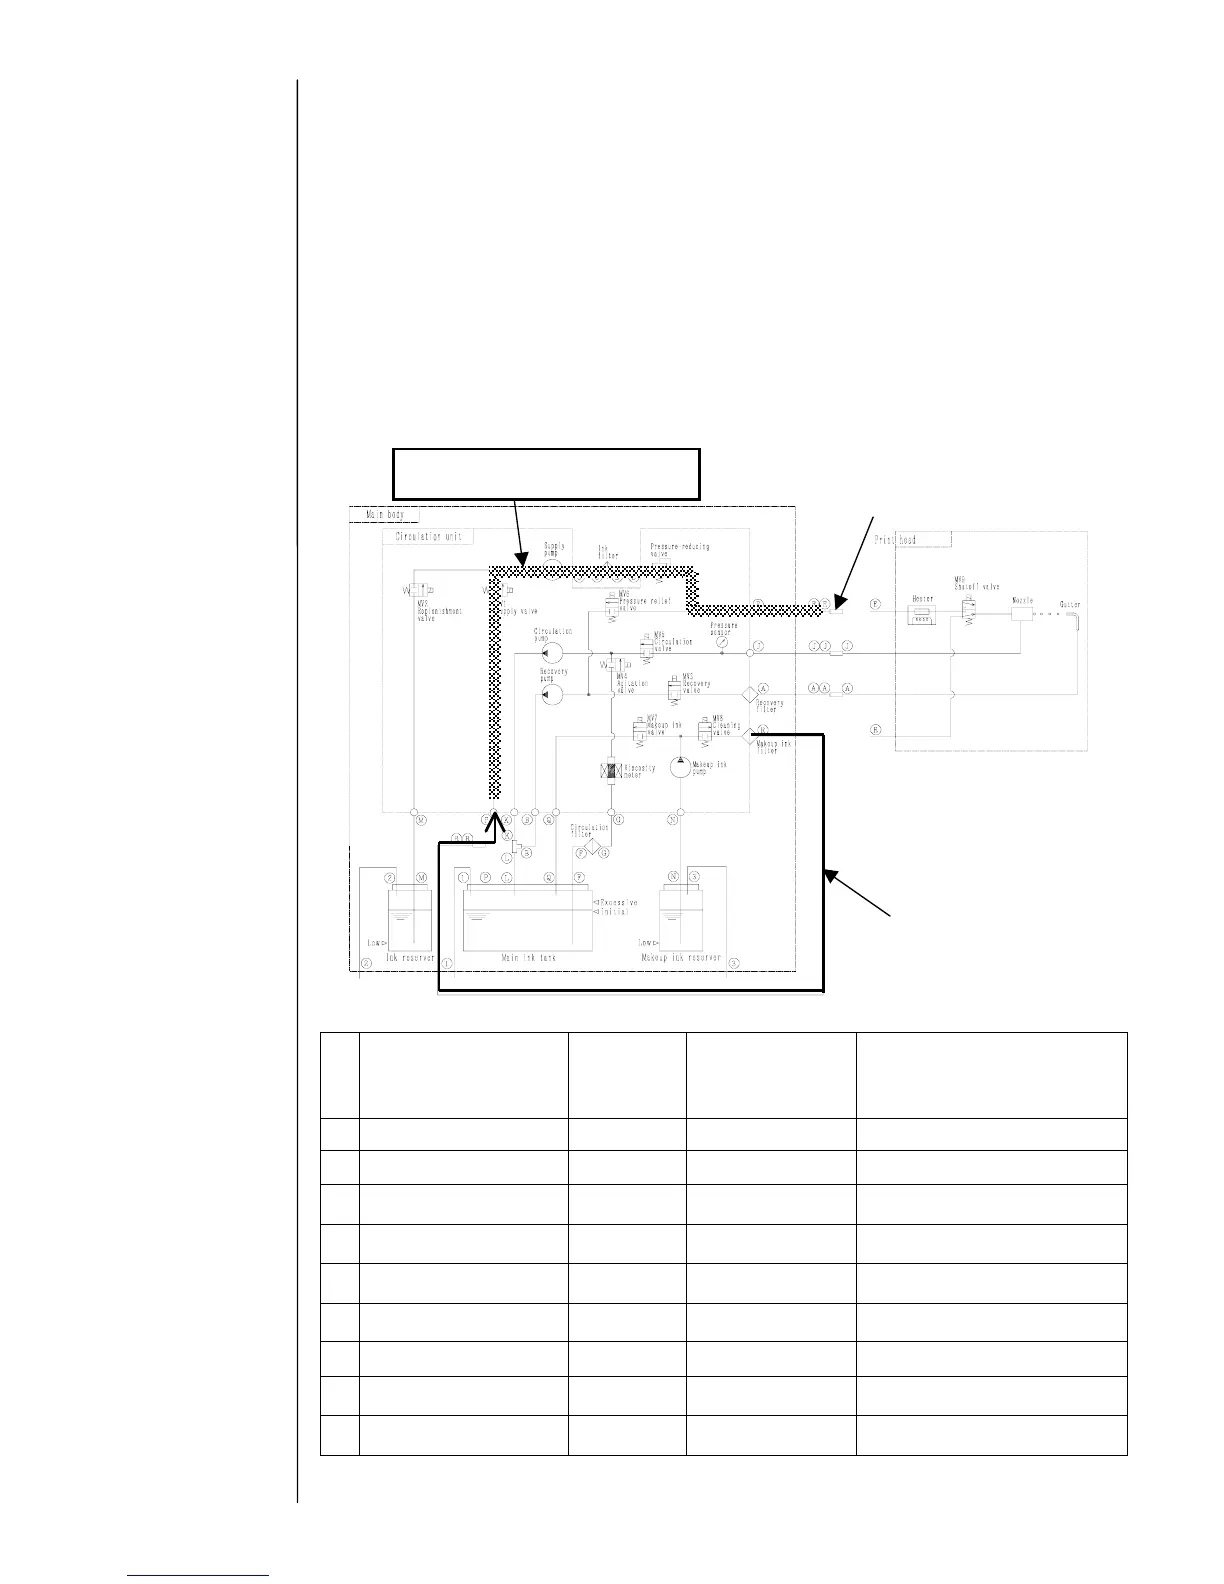
Use the solvent pump, after connecting ink tube “RR” to each joint, and turn ON each
solenoid valve and pump using “Solenoid valve/pump test” screen. By doing so, sticking
of ink inside each path can be cleared.
<Example of repair work>
Connect ink tube “RR” to “P” as shown below, and turn ON MV1 using “Solenoid
valve/pump test” screen.
* If solvent ejects from ink tube “EE”, repair is complete.
List of other repairable paths:
N
o
Part to be repaired
(Solenoid/pump)
Connecting
end from
RR
Operating part Reception port
1 MV1/ Supply pump P MV1, MV8, pump Put ink tube “EE” into beaker
2 MV2/ Supply pump M MV2, MV8, pump Put ink tube “EE” into beaker
3 MV3/ Recovery pump AA MV3, MV8, pump Main ink tank “L”
4 MV4/Circulation pump G MV4, MV8, pump Main ink tank “L”
5 MV5/Circulation pump JJ MV5, MV8, pump Main ink tank “L”
6 MV6/Recovery pump EE MV6, MV8, pump Main ink tank “L”
7 MV9 E MV8, MV9, pump Put nozzle/gutter into beaker.
8 Print head “J” line J MV8, pump Put nozzle/gutter into beaker.
9 Print head “A” line A MV8, pump Put nozzle/gutter into beaker.
Catch to ink tube in the
beaker .
Connecting ink tube “RR”
to “P”.
Repairable paths::”P”→”EE”
 Loading...