3-25
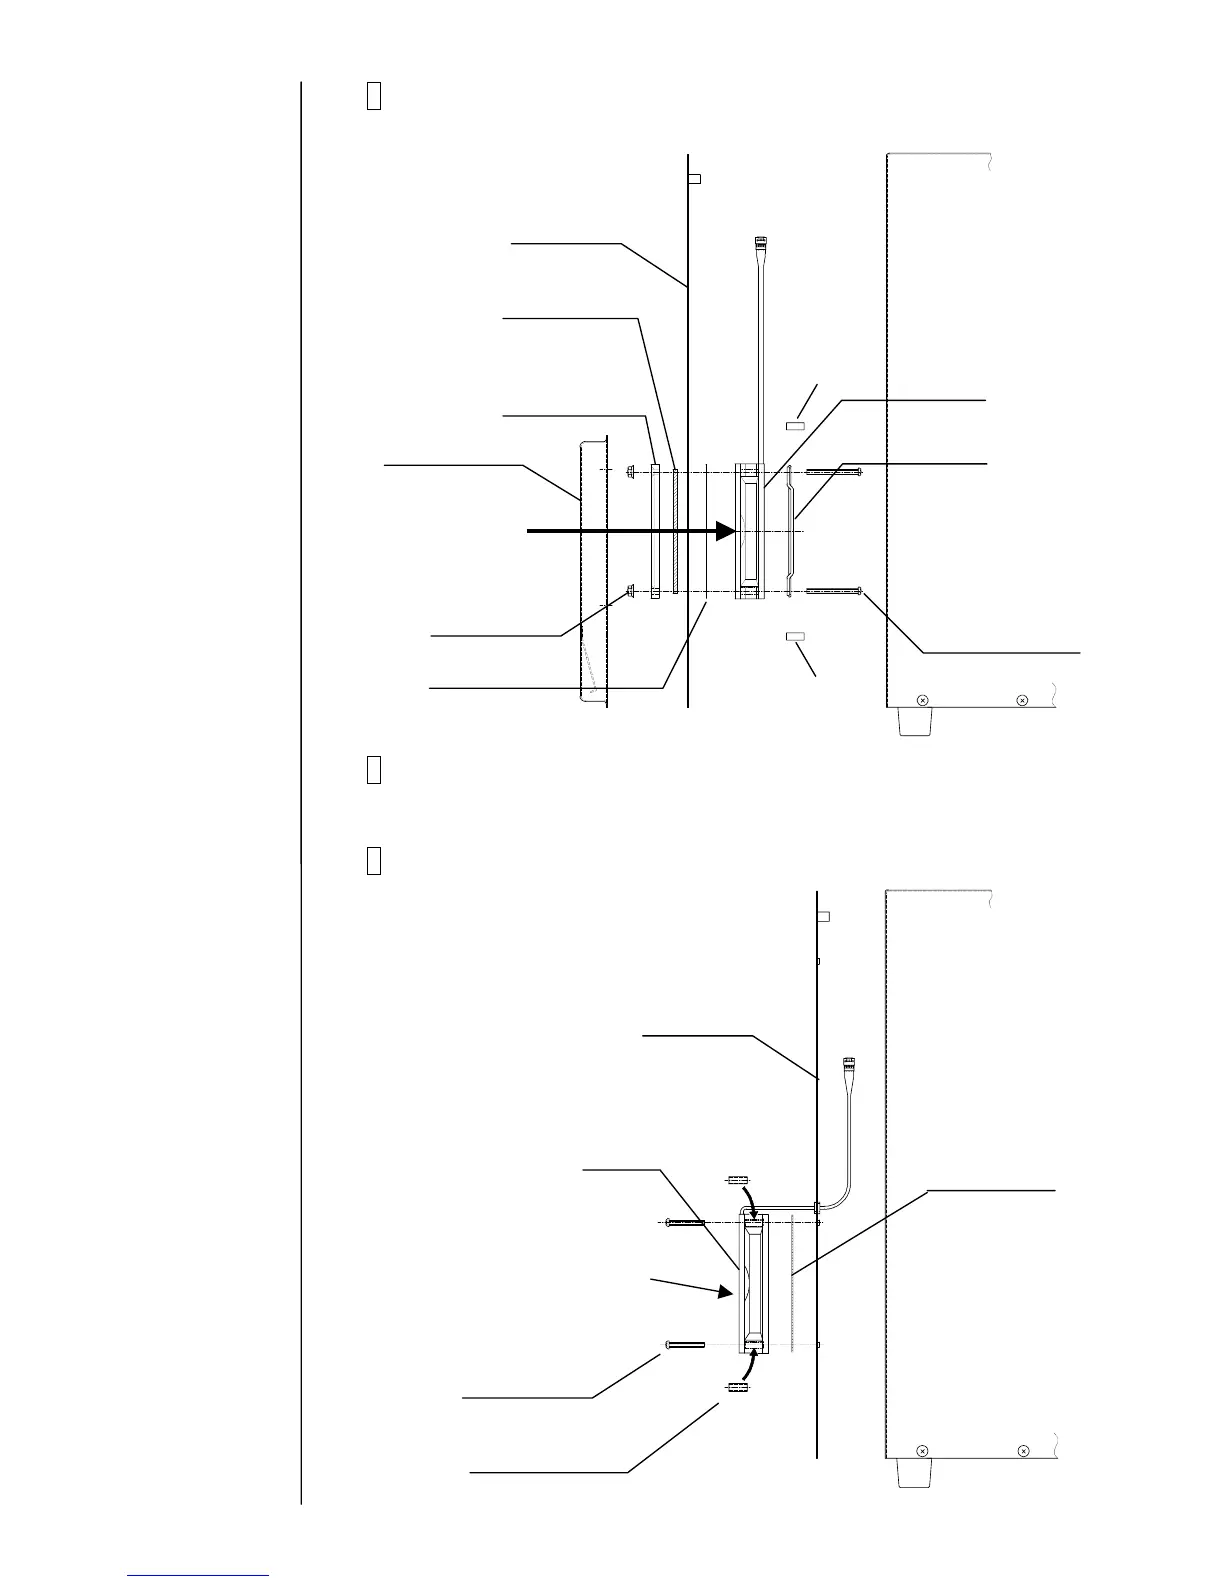
5 Remove the nuts (4 positions) and then remove the filter cover, exhaust
filter, fixing screws (4 positions) and the fan.
[Configuration of the model PXR-D and
the model PXR-H]
6 Install a new fan by reversing the above procedure.
[Caution] Pay attention to the mounting direction of the fan (air flow direction).
7 Turn on the power supply and make sure that “Cooling Fan Fault ”
does not appear.
[Configuration of the model PXR-P]
Exhaust cover
Nut (4 pieces)
Filter cover
Rear cover
Fan
Fan guard
Fixing screw
(4 pieces)
Wire mesh filter
Exhaust filter
Fan (Label side)
Spacer
Spacer
Rear cover
Spacer
 Loading...