5-9
5.5 Pump Unit Replacement Procedure
Pump unit is the same as for PXR-D type.
See the “4.5 Pump Unit Replacement Procedure”.
5.6 Solenoid Valves Replacement Procedure
5.6.1. Solenoid valve for circulation unit
Circulation unit is the same as for PXR-D type.
See the “4.6 Pump Unit Replacement Procedure”.
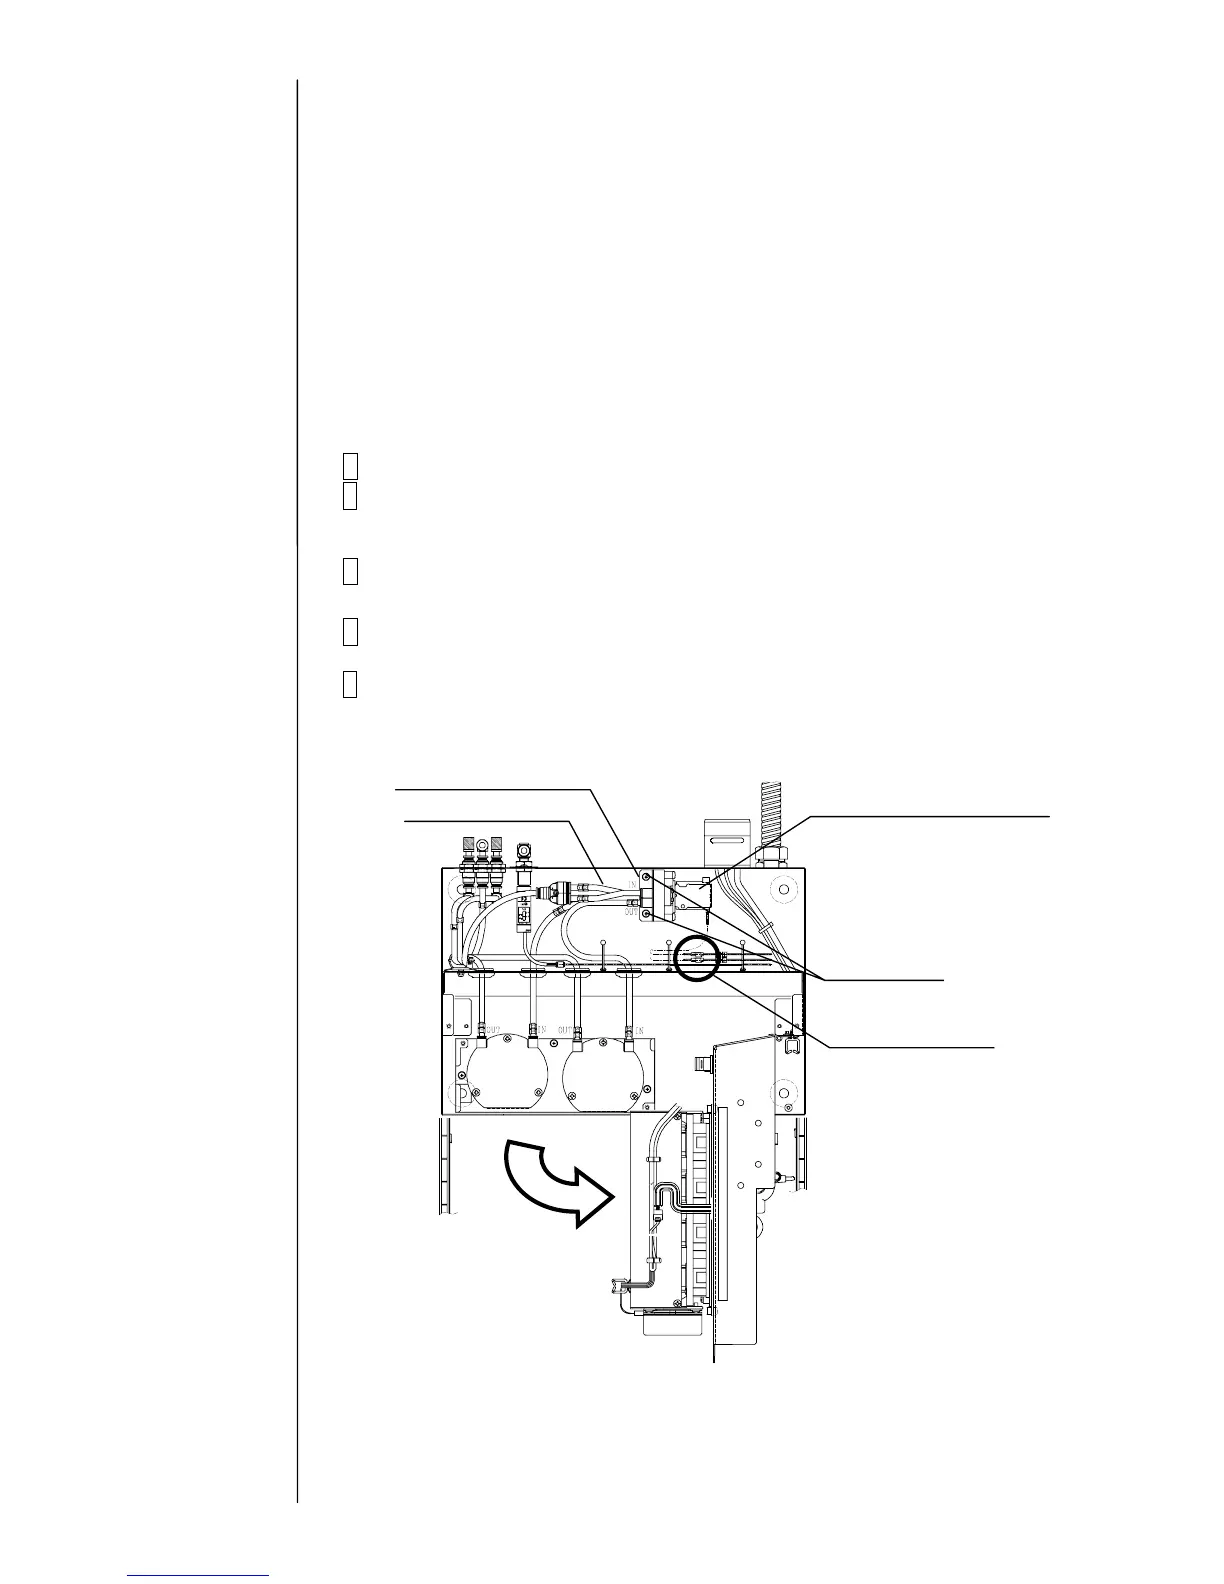
5.6.2. Solenoid valve for stirrer
1 Turn the power off and shut off primary side air before starting work.
2 Perform the procedure in “5.1.3 Approach to the parts on the rear side of
the equipment”.
3 Remove the air tube inserted into the solenoid valve (MV11, MV12).
Refer to “5.4.3 Air joint structure and handling” for removal of the tube.
4 Disconnect the connectors of solenoid valve (MV11, MV12).
5 Remove the two screws securing solenoid valve fixing plate, and then
remove the solenoid valve.
Solenoid valve
 Loading...