resser foot
Heating unit
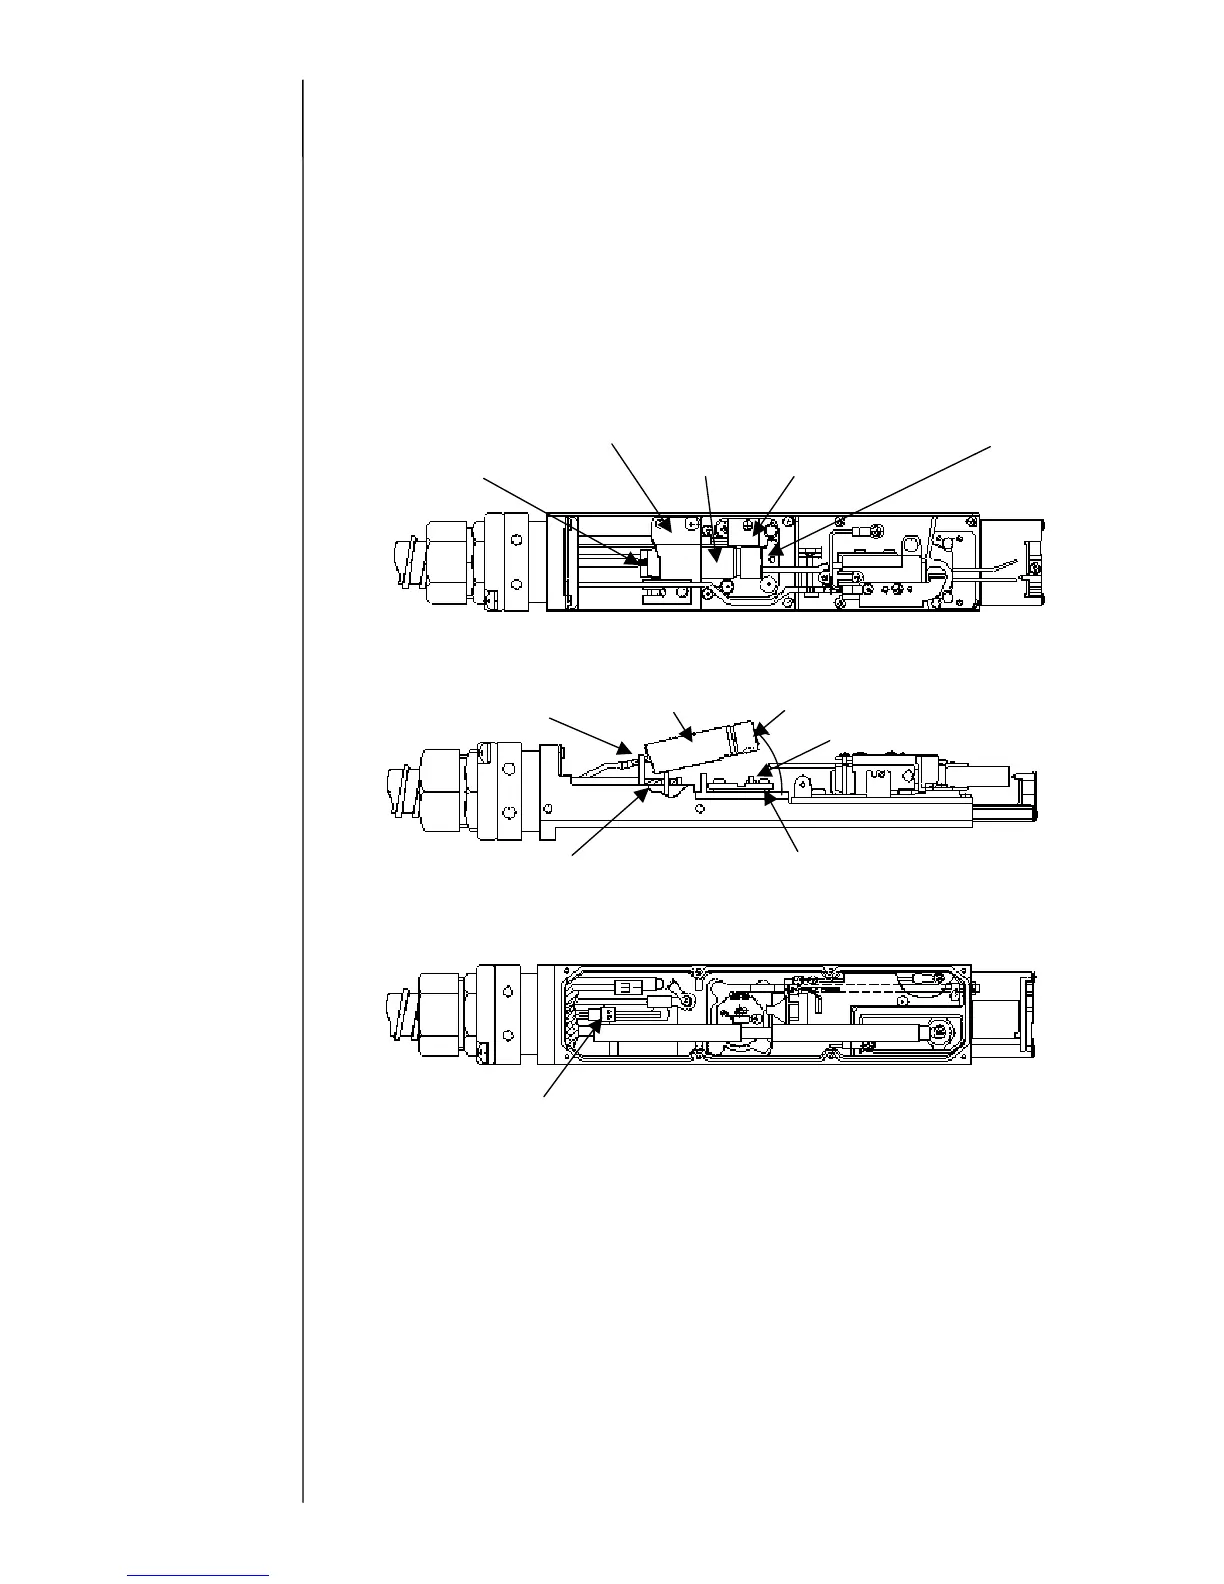
6.5 Sealing valve (MV9) Replacement Procedure
(1) Depressurize the printer.
(2)
Remove the head cover and the heater cover.
(3)
Remove the head base rear cover and disassemble the connector of the sealing
valve.
(4)
Unloosen the nozzle IN joint presser foot and the sealing valve presser foot.
(A) A filter is put in the terminal area (inside the sealing valve) of the nozzle
IN joint.
(5)
Take up the sealing valve, remove the makeup ink IN joint and remove the sealing
valve.
(A) Lift the fore of the sealing valve as in the drawing.
(B) When the O-ring (P2.2) is remained at the heating unit, remove it.
Sealing valve connector
Makeup ink IN joint
Sealing valve
O-ring P2.2
Heating unit
Filter
Sealing valve packing
 Loading...