6-9
(8) Push “Ink stream alignment” on the “Circulation control screen” to adjust the
position of the ink stream.
(9) Perform the auto phase gain adjustment.
6.4 Cover switch Replacement Procedure
(1) Remove the head base rear cover.
(2)
Pull out the connector of the cover switch and remove the cover switch.
(3)
Fix a new cover switch.
(A) Entwine the boss part of the head base rear cover with the lead wire of the cover
switch.
(
B) When the lead wire comes into contact with the high-voltage electrical power line
setscrew part, it causes high voltage leak.
(C) When mounting the rear cover, paying attention to pinching of the lead and gasket.
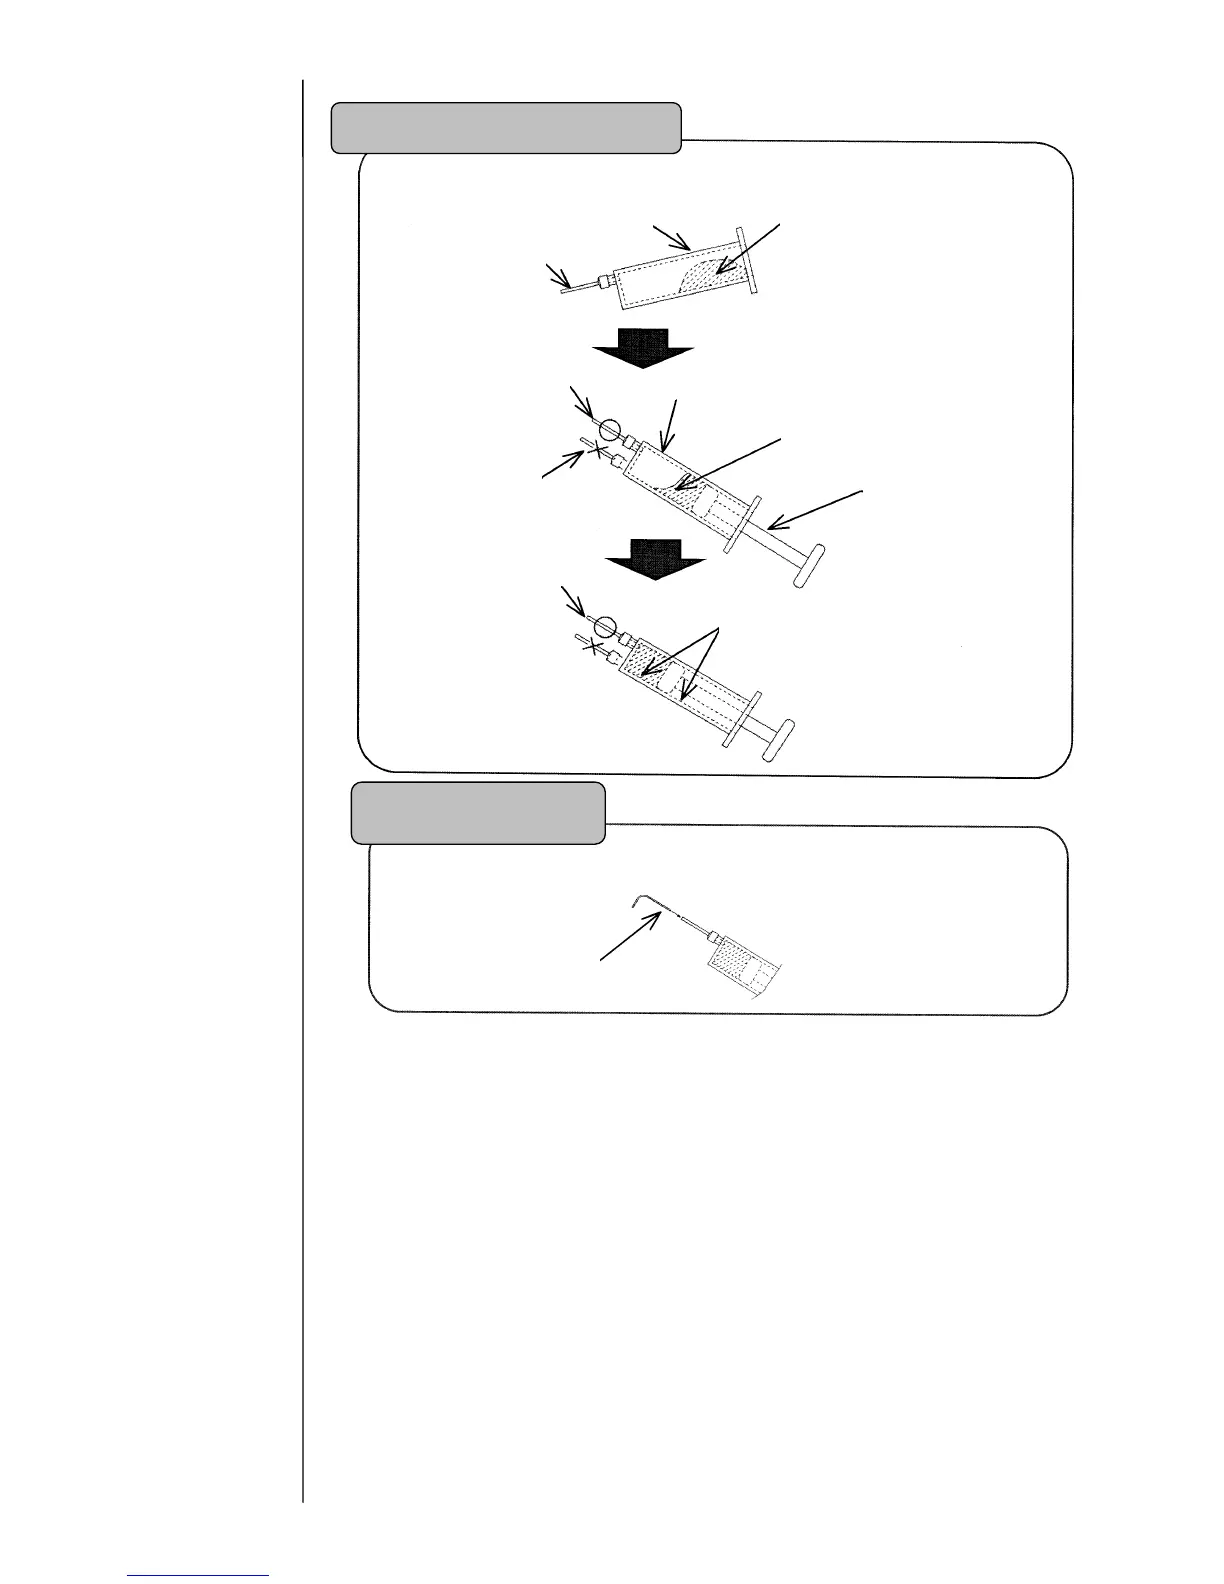
Knack of infusing the silicone
When infusing the silicone into the dispenser, perform it as shown below (to
purge air).
Metallic needle
Cylinde
Put the silicone in
Place the needle on
the upside
Cylinder
Downside is NG
Wait until the silicone comes down
to the piston
Piston
Place the needle on
the upside
Push the piston as if to purge air
Storage of the dispenser
If left as-is after use, the silicone hardens in the metallic needle portion of the
dispenser. Plug it by using a clip and so on.
Clip
 Loading...