NOTE: Microsoft IIS might be installed on the same computer as MPA, or on a different computer.
In the following example, it is installed on the same computer.
1. Browse to the following folder: C:\InetPub\wwwroot
NOTE: This is the default path for the Microsoft IIS Web pages. If the default was changed,
browse to the new path location.
2. Create a new folder to store your Web pages, such as click_maps.
3. Copy the Web pages that you created to the new folder.
Link your Web pages
Use the appropriate section depending on whether you use the HP Managed Print Administration or
the Adminstrative Template and AD for print policies
Use the MPA tool
Use the following steps to link your Web pages:
1. Start the MPA tool.
2. Click Manage MPL View from the left menu, and then select the empty Browse for Printers in
the United States.
3. Expand Find a Printer and the click the empty MPL Search for printers in the United States.
NOTE: You can also select and modify an occupied MPL, and then change the starting URL,
instead of selecting an empty list.
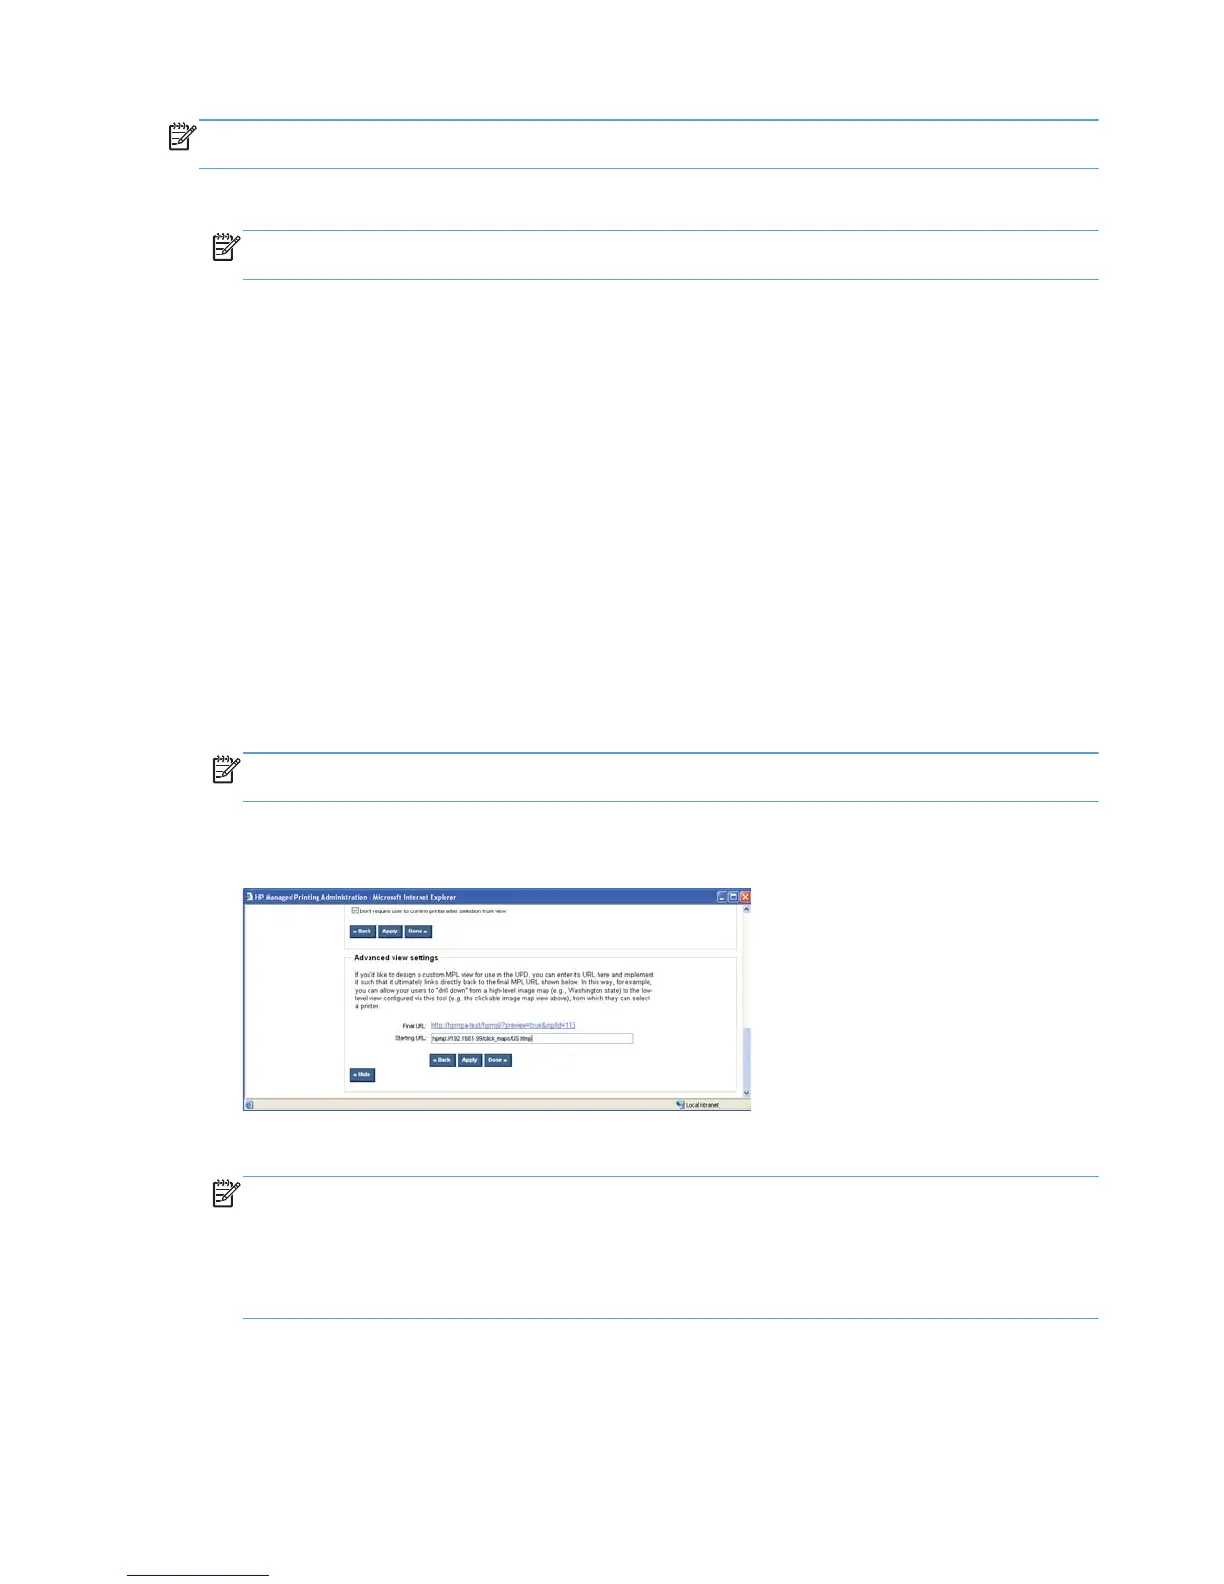
4. Scroll to the Advanced view settings section (near the bottom of the panel), and then click
Show. The following screen is displayed:
5. Enter the URL of the starting Web page in the Starting URL field.
NOTE: You can create as many MPLs and clickable maps as you wish. However, only one
must be associated with a policy. Any remaining maps are associated with the policy through the
Web pages you created.
Use the path prefix html: or http:, and the suffix html. For example: html://192.168.1.99/
click_maps/US.html or http://192.168.1.99/click_maps/US.html
6. Click Apply and then click Done to exit.
176 Appendix B Create multi-layered MPL (graphical) views ENWW
 Loading...