Rev. 1.0
Maintenance Guide
3-2
3-1-2. Replacing the Filter
• Replacing the head filter
1) Follow step 1) described in section 3-1-1 to detach the head left cover.
2) Remove the cap bolts c (×2) to detach the filter box U.
(O-ring is mounted under the filter box U. Carefully handle this O-ring so that it is not lost.)
3) Take out the filter and replace it with a new one.
4) Reassemble the parts and components in the reverse order of disassembly.
5) After the filter has been replaced, check the filter through the head vacuum and the blow
ON/OFF of the manual control.
3-1-3. Replacing the Filter for Release to Atmosphere
1) Follow steps 1) and 2) described in section 3-1-1 to detach the head left cover and head
cover.
2) Loosen the SEMS cap bolts f (×2) to detach the filter for release to atmosphere.
(You can detach the filter only by loosening the SEMS cap bolts.)
3) Reassemble the parts and components in the reverse order of disassembly.
∗ SEMS cap bolts e (2 pcs.) are accessory parts supplied with the solenoid valve.
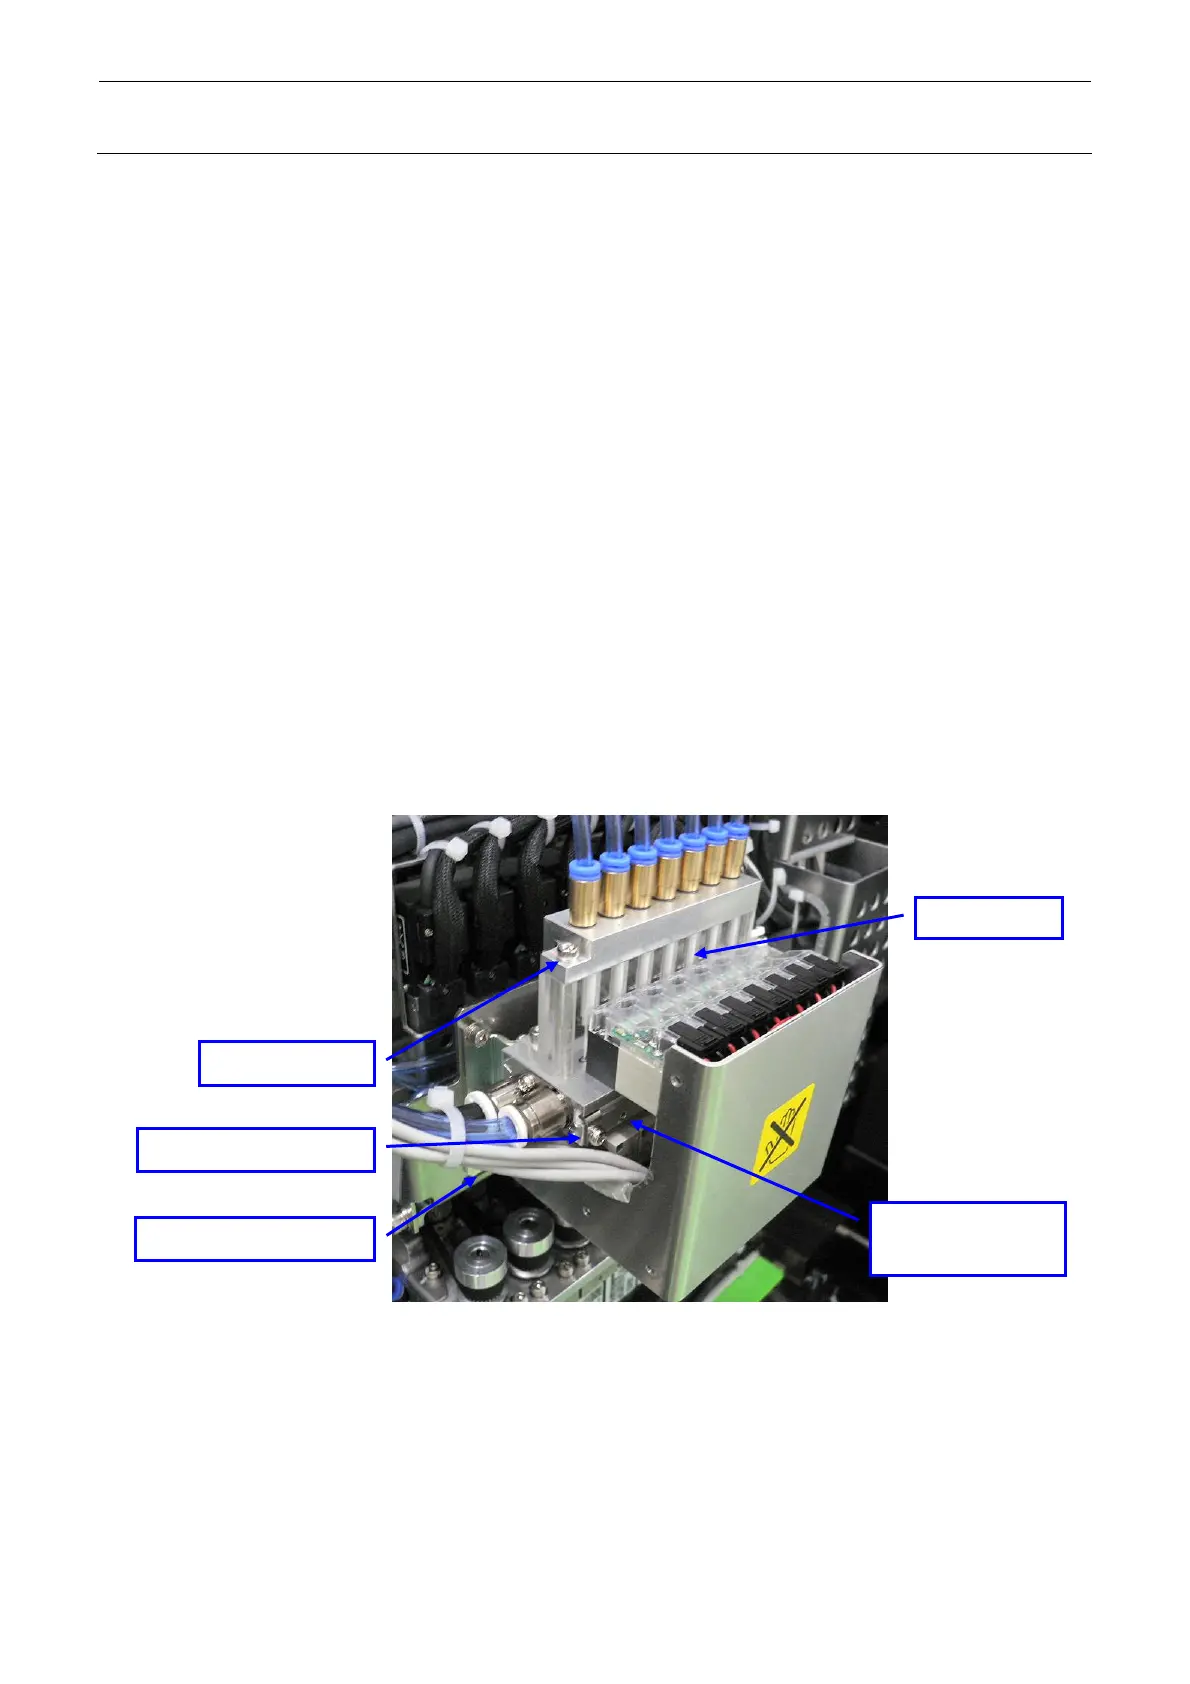
c cap (×2)
Head filter
e SEMS cap bolt (×2)
d SEMS cap bolt (×4)
Filter for release
to atmosphere
Figure 3-1-3-1 Replacing the Head Filter

 Loading...


