Rev. 2.0
Maintenance Guide
5-4
5-4. Replacing the CENTER Motor
1) Detach the connector of the motor relay cable.
2) Loosen the screw c of the motor bracket d to detach
the drive belt C from the motor pulley e.
Figure 5-4-1
3) Loosen the motor fixing screw g to detach the motor f.
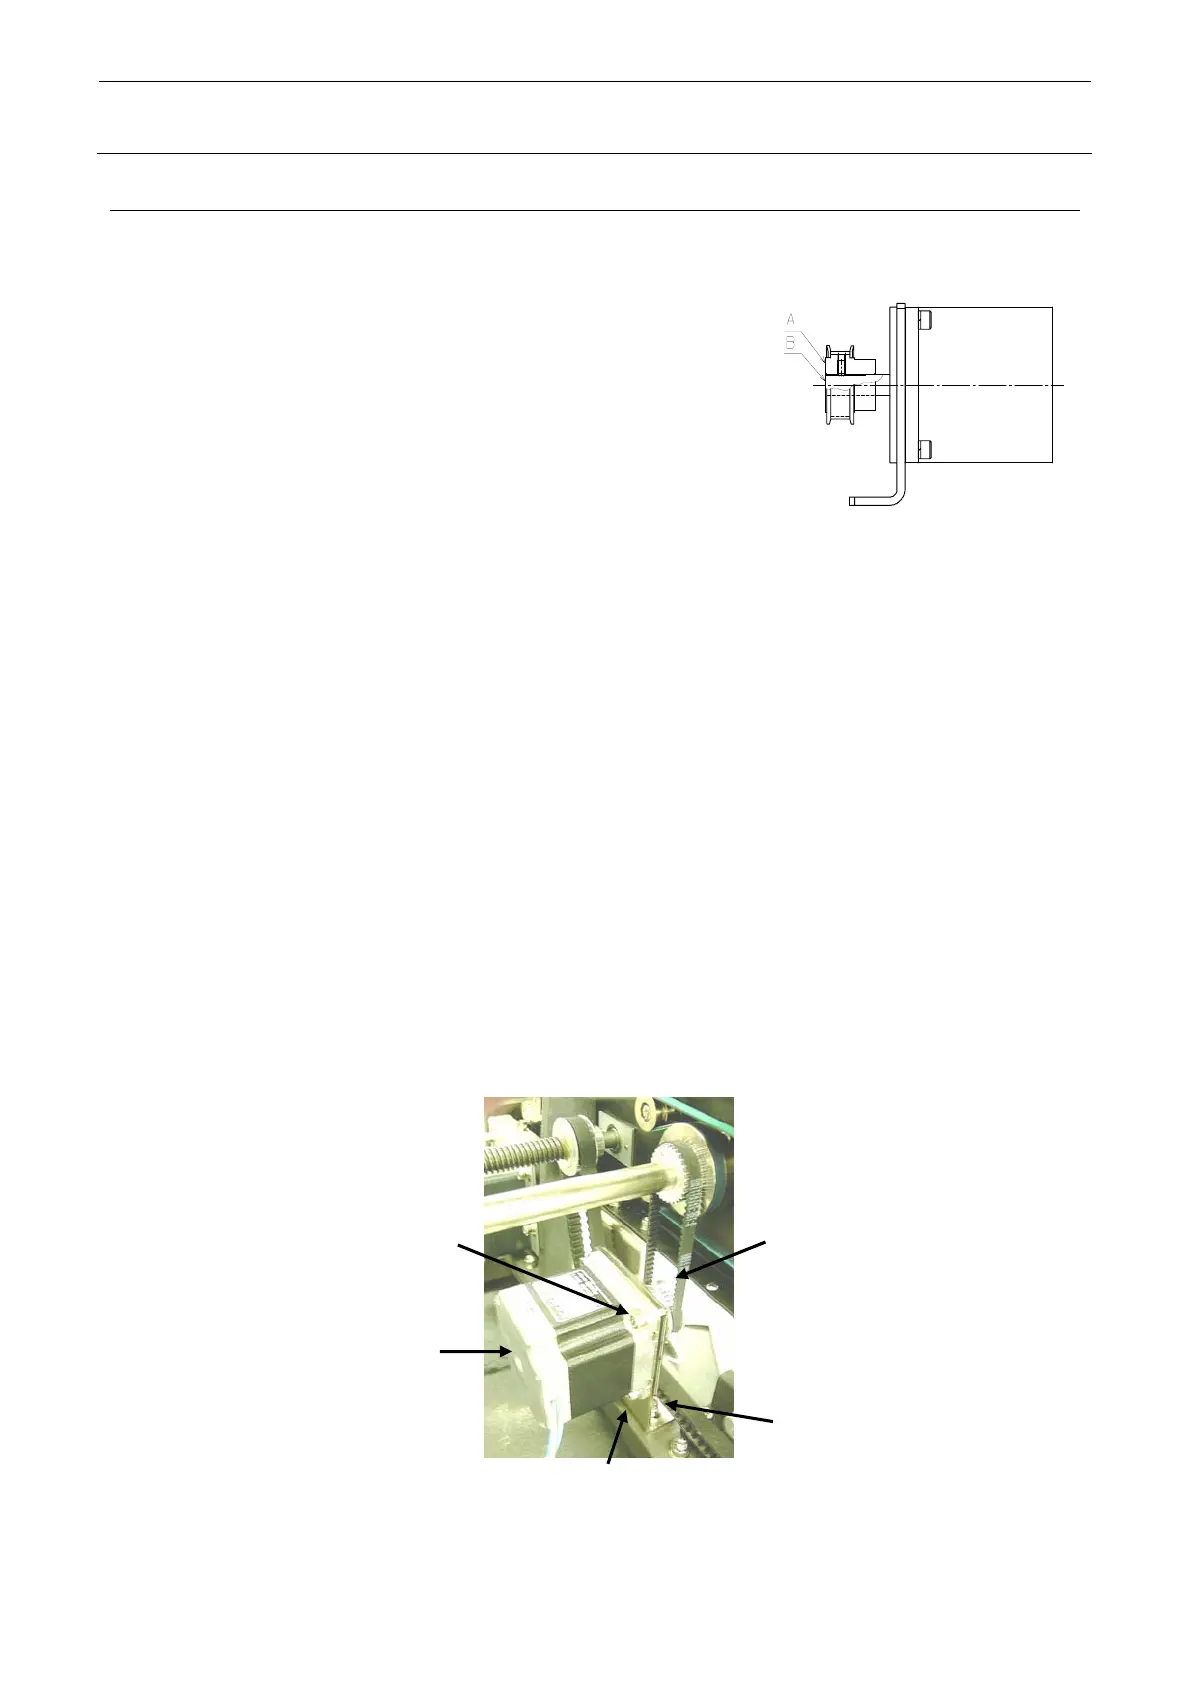
4) Mount the motor shaft and motor pulley e so that the
pulley end A is aligned with the motor shaft end B. (See
Figure 5-4-1.)
5) When installing a new CENTER motor, reassemble the
components in the order of steps 3) to 1).
6) Adjust the tension of the drive belt C as described
below.
<Procedure>
c Loosen the screw c of the motor bracket C, and move the motor bracket to the left and right.
d Loosen the motor fixing screw g and move the CENTER motor f up and down.
e Adjust the belt tension as described at steps c and d. When adjusting, take care not to allow
contact with other components.
f Measure the tension using a sonic belt tension meter (manufactured by UNITTA) and adjust it
to between 17.6 and 21.6N.
(Weight=2.5, Width=6.0, Span=93)
g After the belt tension has been adjusted, tighten the screws c and g to fix the motor bracket
C and motor, respectively.
Note) Belt (tension) is stretched excessively. → Torque of the drive shaft increases.
Note) Belt (tension) is loosened excessively. → Teeth on the timing pulley are skipped.
(Noise is produced.)
c
e
g
f
d
Figure 5-4-2

 Loading...


