Rev. 2.0
Maintenance Guide
18-2
18-2. Replacing the Tape Cutter Main Unit
The following describes how to replace the tape cutter main unit.
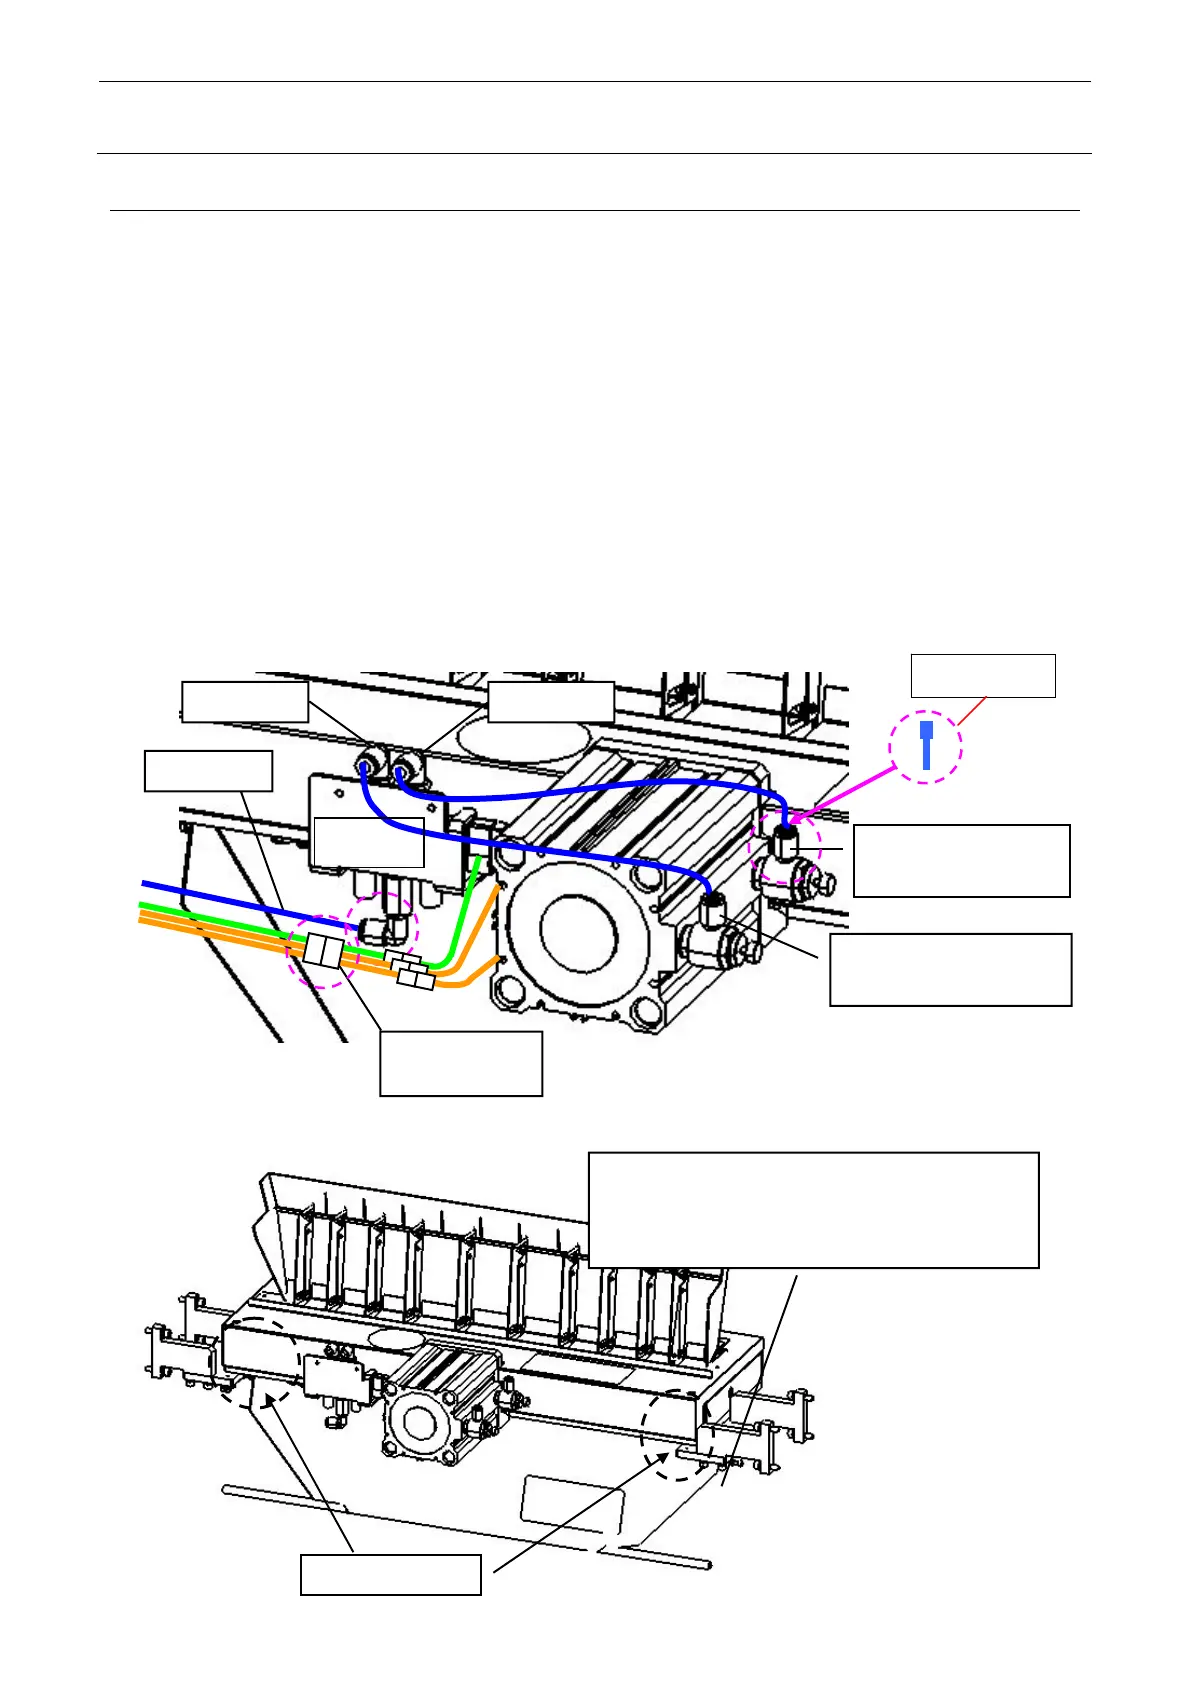
<XL Board Specifications>
1) Shut down the power to the machine main unit.
2) For the machine with the fixed bank specifications, detach the upper discharge guide.
3) Visually check that the upper guide of the cutter unit is opened and that the cutter blade is
closed.
(As the machine is powered OFF, the cutter blade is closed.)
(CAUTION) Never put your hand inside the guide as your hand may be cut by the cutter
blade.
4) After checking that the cutter blade is closed, close the finger valve to shut down the air to the
machine main unit.
5) Disconnect the air tube from the speed controller (air supply: OPEN) for the cutter unit air
cylinder and insert the plug (φ6).
6) Disconnect the air tubes from the solenoid valve. Additionally, disconnect the cable connector
that connects the cutter unit and main unit.
Air tube
Speed controller
(Air supply: OPEN)
Speed controller
(Air supply: CLOSE)
Port A Port B
Cable
connector
Plug (φ6)
Solenoid
valve
7) Remove the M5 screws (4 pcs.) that secure the cutter main unit to the cutter base to detach
the cutter unit from the machine.
Cutter base
(CAUTION)
As the M6 screw fixing the cutter base is
removed, the cutter main unit may fall down.
So, do not remove this screw.